To pin my projects to Pinterest, hover over the picture and a Pin-it Button will magically appear.

Thursday, July 7, 2011

Blog Hop Reminder... and meet my sweet kitties!

Happy Thursday, dear friends! I hope your week has been full of sunshine and smiles. :o)


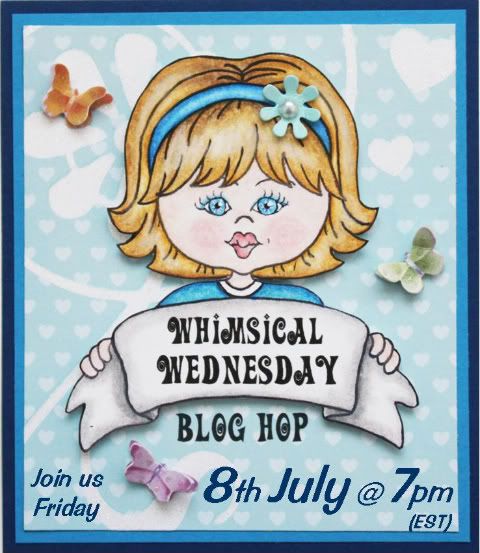
Don't forget about the extra special Whimsical Wednesday blog hop on Friday night, beginning at 7pm EST! There are lots of goodies up for grabs. The grand prize is a Gypsy, with the winner being drawn from everyone who does the entire hop and leaves a comment on each designers' project. For additional entries, read THIS POST. We're so excited!

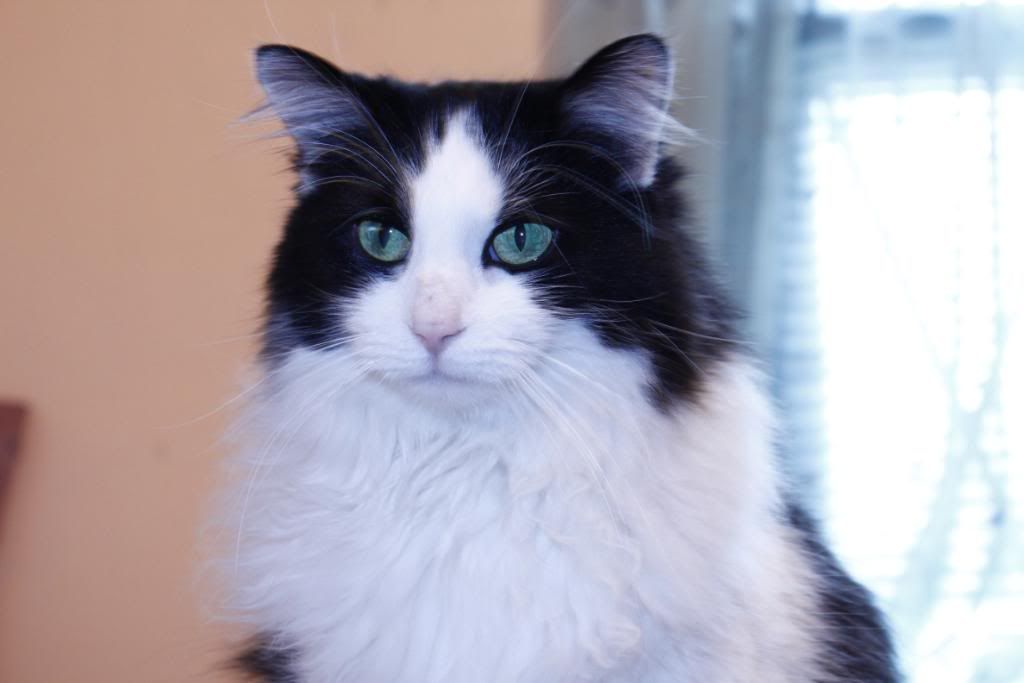
I wish I had a card to share with you today, but I've been so busy with my creation for tomorrow's special event that I've been unable to work on anything else. I can't wait to share it with you! :o) In the meantime... who wants to meet my sweet furry friends? They are as precious and adorable as they look and bring me such joy. :o)

Rascal, the feisty one:


Munchkin, the ultra snuggly one:

Have a spectacular and sparkly day, everyone! I'll see you tomorrow! :o)

Photobucket

Tuesday, July 5, 2011

Exciting news!


Happy Tuesday, my sweet friends! I have some incredible news to share with you! Stephanie has invited me to join her sweet and talented Whimsical Wednesday Design Team! I am so honored. Reading that invitation was just like unwrapping the most beautiful, unexpected gift on Christmas morning. :o) The ladies on this team are inspiring and supportive, with hearts even more gorgeous than their creations. If you pirouette on over to Stephanie's blog, you can welcome the rest of the new Design Team! The challenges are always wonderful, so please visit Whimsical Wednesday each week to take part in the fun! But there's extra excitement in store this week... Beginning at 7pm EST on Friday, July 8th we are having a spectacular Blog Hop! There's something very special about it, so please join us for the festivities. You won't want to miss it. :o) (The grand prize is a Gypsy... how fabulous is that?!)


Photobucket

(I don't think this picture could be any more adorable.) 

Thank you for sharing in this happy news with me, friends! And thank you Stephanie for this thrilling opportunity. The joy is inexpressible. :o) Have a beautiful day!


Photobucket

Saturday, July 2, 2011

Special Encouragement Card and Sweet Saturday

Happy Saturday, my beautiful friends! Is your weekend off to a festive start? :o) Thank you all for such gorgeous comments on the card I posted yesterday... I felt the love and it means so much to me! :o)

Today is extra special because I get to share a card that serves an especially lovely purpose. The challenge this week at Whimsical Wednesday is basically to be a blessing to a sweet boy fighting health issues. Angelo is only fifteen months old, underwent brain surgery last week, and is now (or soon) beginning chemotherapy. He is the grandson of fellow crafter Margie at Bella Bug Creations. Stephanie of WW and the design team made lovely cards to ship to this angelic child and we all have the opportunity to join them. I encourage everyone to skip on over to Whimsical Wednesday to participate in this challenge. And of course to keep this little guy and his loved ones in your thoughts and prayers. :o)

For much of yesterday, I couldn't stop thinking about this card. I originally was going to make it later in the weekend to step aside from crafting for a day... my patriotic card wiped me out Thursday. But I just could not let it go. We know what that means, right crafters? Set aside whatever the scheduled plan is and do what's on your heart instead. I wanted to create a card that was playful and happy, with a few different elements for his gorgeous eyes to wander over. I didn't plan on it being such a limited color scheme.. it just happened that way. I hope he loves it and pray it's a blessing to his family.

"Shipping you lots of love...


"... to lift you up." I couldn't resist decorating the inside so he could see it a little if it's standing up near him... guess I'll be writing on the left side instead! ;)


I added bubbles to the water with Glossy Accents for some fun texture. A drop was added to the seal's paw because he just couldn't resist dipping it in. Just like our precious Angelo will be doing as he grows stronger every day... soon he'll be getting into all sorts of fun mischief. :o) I used twine for the balloon strings and on the sailboat because I'm crazy about twine and love finding ways to incorporate it. I don't have a cartridge that has a sailboat, so I looked up one online and drew it. I think this is the one from Life's a Beach. I embossed and Stickled the clouds for some extra sparkly fun, and ran the interior heart balloons through the Cuttlebug as well. Elegant Edges provided me the perfect base, as it always reminds me of bubbles. :o) Let's keep this beautiful family in our hearts!

Challenges entered:
Whimsical Wednesday (Special Get Well Wishes)

Now it's time to share my absolute favorite dessert of all time... and it's not even chocolate. Caramel Apple Cheesecake Pie. Yes, you read that correctly. 


It's both apple pie and cheesecake, wrapped up into one glorious dessert. This is devoured in lightning speed every single time I make it. Only once was I ever able to snap a couple pictures on time. My boyfriend's coworkers eternally love me for it. His brother ate three pieces on Christmas. My family didn't realize I made it myself the first time... my dad thought it was from some fancy bakery. This is now a staple for every holiday feast, and any regular day in between that needs something incredible. :o) 

I urge you not to let the length deter you. It goes quicker than you might think. For convenience sake, I almost always make everything except the freshly-whipped topping the night before serving. Either way, just make it. ;)

Thank you for visiting me today! You all make my heart sparklier than a Christmas tree. :o)


Note: I am sharing the original recipe, which includes a layer of caramel on top of the crust. I personally no longer make it this way because I've had issues with the caramel severely hardening the crust. Others have had the same issue, whether using homemade caramel or store bought. (I used homemade.) I'm writing it this way so you have the option. I just add more caramel on top to make up for it. ;)

Caramel Apple Cheesecake Pie

Ingredients:
For the crust:
1½ cups graham cracker crumbs
3 tablespoons sugar
½ teaspoon cinnamon
5⅓ tablespoons unsalted butter, melted
½ - ¾ cup caramel
1 cup chopped pecans (optional)

For the apple filling:
5 tablespoons unsalted butter
½ cup light brown sugar, tightly packed
¼ teaspoon salt
1 teaspoon cinnamon
5-6 Granny Smith apples, peeled, cored, and thinly sliced

For the cheesecake:
8 ounces cream cheese
¼ cup sugar
1 teaspoon vanilla extract
1 large egg
1 tablespoon lemon juice

For the topping:
¾ cup heavy cream
3-4 tablespoons confectioners' sugar
¼ - ½ cup caramel
Chopped pecans (optional)

Directions:
To make the crust, preheat the oven to 375º F. Line the bottom of a 9-inch round springform pan with parchment paper. In a medium mixing bowl, combine the graham cracker crumbs, sugar, cinnamon, and melted butter. Toss with a fork until all the crumbs are moistened and the ingredients are evenly mixed. Transfer the mixture to the prepared springform pan and press the crumbs in an even layer over the bottom and about half to two-thirds of the way up the sides. (I recommend doing the sides first.) Bake for 6-8 minutes, until golden in color. Let cool for about 10 minutes. If using, pour a layer of caramel into the bottom of the crust and sprinkle evenly with the chopped pecans. Refrigerate the crust while you prepare the filling.

To make the apple filling, melt the butter in a large skillet over medium heat. Mix in the brown sugar, salt, and cinnamon and cook for 1 minute, until bubbling. Mix in the apple slices and toss well to coat. Cook over medium to medium-high heat until tender and most of the liquid has been reduced, about 15-20 minutes. Let cool for a few minutes and pour into the prepared pie shell. Set aside.

Reduce the heat of the oven to 350º F. To make the cheesecake layer, combine the cream cheese and sugar in the bowl of an electric mixer and beat on medium speed until smooth, about 1 minute. Mix in the vanilla, egg, and lemon juice until fully incorporated and smooth, 1-2 minutes. Spread the cheesecake filling into an even layer over the top of the cooked apples in the crust. Bake until a knife inserted in the center comes out clean, about 30 minutes. Remove from the oven, transfer to a wire rack, and let cool to room temperature. Refrigerate for at least 4 hours.

To serve, carefully remove the sides of the springform pan. In the bowl of an electric mixer fitted with the whisk attachment, beat the heavy cream and confectioners' sugar on medium-high speed until stiff peaks form (being careful not to overbeat). Spread gently over the top of the chilled cheesecake layer. Top with dollops of caramel sauce and swirl with a knife to create a marbled effect. Sprinkle with a handful of chopped pecans, if desired. Slice with a long, thin knife to serve.

Source: Annie's Eats

Key Recipe Components (for card):
 * Cricut cartridges: Create a Critter and Elegant Edges
 * Cuttlebug embossing folders: D'vine Swirl and Polka Dots
 * Paper: Core'dinations, DCWV, Papertrey Ink, miscellaneous
 * Button: My Mind's Eye Tres Jolie
 * Twine: Sew Easy in Limeade and Blue Lagoon
 * Brads: Prima
 * Miscellaneous: Glossy Accents

Photobucket

Friday, July 1, 2011

Patriotic Birthday Card

Happy Friday, dear friends! I hope you have the most wonderful day today. :o)

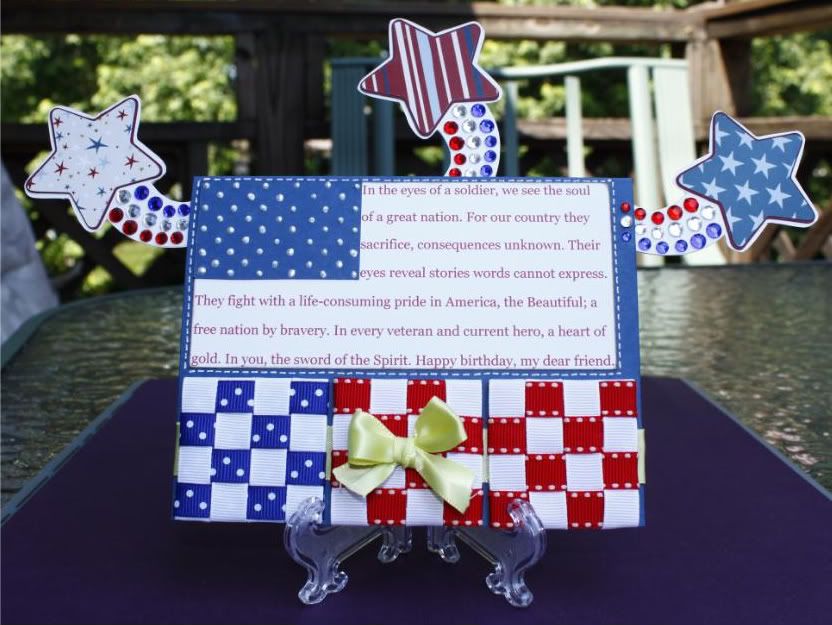
Since it's nearly Independence Day, oodles of my favorite challenge blogs are in the festive spirit. I was excited to play along, deciding upon a birthday card for my boyfriend's sweet brother. He's a Marine and was deployed to Iraq a couple times, making for nervous months. The Lord kept him safe, but he had some very close calls. He is now safely home, but the mental battle rages on from all that he witnessed. It's vital for us never to forget what our soldiers face every single day and to always remember why our beautiful nation is free. Read the Declaration of Independence as part of your celebration this weekend. :o)

In case it's hard to read the passage I wrote to use for the flag's stripes, I'll type it out below. My goal with this card was to be festively fun, yet filled with purpose. Just like he is. :o)


With three tiny twists of brads, you get this! (He will enjoy making the fireworks burst forth from the card... probably with sound effects.)


Text: In the eyes of a soldier, we see the soul of a great nation. For our country they sacrifice, consequences unknown. Their eyes reveal stories words cannot express. They fight with a life-consuming pride in America, the Beautiful; a free nation by bravery. In every veteran and current hero, a heart of gold. In you, the sword of the Spirit. Happy birthday, my dear friend.

Since he is so appreciative of anything handmade, I was determined to add a couple extra elements to showcase that. Not all went as planned, but the heart is there. I measured out the spacing for 50 drops of liquid pearls as the stars on the flag. Why I even tried this with my index finger still needing a splint is beyond me! I invite you to pretend they're uniform in size. ;) The woven squares under the flag serve two purposes. Most importantly, to reflect how we need to be tightly woven together as a country. Additionally, it's another element to make him smile at knowing the time and effort that went into something that looks so simple. The ribbon running beneath the squares and tied in a bow on top symbolizes the traditional yellow ribbon for troops returning home.

And of course the fireworks... he gets quite a kick out of my addiction to sparkles and loves seeing those touches on all my creations. So instead of simply adhering the stars to the card base as first planned, I amped it up to make them truly festive. I positioned the top one to make the rhinestones directly over "soldier." I hope with all my heart that he loves this card. It's appropriate that I ran into so many issues and had to settle with less than 'perfect' results, because he made a point of chastising me on Christmas when I deflected his praise over the dinner and dessert I was in charge of. He wouldn't let me leave until I acknowledged that I'm amazing. ;) He's like so many soldiers... a teddy bear with a golden heart, determined to make people see the good in themselves. :o)

Festive challenges entered (I know it's a ton! I don't know if my finger can take another card this weekend as originally planned, so I'm submitting this to all):
 * Birthday Sundaes (Stars and Stripes)
 * Celebrate the Occasion (4th of July: Red, White, and Blue)
 * Fantabulous Cricut (Happy 4th: Red, White, and Blue)
 * My Craft Spot (Seeing Stars)
 * Scrappy Moms Stamps (Stand and Salute)
 * Wacky Wednesday (Red, White, & Blue)
 * Whimsical Wednesday (Let's Get Patriotic, including brads, bling, or buttons)


Before I flutter off, I have a shout-out to share! Thank you Kim from Crazy About Scrappin' for awarding me the Irresistibly Sweet Blog Award! She is such a sweet person with lovely creations and I am truly honored that she passed it along to me. :o) If you'd like to read more about my original acceptance, you can read this post. Thank you, Kim! :o)

Thank you for stopping by my little blog today! Every visit means so much to me. :o) (And just so you know, you won't want to miss tomorrow's Sweet Saturday. It's so good that I nearly titled this Sweet Saturday Eve so I could post it sooner. It's the dessert that made my boyfriend's co-workers declare me their resident baker. Oh the pressure!) Enjoy your day and Independence Day celebrations, friends! :o)


Key Recipe Components:
 * Cricut cartridge: Simply Charmed (stars)
 * Paper: Creative Imaginations, Papertrey Ink
 * Ribbon: From stash
 * Miscellaneous: Brenda Walton rhinestones, iRock rhinestones, Liquid Pearls

Photobucket

Monday, June 27, 2011

Silhouette Card

Happy Monday, my lovely friends! I hope your day is sprightly and sparkly. :o)

I'm sharing a card with you today that I made for a friend. She's going through a long rough patch and I'm of the mind that even the tiniest gestures can plant seeds of joyful hope. Ironically this card was born out of my own frustration with circumstances... but as is always the case, if you forget about yourself and focus on someone else, peace and determination return. With a prayer for the Lord's love and light to shine through this itty bitty gift, here's what I came up with. I can hardly believe I didn't use patterned paper or my Cuttlebug... but that's just how it worked out! Gasp.


Despite my valiant effort, I just couldn't get a photograph that truly captured the simple beauty that shines in person. One of the challenges I had in mind for this required the use of a Christmas cut in a non-Christmas card. (So perfect for this project, since Christmas is all things miraculous and beautiful.) I was all over that, let me tell you. It took a while for the right idea to develop, but I knew I had to use twinkle lights somehow. So I cut the Christmas lights from CAC and altered them into moonbeams riding swirls of divine guidance. I covered them with liquid pearls to give them the pearly, opalescent moonbeam effect. They lead right up to our moon fairy, who is nestled amongst the rhinestone stars, to guide her attention straight to my dear friend. With a flourish of fairy dust, she's already on her way to making Amie's wishes come true. :o) I pop-dotted the entire fairy section for some dimension, as if the swirls and moonbeams are propelling her onward. :o)

Regarding the sentiment, I rarely (if ever) use my own handwriting on cards. But it seemed appropriate here. I wanted her to see my penmanship every time she looks at the card as a stark reminder that I'm right there with her. The close-up picture somewhat shows the sparkles I dabbed over the three sentiments in an attempt to "illuminate" them. I also doodled and highlighted a bit with a sparkle pen around her sparkle-wielding hands and the stars. This final product is my third attempt at this card since yesterday and is a rather huge contrast from my original vision. I think I like this better... there's always a treasure to be found (and shared) when you let love guide you. :o)

Challenges entered:
 * Die Cuttin' Divas (use a Christmas cut for a non-Christmas card)
 * Frosted Designs (Color challenge: Black & White, plus only one other color)
 * Getting Cricky (Penned entries: use pens anywhere on your project)

I'm so thankful for your visit to my blog and I hope you leave here with a trail of pixie dust. :o) (I couldn't resist.)

Key Recipe Components:
 * Cricut cartridges: Create a Critter, Elegant Edges
 * Paper: Bazzill
 * Stamps: Fairy Moon: Floppy Latte Designs; Swirls: Autumn Leaves
 * Clear rhinestone flourish: Recollections
 * Ribbon: Stash
 * Miscellaneous: iRock, Liquid Pearls, Martha Stewart glitter (lapis)

Photobucket

Saturday, June 25, 2011

Scoops of Birthday Love Card and Sweet Saturday

Happy Saturday, my sweet friends! I hope your weekend is filled with all things lovely. :o)

You know what's a bit challenging? Crafting with a newly-splinted index finger. Equally challenging is only eating one Peach Crumb Bar at a time. After being slowed down for a few days this week, I was finally able to create some goodies to share. With a few challenges in mind, I came up with this birthday card for a fellow ice cream lover. (Clearly this person is fabulous.) The dessert I made was a "Just Because" treat for my parents. I hope you enjoy both! :o)

For the card, I decided to make a heaping bowl of ice cream, bursting with our favorite flavors. Glitter and embossing helped me achieve the intended flavors, which made me sparkly happy. Along with the classic vanilla, strawberry, and chocolate, we have: Chocolate Caramel Swirl (aided by bronzey glitter glue and caramel-colored rhinestones); Cotton Candy (pink base with a ribbon of sparkling blue... my personal favorite from our beloved dessert establishment); and Fudge Swirl (white base with swirls of brown). For variety in the toppings, I used glitter paper for sprinkles as well as rhinestones for nonpareils. I coated the spoons in silver Stickles and then covered them with Glossy Accents to make it a bit more realistic. (I'd love to do this to my real silverware... but I shall resist.) Are you craving ice cream now? I certainly am! :o)

As usual where faces are involved, I did my best to draw the sweet Peachy Keen faces. The cute little bite is a bit unsettled about the events that have transpired...


Challenges entered:
 * Birthday Sundaes (shaped birthday cards)
 * Getting Cricky (Let's Face It!)
 * My Craft Spot (How Sweet it is!)

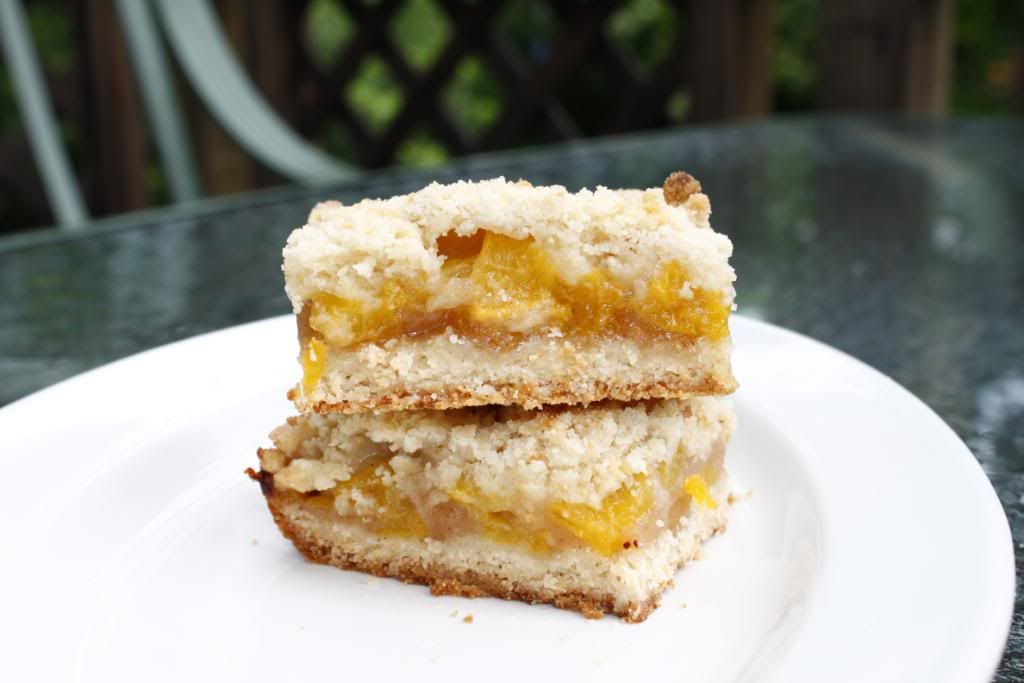
Sweet Saturday time! Who's ready for a delicious summery fruit dessert? Peach Crumb Bars... they taste as incredible as they look:


These bars are fantastic! If you're a fan of portable pie, this is your new friend. It tastes so much like peach pie in bar form. Juicy and delectable, yet surprisingly easy! My sweetheart peeled the peaches for me so I could rest my finger, otherwise this might not have been baked this week. As I was grating a leftover whole nutmeg from Christmas, my thoughts drifted to the glorious desserts of the holidays. :o) As incredible as this tasted, I know it will be even more spectacular when peaches are in season at my local orchard in August. Freshly picked peaches? Yes, please! This is also a great base for any crumb bar recipe... I think blueberry is next for me.

Thank you for visiting my blog today! I'm so grateful for all of you. :o) I would also like to thank Tiffany from Sparkled Memories and Candace from My Passion 4 Scrappin for awarding me the Irresistibly Sweet Blog Award! I am truly blessed to have such lovely followers... to read more about the award you can read my previous blog post. Thank you for thinking of me, ladies! Have the happiest weekend, my creative friends... and a scoop or two of dessert! :o)

Peach Crumb Bars
Yield: 24 bars

Ingredients:
For the dough:
3 cups all-purpose flour
1 cup granulated sugar
1 teaspoon baking powder
¼ teaspoon salt
1 cup (2 sticks) unsalted butter, cold
1 egg, lightly beaten

For the filling:
5 cups diced or sliced peaches (about 7 peaches, peeled)
2 tablespoons lemon juice
½ cup all-purpose flour
1 cup granulated sugar
¼ teaspoon salt
½ teaspoon ground cinnamon
¼ teaspoon ground nutmeg

Directions:
Preheat the oven to 375º. Grease a 9x13-inch baking dish.

Prepare the dough: In a medium bowl, whisk together the flour, sugar, baking powder, and salt. Use a pastry blender to cut in the butter, followed by the egg. The dough will be crumbly. Pat half of the dough into the prepared pan. Place the pan and the remainder of the dough in the refrigerator while you prepare the filling.

To make the filling, place the diced or sliced peaches in a large bowl and sprinkle with lemon juice. Mix gently. In a separate bowl, whisk together the flour, sugar, salt, cinnamon, and nutmeg. Pour over the peaches and mix gently. Spread the peach mixture evenly over the crust. Crumble the remaining dough over the peach layer.

Bake for 45 minutes, or until the top is slightly golden brown. Cool completely before cutting into squares and serving.

Source: Brown Eyed Baker

Key Recipe Components (for card):
 * Cricut Cartridge: Simply Charmed
 * Cuttlebug embossing folders: D'vine Swirls and Polka Dots (sentiment tag)
 * Paper: Core'dinations, DCWV
 * Button: My Mind's Eye Tres Jolie
 * Twine: Sew Easy in Lollipop
 * Miscellaneous: iRock, Martha Stewart glitter (lapis), Stickles

Photobucket

Tuesday, June 21, 2011

I Treasure You Card and a Sweet Blog Award!

Happy Tuesday, my dear crafty friends! I hope your day is full of butterflies and sunshine... and a touch (or twelve) of chocolate. :o)

First up today is my new card! I was truly blessed this weekend to receive two new Cricut cartridges from my sweetheart: Kate's ABC's and Elegant Edges. How I've yearned for these! In fact, I simply couldn't decide which to use first, so I used both. ;) These have endless possibilities and I'm happier than a shimmery clam to own them. :o)

(I know I very recently used this color scheme... but I ask you, can you ever have too much pink and green? They're like hot cocoa and marshmallows: always happy together.)


I had to channel my energy while making this card... I was overly thrilled to be using these cartridges. I simply *needed* to make a girly-girl card with them. I surrounded myself with rhinestones, glitter, buttons, twine, liquid pearls, and sparkly paper... just waiting to see what would happen. I didn't even take a few moments to see what the new challenges were for any blogs... I simply created what my heart wanted to say. :o) The paper used for the scallop mat makes me think of bubbles... like Kate's sweet self had just finished blowing bubbles before scooping up her kitten. I love that. :o) Thank you, my sweet boyfriend, for this incredible gift!

Now I have several people to thank! I am truly honored and ecstatic to have been given the Irresistibly Sweet Blog Award by five fantastic crafters this past weekend. All five of you made my heart extra sparkly all weekend long! I sincerely appreciate your support. :o) Extra love and hugs to these super talented sweethearts:

Pam from Crafty Cards 4 u 2
Kaitlin from Cupcakes and Cards
Lisa from A Mermaid's Crafts
Nita from Nita Notes
Sabrina from Scrappin' with Sabrina


Photobucket


The rules for the award are as follows:
1) Send a thank you to the person who nominated you and include their link.
2) To accept this award, tell 7 random facts about yourself.
3) Pass the award on to at least 8 other awesome blog buddies.

My 7 tidbits of randomness:
1) Christmas is every single day in my heart... my pals know exactly what I mean when I say I'm having Christmas pizza or Christmas eggs for dinner.
2) I ditched all the clothing from the biggest drawer of my dresser to make more storage space for my sparkly make-up.
3) I was a competitive Scottish highland dancer for 16 glorious years.
4) Josh Groban is my favorite musician in the history of the world. (He better hope I don't win a Meet and Greet for the upcoming Michigan concerts. He will be sparklier than ever if I hug him.) ;)
5) I love watching Disney's House of Mouse episodes when I'm on the elliptical machine, working off my sweets addiction.
6) I see infinite beauty in a tiny blade of grass.
7) I became teary when I first saw the ice surface at a Detroit Red Wings game in March... I love my hockey team. <3

I am passing along this sweet award to the following 8 blogs (in alphabetical order). They are all wonderful people with so much to offer their readers. Thank you for being a source of beautiful inspiration with your mere presence. :o) (I know some were recently recognized, but I simply couldn't resist sending my love in return.)

1) Catarina~ Docerela Creations
2) Ellen~ Ramblings of a Travel Bug
3) Jalisa~ Patches of Pink
4) Lisa~ A Mermaid's Crafts
5) Nita~ Nita Notes
6) Pam~ Crafty Cards 4 u 2
7) Sabrina~ Scrappin' with Sabrina
8) Tiffany~ Sparkled Memories

Thank you for visiting, my friends! I wish you all a gorgeous day. :o)

Key Recipe Components:
 * Cricut cartridges: Elegant Edges, Kate's ABCs
 * Cuttlebug Polka Dots embossing folder
 * Paper: DCWV, Papertrey Ink, SEI
 * Ribbon: Gorgeous, but unknown... it was a gift from a friend.
 * Buttons: My Mind's Eye Tres Jolie
 * Twine: Sew Easy in Limeade
 * Miscellaneous: iRock, Liquid Pearls, Martha Stewart Peridot glitter, Studio G glitter glue


Photobucket
Related Posts Plugin for WordPress, Blogger...
Blogging tips