To pin my projects to Pinterest, hover over the picture and a Pin-it Button will magically appear.

Tuesday, August 30, 2011

Tree of (Peachy) Blessings Birthday Card

Happy Tuesday, my sweet crafty friends! I hope you're having a bubbly week so far! :o)

I'm so excited I finished this card today to share with you. If I miss two consecutive weeks of playing at Cooking With Cricut, I get a little crabby. ;) It was close, but I made it! The challenge this week is peach, so I whipped up a peachy birthday card for a friend of my boyfriend. She's super sweet and is in the midst of a rough patch, so I made her a birthday card with encouragement mixed in. This isn't just a peach tree.. it's a tree of blessings. :o)

"Birthday blessings..."
"... for someone who makes life peachy!"

Upon doing some peachy research since I don't have any cartridge with one, I immediately gravitated to the Preserves cart that has them look so much like hearts. :o) I drew some in a couple different sizes on sparkly cardstock because I can't ever pass up an opportunity to make sugared fruit! :o) This tree has a few peach blossoms inscribed with Faith, Hope, and Love, reminding her of the rich blessings in her life that will sustain her. Not only that, but they also serve to tell her how she is a blessing to us. She has been a representation of those divine promises, too.

For her special day, I bejeweled a birthday tiara with rhinestones and glitter. A dab of Stardust gives the sweet deer a twinkle in her eye, which is a tiny detail that I'm just crazy about for some reason... plus it goes well with her sparkly face. I sparklified her little spots and the tips of the blades of grass to make it a little more festive. I used a super pretty butterfly paper for the gift, but once I wrapped it in twine it covered most of them up. Oops. ;) I embossed the deer and tree for some texture, then ran a brown ink pad over the trunk to enhance the dots. The tiara, gift, tree, and front blades of grass are pop-dotted for dimension. The background SEI butterfly paper is one of my favorites and I hope she likes it, too. :o)

I had a blast making this with my Gypsy. I was able to use two features that had me yearning for this since I discovered it: hide contour and shape cards. This is such a blessing. Thank you for stopping by today and I wish you a gorgeous evening. :o)

Challenge entered:
 * Cooking With Cricut~ Peach

Key Recipe Components:
 * Cricut cartridges: Cindy Loo, Create a Critter, Elegant Edges, Gypsy Wanderings
 * Cuttlebug embossing folders: Polka Dots, Swiss Dots
 * Paper: Core'dinations, Papertrey Ink, SEI
 * Ribbon: Essentials
 * Button: My Mind's Eye Tres Joli
 * Twine: Sew Easy (limeade)
 * Corner Punch: Fiskars Punch Plus Emboss
 * Sentiment: Computer generated
 * Flowers: Prima
 * Miscellaneous: Brenda Walton rhinestones, Dew Drop Brilliance, iRock, Stickles

Photobucket

Saturday, August 27, 2011

Double Cupcake Box and Sweet Saturday!

Happy Saturday, my lovely friends! I hope you're smiling lots today. :o)

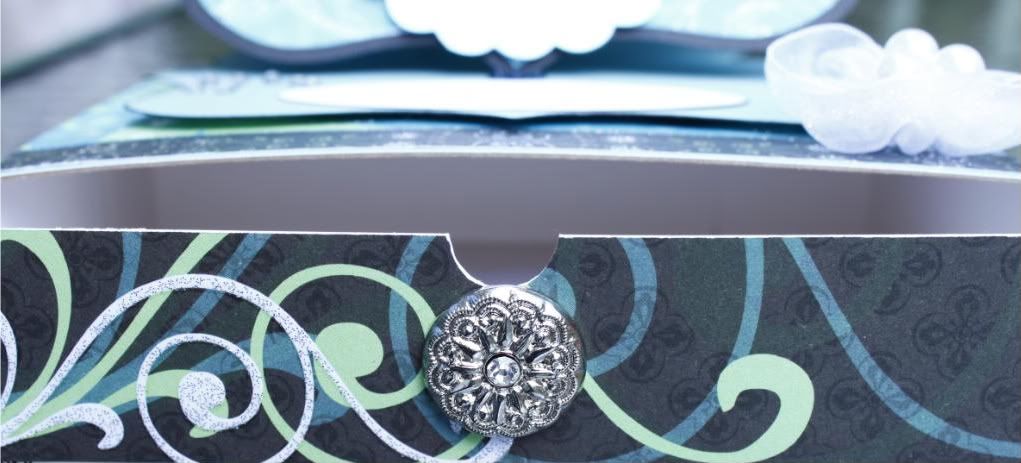
I have a couple of happy things to share with you! I used my Gypsy for the first time and I LOVE IT. It's amazing, just like you all have said. :o) Well before I had one in my possession, I knew what my first project needed to be. It *had* to be one of those super cute cupcake boxes I've stared at countless times. During my search for any information I might need since I'm a Gypsy newbie, I stumbled upon something even better than that beloved cupcake box. A DOUBLE cupcake box. Why hadn't I thought of that?! Two for a sweet couple, best friends, or if you simply want to gift yourself one for each hand. ;)


I followed a basic tutorial from Country Heart and Home, then used Elegant Edges and Classic Font for the pieces to weld and such on my Gypsy. (I feel so fancy schmancy saying that. Gypsy. I have a Gypsy.) I will be making a few alterations and tweaks next time, but this is still a great base to begin from and I'm so thankful I came across it. :o)

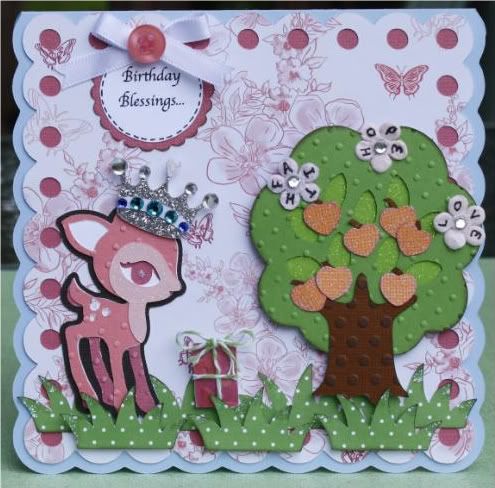
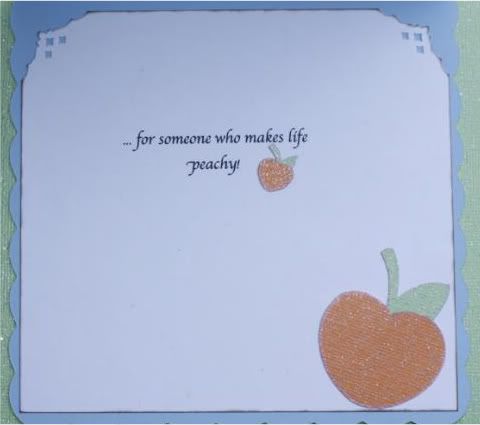
I went with a pink, green, and white color scheme not only because it's naturally gorgeous, but also because a coordinating birthday card was going to be made for the Birthday Sundaes challenge. Alas, the deadline is too soon for the super sweet matching card to be completed. (Can I get an extension and make it Birthday Mondays, just this once?) I had SUCH fun with my first Gypsy project! I used some fun pom-pom ribbon because it's so celebratory and smile-inducing. Plus the poms look cute against the polka dot paper! Not shown all that well is my Core Couture cardstock. The green beneath the ribbon and the green butterfly are sparkly. The white butterfly is opalescent due to the Gemstone cardstock. The little tag is embossed and stamped with a sweet sentiment because everything I bake is jam-packed with love. (The ink is shimmery!) The view from above shows the reason I adore double-sided paper. Such a pretty, festive coordinating interior. I hope you like it as much as I do. :o)

Challenge entered:
My Craft Spot~ Gift bags and boxes

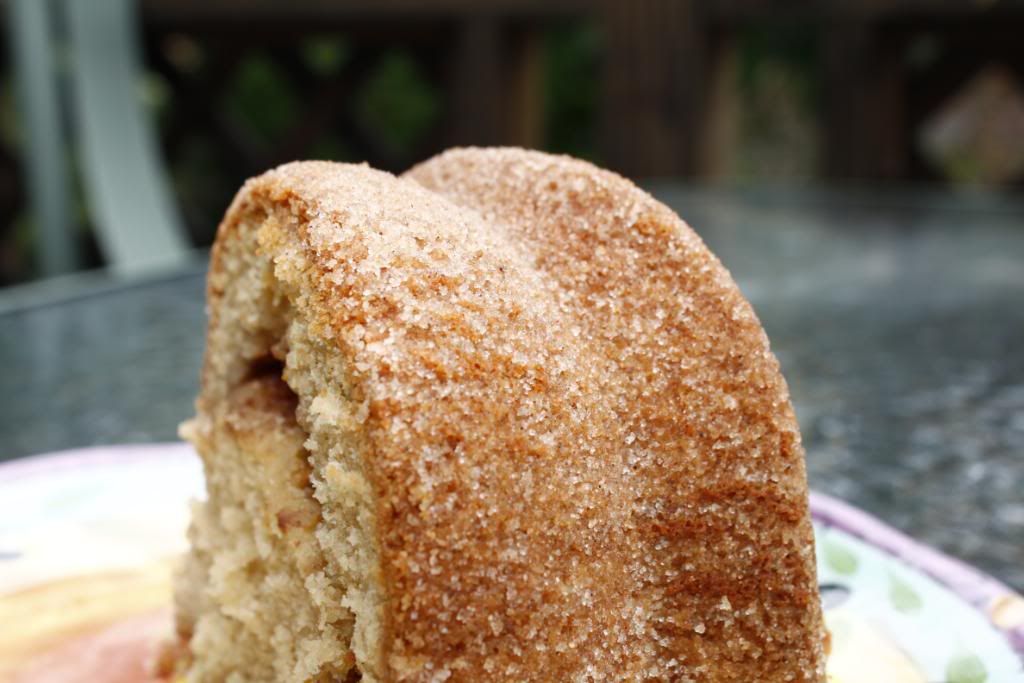
Did you notice the gorgeous contents of that box? I assure you they taste even better than they look. I just ate one to give me energy to post the recipe. ;) Sweet Saturday this week is all about chocolate, cherries, and vanilla-flavored freshly whipped cream... and it just may have made me my dad's hero. Black Forest Cupcakes, I love you.

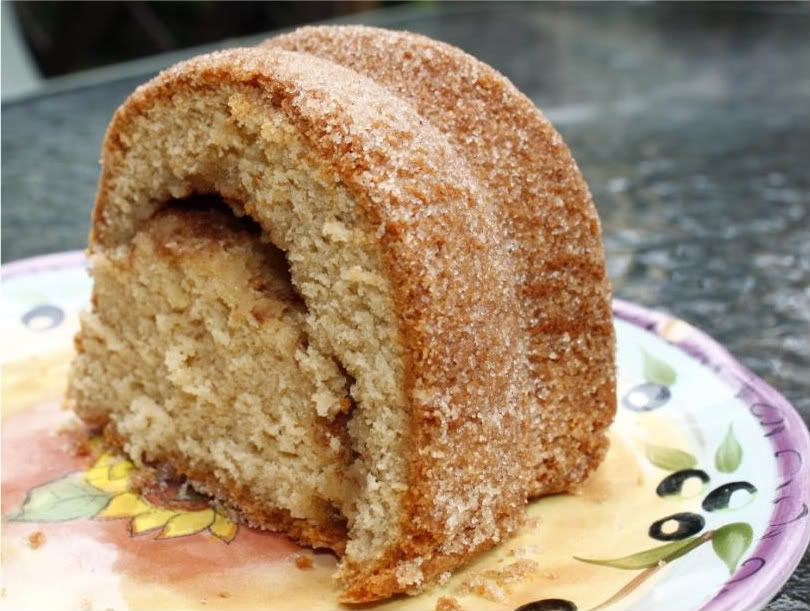
SO pretty and equally fun to bake. Guess what? There's a surprise inside. The only cherry in Black Forest Cupcakes can't be on top... instead, the centers of the moist, deep chocolate cakes are filled with a delicious cherry filling. (This picture is a baking-at-4am phone camera image... forgive the blur.) ;)

After cutting off the bottom of the removed cones (and maybe sampling a couple of them), I replaced the tops to cover the filling and then piped the whipped cream. I had such a blast with these last night and I hope you'll make them sometime, too! :o)

Have a sparkling weekend, my crafty friends! Thank you for stopping by. I am so blessed! I wish I could give you all a cupcake.

Black Forest Cupcakes
Yield: Approximately 22 cupcakes

Ingredients:
For the cupcakes:
½ cup unsweetened Dutch-process cocoa powder
½ cup hot water
2 cups all-purpose flour
¾ teaspoon baking soda
¾ teaspoon baking powder
¾ teaspoon coarse salt
1 cup (2 sticks) unsalted butter
1½ cups sugar
3 large eggs, at room temperature
2½ teaspoons vanilla extract
⅔ cup sour cream, at room temperature

For the cherry filling:
16 ounces frozen cherries, thawed*
⅓ cup sugar
3 tablespoons cornstarch
1 teaspoon lemon juice
1 tablespoon kirsch (optional)

For the frosting:
1½ cups heavy cream, chilled
6 tablespoons confectioners' sugar, sifted
1 teaspoon vanilla extract

For garnish:
Fresh (or maraschino) cherries, with stems
Chocolate shavings

*Note: You can use either tart or sweet cherries for this filling depending on your personal tastes and what is available to you. Feel free to adjust the sugar as needed to achieve your desired level of sweetness or tartness in the filling. I used tart cherries and the amount of sugar indicated.

Directions:
To make the cupcakes, preheat the oven to 350º F. Line standard cupcake pans with paper liners. In a small bowl, whisk together the cocoa powder and hot water until smooth. In a medium bowl, whisk together the flour, baking soda, baking powder, and salt. Set aside.

In a medium saucepan, combine the butter and the sugar over medium heat. Heat, stirring occasionally to combine, until the butter is melted. Remove the mixture from the heat and transfer to the bowl of an electric mixer fitted with the paddle attachment. Beat on medium-low speed, 4-5 minutes, until the mixture is cooled. Mix in the eggs, one at a time, scraping down the sides of the bowl as needed and beating well after each addition. Mix in the vanilla, followed by the cocoa mixture, and beat until incorporated. With the mixer on low speed, add in the dry ingredients in two batches, alternating with the sour cream, beating just until combined.

Divide the batter between the prepared cupcake liners, filling them about ¾ of the way full. Bake 18-20 minutes or until a toothpick inserted in the center comes out clean, rotating the pans halfway through baking. Allow the cupcakes to cool in the pan 5-10 minutes, then transfer to a wire rack to cool completely.

To make the filling, drain the thawed cherries, reserving the juice in a liquid measuring cup. Add enough water so that the total liquid equals 1¼ cups. Add the liquid to a medium saucepan with the sugar and cornstarch. Heat over medium-high heat, whisking occasionally, until the mixture beings to bubble and thicken. Continue whisking so no lumps form. Once thickened, remove from the heat and whisk in the lemon juice. Fold in the drained cherries with a spatula. Stir in the kirsch, if using. Cover and chill until ready to use. (The filling will continue to thicken as it chills.)

To fill the cupcakes, use the cone method to remove a portion from the center of each cupcake. Fill each with a spoonful of the cherry filling.

To make the whipped cream frosting, add the heavy cream to the bowl of a stand mixer fitted with the whisk attachment. Start beating on medium-low speed, slowly increasing as the cream begins to thicken up to medium-high speed. While the cream is being whipped, gradually add in the confectioners' sugar a spoonful at a time. Whip the cream until stiff peaks form. (Be careful not to overbeat!) Fold in the vanilla extract.

Frost the filled cupcakes with the whipped cream. Garnish as desired with cherries and chocolate shavings. Refrigerate until ready to serve.

Source: Annie's Eats


Key Recipe Components (for double cupcake box):
 * Cricut cartridges: Classic Font, Elegant Edges
 * Cuttlebug embossing folder: Swiss Dots
 * Paper~ Core'dinations, Heidi Grace
 * Stamp~ Studio G
 * Punches~ Martha Stewart small monarch, heart punch from stash
 * Ribbon~ American Crafts
 * Buttons~ My Mind's Eye Tres Jolie
 * Twine~ Sew Easy (limeade)
 * Miscellaenous~ Dew Drop Brilliance
Photobucket

Wednesday, August 24, 2011

Whimsical Wednesday Challenge: Inspiring Words

Happy Wednesday, sweet friends! :o)

Guess what today is? It's another Whimsical Wednesday! :o) The Whimsical Wednesday challenge this week is Inspiring Words. The requirements are to create a card or project inspired by one of the words in the following photograph and to include that word somewhere on your creation.

My sentimental heart fell in love with this challenge and I knew I needed something extra special for it. It ended up being my first step card and my first real attempt at using Copics. My inspiration was quickly ignited by the rock designated as FAITH. Equally speedy came the idea for my card. I was compelled to use it as an outlet for a personal battle. Faith: He will deliver. That is the purpose behind my card. The Lord will deliver me from my injuries and I absolutely will dance again. Not only did this one creation stir my belief, but it serves as a declaration to myself and to Him. He will deliver me... and He can deliver you from any tribulation you face.

"You can dance anywhere, if only in your heart."

The main storyline is that if we take a step back and let God take the lead, He will deliver, heal, provide, etc. But we need to entrust ourselves to Him, believing Him to be our faithful protector and provider. There are a few things going on here, so I'm including a closer picture of each section with its individual part of the story. I promise to understand if you don't have time to read through all the details... I'm just thrilled you stopped by to check out the main card image! :o)

Faith... the most important part of this card. I cut out a heart with my Cricut and weaved pristine white ribbon atop it, just as faith needs to be woven into every aspect of our life. With my MS pen, I wrote FAITH across the center because we need to write the Word upon our hearts. Writing on this ribbon was a bit messy due to the ink instantly spreading. There were other options to make it neat, but I chose this route because it reflects how we sometimes finally surrender and entrust everything to Him. We're a complete mess. For the background, I typed up some Scripture from Psalms 31 and 91 and stamped it with a lovely agapanthus design.

Here is our sweet little star... fully trusting, patiently waiting for her prayers to be answered. I confess I am thrilled with how she turned out. As I sat down to color her this past weekend, I panicked a bit, wondering why in the world I was using a Design Team project for my first cute stamp attempt. Then I decided it's rather lovely to share in every part of the creative journey, as I often do on my relatively young blog. I don't really think my initial Copic usage (outside of a failed flower attempt), could have gone much better. I am ecstatic! There are mistakes of course, but I don't even see them anymore... I'm wisely focusing on the positives. :o) I love her! I used every single one of my beginner collection of markers. Hehe.

She's framed in Flower Soft for a pretty textural element, plus it goes so well with the beautiful image. It shows up better if you click on the picture for a closer look.. you'll also better see the Stardust sparkles I used throughout the stamp. For the middle step I made a simple lace flower to coordinate with the ballet costume and centered it with a Tim Holtz button. The front step simply holds the all-important sentiment. Despite being sidelined for far too long, I can still dance in my heart... it's one of my favorite "anonymous" dance quotes.

Finally, the last segment! I used textured cardstock, sheer glitter ribbon, lacy ribbon, and rhinestones to make a romantic-length tutu... a visual reminder of what awaits in my future. Naturally, I couldn't resist lining the ruffle layers with more Stardust. Beneath the tutu is a layer of the same glitter ribbon as the sparkling V-shaped overlay on the bodice, so in person there's a lot of sparkle showing through. It's gorgeous. I don't have any cartridges with dress forms, so I looked up some online and drew elements from the ones found on Nifty Fifties and Forever Young. I'm a huge fan of white-on-white, so I trimmed the bottom of the dress form with liquid pearls. It seemed fitting for such an elegant ballet costume. :o)

Lastly, a side view to show you the levels/dimension that come about when creating a step card. They're such fun! Despite being such a highly personal card, this is also one of the most wonderful for me to give away. It's always special to create a card tailored to someone else's tastes, knowing what makes their hearts tick. But sometimes one of the most lovely gifts to give is a peek deep into the innermost recesses of your own heart. I hope she loves it. :o)

I hope you'll play along with us this week by linking up your creations at the Whimsical Wednesday Weekly Challenge post! I'm eager to see your unique takes on this fantastic challenge. Our sponsor for this week's prize is Barb from BugBites, who is generously donating her new All Year Round stamp set to one lucky winner. :o) Thank you, Barb!


Be sure to dance on over to the rest of the Design Team's blogs to check out their wonderful projects. :o) Thank you for visiting me and I wish you a day bursting with sunshine and sparkles. :o)

Key Recipe Components:
 * Cricut cartridges: Classic Font (for heart), Elegant Edges
 * Cuttlebug embossing folders: Polka Dots, Swiss Dots
 * Paper: Core'dinations, Papertrey Ink, Wausau (a lovely inexpensive option for Copic work, found at Michaels in a jumbo 250 pack... 40% coupon eligible!)
 * Stamps: Agapanthus Long (Stampendous), Sweet Blossom (Wee Stamps)
 * Copic colors: E00, E02, RV13 (skin); YR 12, YR31 (hair); RV10, RV13, RV14, BV0000, BV01 (clothing, flowers, purple butterfly); E31, E37 (furry friend); BG11, BG15 (blue butterfly)
 * Ribbon: Casa Collection Special Occasion (sheer glitter); Essentials (white); Wrights (black lace)
 * Button: Tim Holtz Fanciful Buttons
 * Miscellaneous: Dew Drop Brilliance Ink, Flower Soft (in Fuchsia); iRock, Liquid Pearls, Stickles

Photobucket

Saturday, August 20, 2011

Owl Bookmark and Sweet Saturday!

Happy Saturday, my dear friends! I hope your weekend is sunshiny and sparkly. :o)

I hesitated to share this bookmark with you today, only because I am disappointed with it. I don't say that often, as you know. The only part of this that came out as intended is the happy owl himself. I love him! My vision was to have him nestled amongst flower blossoms within a tree, as if he was snuggled up with the book the recipient will be reading. Instead, I fear it looks like I made him part peacock. Teehee! It was one of those projects that just didn't go as planned in most facets. But it's all I've had time to complete because I'm working on my Copic 'skills'... so that's taking up my limited crafting time. I'm determined to use them on a project this weekend, so we'll soon see if I've made any technical progress. ;)

One more thing before I share my bookmark and tasty treat! I got a gift from my super sweet boyfriend today. Guess what it is? A GYPSY!!!!! I cannot believe I have one! I wanted to faint. SO excited to learn how to use it! Oh the joy of not hand-cutting shaped cards any longer, plus a million other things! :o)

Here he is! Isn't he so cute? Even with peacock feathers, if that's what my mom thinks they are. ;)

One way to shake off a less-than-successful creativity session is to bake! My mom is absolutely crazy about snickerdoodle cookies, but I found something even better... Snickerdoodle Bundt Cake! Oh yes, it exists. It is truly fabulous and my mom fell in love with it.

The dark skies didn't help me here, but the gorgeous topping sparkles like a bottle of glitter. :o)

This legitimately tastes like a massive snickerdoodle cookie. While I love the cookies, I don't make them because the authentic recipes use shortening and I just *cannot* get myself to use it. So when I stumbled upon this recipe, the joy was palpable! The entire crust (even the bottom) is coated in a sparkling cinnamon-sugar mixture, giving it a lovely crunch. (And it is SO sparkly.) The cake is perfectly moist, with a cinnamon-sugar band that is both lovely and delicious. This comes together so simply (and my-oh-my, is the batter ever tasty) and I will certainly be making this again soon. My entire family loved it, from pre-teen to 70! :o)

Note: The recipe as stated uses a 9-inch Bundt pan, but I only have the large 12-cup, 10-inch capacity pan. I took it out a few minutes earlier than the minimum bake time, and it was perfect. Now go make this cake! (Recipe just a smidgen below!)

Before I flutter off, I want to show you something... take a peek at this adorable badge:

That's right! The wonderful Whimsical Wednesday Design Team is having a Halloween Blog Hop! It's never too early to be excited about something, right? I'm anxious to see what everyone comes up with for the fun event. :o)

Have a beautiful day, my sweet friends! Thank you for taking a moment to visit :o)

Snickerdoodle Bundt Cake

Ingredients:
2 teaspoons ground cinnamon
1 cup white sugar

2½ cups all-purpose flour
1 teaspoon baking powder
½ teaspoon baking soda
½ teaspoon Kosher salt
1 cup unsalted butter, at room temperature
1 cup white sugar
1 cup light brown sugar
3 eggs, at room temperature
2 teaspoons vanilla extract
1 cup full-fat sour cream, at room temperature

Directions:
In a small bowl, combine 1 cup of sugar and 2 teaspoons of cinnamon. Mix together really well and preheat oven to 325º F. Generously spray a 9-inch Bundt pan with Pam with Flour, being careful to cover all nooks and crannies, as well as the center tube. (Alternatively, grease the pan with shortening.) Gently dust the entire inside of the pan with the sugar and cinnamon mixture. You should only need about ¼ to ½ cup of the mixture, but be sure to evenly coat the inside surface of the pan, including the tube. Save the remaining cinnamon-sugar mixture and set everything aside.

Sift together the flour, baking powder, baking soda, and salt. Set aside.

In a mixer fitted with the paddle attachment, beat just the butter on medium speed for one full minute. Add the white sugar and mix for 3 minutes, until light and fluffy. Scrape down the bowl and blade, then add the brown sugar.

Mix for 2 minutes until the mixture is light brown and uniform in color. Add the eggs one at a time, beating each for one full minute. Stir in the vanilla. Add the flour mixture alternately with the sour cream; beat well.

Spread half of the batter into the prepared pan. Sprinkle ¼ to ⅓ of a cup of the cinnamon- sugar mixture over the top. Spread the rest of the batter into the pan and sprinkle any remaining cinnamon-sugar mixture over the top. (If you run out of the mixture, simply mix together ¼ cup of sugar + ½ teaspoon of cinnamon for the top of the cake.)

Bake in the preheated oven for 55 to 65 minutes, or until a toothpick inserted into the cake comes out clean. Allow to cool for 10 minutes before inverting onto a wire rack to cool completely.


Key Recipe Components (for bookmark):
 * Cricut cartridge: Cindy Loo
 * Paper: Core'dinations, Papertrey Ink, stash
 * Ribbon: Essentials
 * Miscellaneous: Heart punch, K and Company die-cut flower (I traced one onto the main paper to double it up)

Photobucket

Tuesday, August 16, 2011

S'mores Wiper Card

Happy Tuesday, dear friends! :o)

Today I have a sparkly sweet card to share with you, but only a minute to chat about it! (I bet you never thought that would be possible!) ;) Since I don't have long, I want my little chunk of time to be spent visiting some fabulous blogs instead of writing a novel here.

I was ecstatic when I saw the challenge last week at Cooking With Cricut! S'mores? Yes, please! My boyfriend and I love Christmas and we listen to Christmas music year-round... because of that, when I saw the S'mores challenge I instantly started singing, "It's a marshmallow world..." That song always makes us laugh when it comes on the radio during the holidays, so I created our own little sugar date! We love s'mores, so during the winter we make them over candlelight. I think he'll love a card that combines wintery fun and s'mores.

This is my first wiper card, and I can't believe how easily it came together! I used this tutorial at Splitcoast Stampers because it came up first, but there are tons of great ones out there.

"It's a marshmallow world..."

Once opened: "I love you s'more than chocolate." (Which he knows is saying a LOT.) ;)

A few tidbits: The sweet penguin boy is quite chivalrous.. he's roasting both marshmallows so his love doesn't get chilly hands. (At least not until it's feasting time, but chocolate is always worth it.) She's in charge of the chocolate and graham crackers, which she stacked up beside her. I cut fringe on the scarves and dolloped/trimmed her hat with cotton and sparkles. You may have noticed a lack of marshmallows by their fire... in their lovey-dovey state, the cute couple decided to make a mallowman, as opposed to a snowman. So the lumpy snowman is made of marshmallows, sparkling with their love. Hehe. For some reason, I find that highly amusing. ;) I drew on some Peachy Keen faces and sprinkled the entire card with sparkle, but a whole lot of it doesn't show up via photographs. It looks much icier in person. :o)

Challenge entered:
 * Cooking With Cricut~ S'mores (or s'more elements)

Thank you so much for stopping by! I hope everyone has a gorgeous week, filled with all things beautiful. :o)

Key Recipe Components:
 * Cricut cartridges: Create a Critter, Elegant Edges, Simply Charmed
 * Cuttlebug embossing folder: D'vine Swirls
 * Paper: Bazzill, Core'dinations, Papertrey Ink
 * Ribbon: Essentials
 * Sentiments: Computer generated
 * Miscellaneous: iRock, Martha Stewart glitter, Stickles, super old snowflake punch

Photobucket

Saturday, August 13, 2011

Friendship Card and Sweet Saturday

Happy Saturday, my treasured friends! :o)

Against all odds, I have some goodies to share with you today! In a sparkly nutshell, the last 24 hours have been the type where the simplest things turn monumentally challenging. Thankfully this afternoon I was able to finish up my card and salvage my dessert (taste-wise, anyway). Miracles do happen! ;)

First up is a friendship card for one of my dearest pals. We first crossed paths about four years ago and she quickly became a steadfast presence. She colors my life with such joy. I wasn't able to do any challenges last week, so I was eager to use a few as my base inspiration for this one. :o) It tells a bit of a story, explained below. (Forgive the blurry pics and the one that makes you feel like you're on a rollercoaster! My picture-taking skills are on vacation.)
One more to show some of the dimension:

The story here is that this butterfly is fluttering along on her sparkling path. Approaching a curve in the road, representing a new creative journey, she has two options. To the left, she finds black and white... beautiful and full of promise with its sparkly rhinestones and pearlescent butterflies, but still merely black and white. To the right is the path taken amidst the bond of a gorgeous friendship. Friendship colors your world with an explosion of sparkling love. The rhinestone path has changed from crystalline to a rainbow, while the base is a burst of bright pink swirled with stardust glitter. Naturally this environment brings out your own inner sparkle, evidenced by the brightly colored, ultra glittery butterflies. I certainly know which path I'd choose... and thankfully our main fluttery friend here, edged with a tiny bit of black and white doodling, is slightly angled to the right. Her shadow is bright yellow as opposed to black because she's frolicking on a ray of sunshine that keeps all darkness away. Just like my friend who blesses me so richly and strives to defy any dark clouds that come my way.

The ribbon flower is one of my favorite parts! (Shocking, right?) It's super simple, but I think it's lovely. I followed a fabulous tutorial, but instead of keeping it a single flower, I coiled it up to create a double dose of polka-dotted love. I lined an edge of the ribbon with Glossy Accents and coated it in bright pink glitter before stitching it into the flower. It seemed to be the best way to get every millimeter of trim sparkly, as opposed to sparklifying it once already coiled.
Tutorial: Dawn's Stamping Studio

The interior needed to be colorful as well, so I decorated it a bit instead of solely holding the sentiment. This is my first time using Scrappy Moms stamps, and I love them! I won them at FCCB and was so excited that I *needed* to use one immediately. I added a Stardust-covered butterfly to the bottom because it just seemed like there should be one inside. :o)
(I don't really think it's possible to have used 'sparkly' or its variations any more than I did in this card explanation.) :o)

A first for me, I'm entering this into the My Pink Stamper blog hop challenge. The requirement is to use your style making your favorite thing... be it a favorite color combo, technique, cartridge, etc! I struggled at first because style-wise, sometimes it seems like I'm all over the place. Then I figured it out. My style is from the heart. I can't really classify it as anything else.. because no matter what project I do, regardless of outward appearance, it must be from the heart and must have a story (whether obvious or subtle). Upon that realization, I'm playing along! My favorite things are ribbon and sparkle, which my crafty friends are very familiar with by now. ;) Hehe.

Challenges entered:
 * Fantabulous Cricut~ Let's Get Buggy
 * My Craft Spot~ Use hot, bright colors
 * My Pink Stamper~ Use your style making your favorite thing!
 * Wacky Wednesday~ Friendship

Who's hungry? It's Sweet Saturday time! My favorite baking season is rapidly approaching, but there are still a few weeks left to celebrate the fruity goodness of summer. I love adding summer fruits to heavier desserts because it seems to lighten them up a bit in a most refreshing way. For example... Lime Cheesecake with Blackberry Sauce.
Oh the journey of this dessert, made late last night. It was going so well! Then I made a ridiculous error that altered everything, and also made it look as crazy as it does. I was a few seconds away from trashing the whole thing when I was encouraged to just wait it out while it chilled to see what would happen. I'm so thankful I did because miraculously, this tastes delicious. I can only imagine how incredible it would have been had I not made such a silly mistake. I knew this recipe would be amazing, which is why I've been longing all summer to make it. The fact that it still tastes rich, creamy, and wonderfully limey despite NOT scraping the bowl during mixing is a true testament to the success of this recipe. I was mortified when I dumped the mixture over the crust, only to see a HUGE layer of cream cheese that was not mixed into everything else. Probably at least three-quarters of a cream cheese brick. It was too late to incorporate it because it would have been overmixed, so I went with what I had. I'm still in shock that this tastes so good! I wanted to pretty it up, but I was plum exhausted so I kept it simple. But, I beg you... for the love of cheesecake, scrape the bowl at least once during mixing!

Note: The source of this recipe doesn't bother bringing the ingredients to room temperature before beginning, but when it comes to cheesecake I'm a bit of a stickler... so I made sure the cream cheese was softened and the eggs weren't the least bit cold. Apparently it works fine either way, but I just couldn't get myself to use them cold. ;)

Lime Cheesecake with Blackberry Sauce
Yield: 1 9-inch cheesecake or 6 4-inch cheesecakes

Ingredients:
For the crust:
2 cups graham cracker crumbs
6 tablespoons sugar
6 tablespoons unsalted butter, melted

For the cheesecake:
3 (8 oz.) packages cream cheese
1 cup sugar
3 large eggs
Juice of 2 limes
Zest of 2 limes

For the blackberry sauce:
6 ounces blackberries, rinsed and drained (plus extra for garnishing, if desired)
2 tablespoons sugar
1½ teaspoons cornstarch
1½ teaspoons cold water

Directions:
To make the cheesecake, preheat the oven to 325º F. Combine the graham cracker crumbs, sugar, and butter in a medium bowl. Stir together until well combined and moistened. Press the crumbs into the bottom of a 9-inch springform pan (or 6 4-inch mini springforms). In the bowl of an electric mixer fitted with the paddle attachment, beat the cream cheese on medium-high speed until smooth. Gradually mix in the sugar. Blend in the eggs one at a time, beating well after each addition. Beat in the lime juice and lime zest until well combined. Pour the filling over the graham cracker crust.

To minimize cracking, place a shallow pan half full of hot water on the bottom rack of the oven during baking. Bake for 55-65 minutes or until the center is set (25-33 minutes for mini springforms). Turn off the oven and prop open the door about 4 inches. Let the cheesecake stand 30 minutes. Remove from the oven and transfer to a wire rack. Let cool 10 minutes. Carefully remove the sides of the pan and let cool to room temperature on the rack. Cover and refrigerate for at least 8 hours before slicing and serving.

To make the blackberry sauce, combine the blackberries and sugar in a medium saucepan set over medium-high heat. Cook, stirring occasionally, until the berries begin to release some of their juices and the mixture is simmering. Combine the cornstarch and water in a small bowl; whisk until smooth. Add the cornstarch mixture to the blackberries and mix well. Reduce the heat to medium and let cook, stirring occasionally, until the mixture comes to a low boil and slightly thickens. Remove from the heat and press the mixture through a fine mesh sieve to remove the seeds. The sauce will slightly thicken as it cools.

Drizzle the blackberry sauce over the cheesecake before serving.

Source: Annie's Eats

Thank you for visiting me today! Your mere presence makes me smile. :o) Have a gorgeous rest of the weekend, friends!

Key Recipe Components (for card):
 * Cricut cartridge: Storybook
 * Cuttlebug embossing folders: Polka Dots, D'vine Swirls
 * Paper: Core'dinations, DCWV, Papertrey Ink
 * Ribbon: Papertrey Ink
 * Stamp: Scrappy Moms Quirky Quotes
 * Punches: Martha Stewart monarch; Fiskars heart border (interior of card)
 * Miscellaneous: Glossy Accents, iRock, Martha Stewart glitter, Stickles

Photobucket

Wednesday, August 10, 2011

Whimsical Wednesday Challenge: Back to School Project!

Happy Wednesday, my sweet crafty friends! I hope your day is off to a sparkly start. :o)

The Whimsical Wednesday challenge this week is Back to School! Our fabulous Design Team member Faith came up with the idea. How fun is that? It's always nice to break out of the norm and create a project as opposed to a card or layout. There are so many exciting options for this challenge, and after much debate, I decided upon a teacher's gift. You can never have those too early, right? With a specific educator in mind, I created a drawer box and topped it with an easel card (my first!) that functions as a picture frame instead of a card.

"A smile is the reflection of a joyful heart."

The sentiment came about as I reflected on one of the things I most love about this teacher. It's the fact that her sweet demeanor encourages so many smiles. There are few things as beautiful as a child's smile. She continuously and effortlessly draws them as she fills their hearts with such joy, making the most of every opportunity to brighten their lives. It's also fitting, seeing as it rests below the frame that will soon hold cherished memories.

Suited to her personal preferences, I styled it to merge two of her favorite things: sparkly, swirly patterns used as the canvas to display her love for her kiddos. Displaying goofy photographs of her students on an elegant 'easel' is right up her alley. The scallop frame is trimmed in light turquoise (which doesn't really show) and is permanent. Tucked inside the drawer she'll find slightly smaller scallops ready to embrace a treasured picture, to be attached with small pearl brads. The frame is pop-dotted, so there's space to secure the tiny brad without wrinkling the papers. As a separate gift, I'll be making coordinating scallops containing little tidbits of encouragement, silliness, and observations to interchange with her personal photographs.

My love of sparkles and ribbon only intensified while I was away, so when I stumbled upon sheer glitter organza ribbon and a flower tutorial... jackpot! These are beautiful and easy as (eating) pie.

For the fastener/knob, I used one of my favorite buttons. Though the design is not hearts, it somewhat resembles them enough to make me think of them every time I see it. (Not that I'm sappy or anything.) Perfect for this project. :o) 

To finish it off, I adhered a rhinestone heart to the side because love needs to be a part of everything for this sweet teacher whose desire in life is all things beautiful. (More sap. I know.)

Tutorials used:
 * Drawer Box: Splitcoast Stampers (Note: I recommend making the drawer a little taller. I had to do some willy nilly things and improvise to lessen the gap.. next time I'll certainly increase the drawer height.)
 * Organza Ribbon Flower: My Butterfly Kisses 12 (Note: I had to use significantly narrower ribbon to suit this project and it was not wired, so your supplies need not be precisely as stated. Fabulous!)

I hope you'll join us this week in celebrating the beginning of a new school year! I'm excited to see what you all create. Visit the Whimsical Wednesday Weekly Challenge post to see what lovely prize is being offered. Also be sure to skip on over to the rest of the Design Team's blogs to see their incredible projects. :o) Thank you for stopping by and have a blessed day!

Key Recipe Components:
 * Cricut cartridge: Elegant Edges
 * Paper: DCWV
 * Ribbon: Casa Collections Special Occasion
 * Button: Tim Holtz Fanciful Buttons
 * Miscellaneous: iRock, Pearls

Photobucket

Saturday, August 6, 2011

Happy News and Sweet Saturday!

Happy Saturday, dear friends! :o)

Firstly, I'm so honored to share that the incredible ladies at Cooking With Cricut loved my Sowing Seeds of Love card and named me a Top Chef! I am ecstatic and over the moon with joy. It always feels extra amazing upon discovering a card was so well received. Thank you so much! :o)

Secondly, a brief update! I feel awful that my blog has not been terribly active the past couple of weeks. I've been so drained and exhausted from busy-beeness, stress, and injury issues that I've been unable to get much done. I miss being able to visit everyone on a daily basis, and of course miss sharing my own creations. It appears as though I'm nearly over the hump, so I hope to be back in the crafty zone super soon! I'll be heading away for a mini weekend getaway in a couple short hours, so I'm sure that'll help ease some pains. Plus, tonight is the Josh Groban concert and I'm fairly certain that it will fix everything. ;) Hehe! Love and hugs to all who have sent me encouraging messages during this down time. I *heart* you!

Thankfully I have a quick little recipe to share with you, so not all is lost this week! This is one of those desserts you can make speedy-like and enjoy a mere 30 minutes later. It's ideal for those busy days when you still want to make a homemade treat for everyone (or just yourself... I won't tell!). Perfectly in tune with the past couple of weeks, this picture was taken in such a rush that it's from my phone as opposed to my lovely camera. My "food styling" consisted of shoving aside anything too distracting and hoping for the best. ;) That's just how life can be, right?

I give you.... Peanut Butter Cup Bars! (Essentially a giant Reese's PB cup!)

These are SO delicious... and with how quickly it comes together, I was originally amazed at how authentic they taste. To be honest, once I started making these I sort of stopped eating the actual Reese's PB Cups. I kid you not! These are just that tasty... and easy.

Peanut Butter Cup Bars
Yield: 16 bars

Ingredients:
½ cup unsalted butter
1¾ cups powdered sugar
1 cup smooth peanut butter
¾ cup graham cracker crumbs

¼ cup unsalted butter
½ cup milk chocolate chips (or chopped chocolate)

Directions:
Line an 8x8-inch square pan with foil, leaving enough to hang over the sides. Butter the foil and set aside.

In a medium saucepan, melt the ½ cup of unsalted butter over low heat. Once melted, remove from heat and stir in the powdered sugar until smooth. Stir in the peanut butter and graham cracker crumbs until completely combined and smooth. Spread the peanut butter mixture into the prepared pan and smooth the top.

In the now-empty saucepan, melt the ¼ cup of unsalted butter. Add the chocolate and stir until almost completely melted. Remove from heat and continue stirring until completely melted. Pour the melted chocolate over the peanut butter layer and smooth into an even layer.

Refrigerate for at least 30 minutes to set. Using the foil overhangs, remove from the pan and place on a cutting board. Use a pizza cutter to slice into 16 bars. Store in an airtight container in the refrigerator.

Source: Brown Eyed Baker


Thank you so much for swinging by today! I hope to be back super dooper soon with a heartfelt creation that sparkles all over the place. :o) Have a gorgeous weekend, my sweet friends!

Photobucket
Related Posts Plugin for WordPress, Blogger...
Blogging tips