To pin my projects to Pinterest, hover over the picture and a Pin-it Button will magically appear.

Saturday, March 31, 2012

Sweet Saturday!

Happy Saturday, my sweet friends! :o)

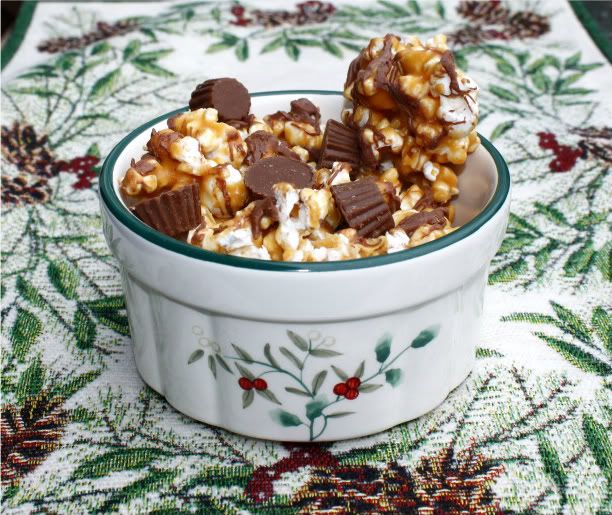
I was unable to complete a card last night, but at least I have a fun little treat to share today. :o) This is one of my favorite types of things to make because it's a homemade version of a popular store-bought treat. Not only does homemade always taste better, but it's also comforting to know exactly what's in the tasty morsel you're giving a loved one. :o)

I made these particularly for my sweetheart, who is super busy and always on the go. Granola bars are convenient and tasty, but they're pretty pricy in the packaged version and can be made 'healthier' at home. I was positively delighted when I kept seeing versions of this recipe popping up on my favorite food bloggers' websites over the last month and I finally made them this week. Homemade Chewy Chocolate Chip Granola Bars! Color me sparkly!
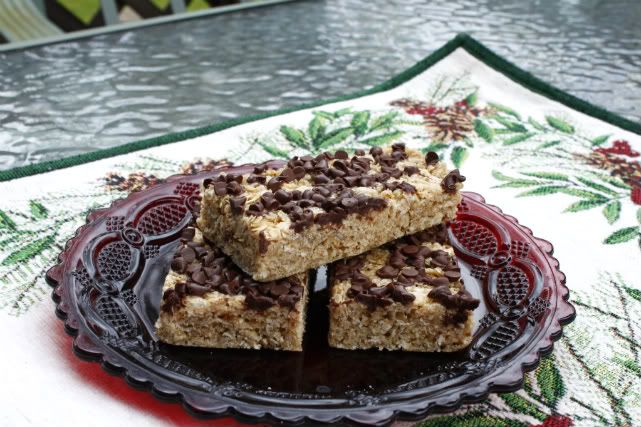
Oh how I wish this photo was happier. These turned out as delicious as I had hoped. Chewy, packed with granola yet doesn't weigh you down, sparkling with a slight honey flavor, and sprinkled with mini chocolate chips. Fantastic! (I may have been overly generous with the chippers... but really, can you ever have too many chocolate chips?) My sweetie loves them and has certainly taken advantage of their portability, munching on them on the drive to work and also on the way to the gym. Not only are they tasty and a fabulous replacement to the packaged versions, but they're also easy peasy! No oven, no odd-ball ingredients, and no fuss. My only mistake was pressing too firmly on the chocolate chips, thus melting the ones that were pushed too far into the warm granola. Merely cosmetic! They tasted amazing. 

Another bonus is that this recipe is highly adaptable to suit what you're in the mood for. Fruits, raisins, nuts, different flavored chips, coconut, peanut butter, etc. These are now a staple and I'm excited to have a batch made for him to snack on while he's away during the work week. (Due to distance, I mostly only see him on his days off.) If you try them, I hope you love them! 

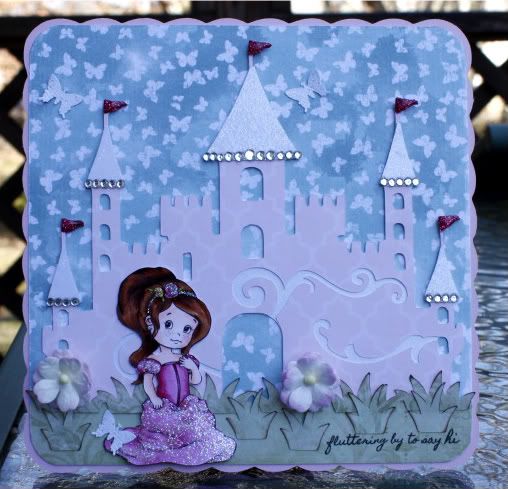
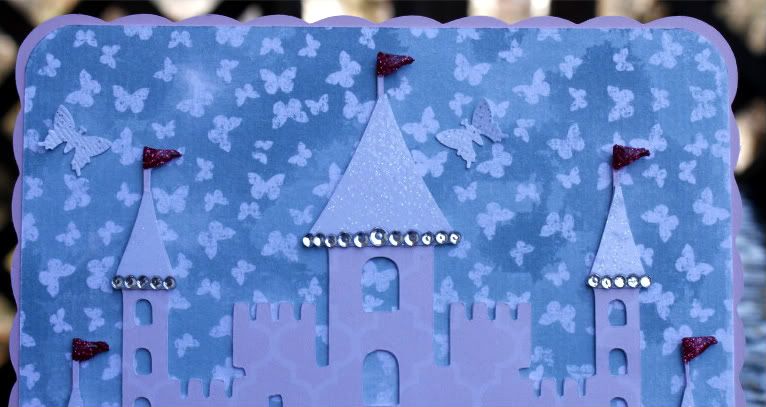
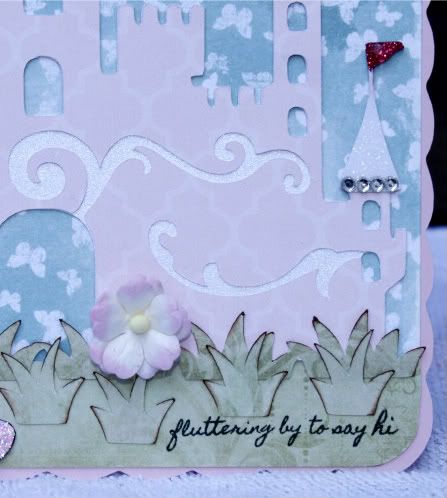
Thank you for fluttering on by today! I hope you have a beautiful weekend. :o)

Chewy Chocolate Chip Granola Bars
Yield: 10 bars

Ingredients:
⅓ cup light brown sugar
¼ cup honey
4 tablespoons unsalted butter
2 cups quick-cooking oats
1 cup crispy rice cereal
½ teaspoon vanilla extract
3 tablespoons mini chocolate chips

Directions:
Lightly grease an 8-inch square baking dish; set aside.

In a large bowl, stir the oats and the rice cereal together; set aside. In a small saucepan, melt the brown sugar, honey, and butter together over medium-high heat until it begins to bubble. Reduce the heat to low and cook for 2 minutes. Remove from heat and stir in the vanilla extract.

Pour the melted mixture over the dry ingredients and mix well to moisten all ingredients. Pour the oat mixture into the prepared pan and press down firmly to ensure that the ingredients are tightly compacted in the pan. Sprinkle the top evenly with the miniature chocolate chips and press down on the top lightly with the back of a spoon.

Cool at room temperature for at least 2 hours or until the chocolate chips are set before cutting into bars. Wrap in plastic wrap or keep in an airtight container and store at room temperature for up to 5 days.


Photobucket

Friday, March 30, 2012

Blog Awards! :)

Happy Friday, my sweet friends! I hope everyone has had a fantastic week. :o)

Unable to craft so far this week due to unsparkly health, I decided now is a good time to to catch up on the lovely blog awards I have recently been given. (Recently is a stretch... one of these is from summer or autumn! Where does time go?!) Despite my Pokie Little Puppy pace, I am always truly honored when a fellow crafter thinks of me. I certainly don't take them lightly. :o) Thank you for making my blog sparklier by your presence!

First up: The Butterfly Award! :o)
Not only is the award gorgeous, but so are the people who awarded it to me. :o) To receive this award, I need to: answer several questions, award this 'Butterfly Award' to 10 other bloggers, contact those 10 bloggers to let them know they have been given this award, and also show a link to the people who gave me the 'Butterfly Award.'

Q1) Name your favorite color?
Blurple! (I say that when I can't choose between blues and purples.)

Q2) Name your favorite song?
Higher Window by Josh Groban. I may or may not have been teary during this song at both of his concerts I attended last summer. Best nights ever.

Q3) Name your favorite dessert?

Q4) Skipping because I'm not a fan of the wording

Q5) Your favorite pet?
Impossible. I love every precious kitty I've owned... but I do admit my current ones (Munchkin and Rascal) have very special places in my heart. They're from the humane society and are the sweetest and most adorable cats I've ever had. :o) The fluffiest, too!

Q6) Black or White
White. So pure and pristine.

Q7) Your biggest fear?
Disappointing God

Q8) Best feature?
Can my heart be a feature? If not, then my eyes. God shines through both features.

Q9) Everyday attitude?
Finding ways to bless others rather than focus on myself. There are so many in need.

Q10) What is perfection?
God, of course. :o)

Q11) Guilty pleasure?
Loving cupcakes too deeply?

Q12) When you're upset you?
Pray, then fellowship with my sweetheart and best friends.

Now to pass this award along... I of course am passing it along to the following sweethearts who awarded it to me. Thank you for making my days extra sparkly! In order they were received (if I wrote it down correctly back then.. hehe):

Nita~ Nita Notes

Additionally, I am passing this along to:

Next up is the Versatile Blogger Award!

How sprightly and exciting is this?! My dear friend Sherrie of Sherrie Scraps with Passion passed along this award to me and I am so honored. Thank you for being such a steadfast presence in my crafty life! :o)

Here are the rules and guidelines for this award:
 * Thank the person who gave you this award. That's common courtesy. (Hehe)
 * Include a link to their blog. That's also common courtesy- if you can figure how to do it. (And again I giggled.)
 * Next, select up to 16 blogs/bloggers that you've recently discovered or follow regularly.
 * Nominate those bloggers for the Versatile Blogger Award- you should include a link to their site for others to see how versatile they really are.
 * Finally, tell the person who nominated you "7 things about yourself."

Here are the 7 things about myself:
1.) Aside from our amazing Lord, dance is my ultimate passion
2.) I would love to own an orchard someday.. with a tiny bakery nestled within
3.) I believe sparkles are complete and perfect happiness ;)
4.) I adore nature photography
5.) I most love hot cocoa when I let a mini candy cane melt inside it
6.) I am a huge sports fan! My heart races upon entering the stadiums/arenas.
7.) Gorgeous music stirs my soul

I am passing along this award to the following versatile bloggers! They are amazing, inspiring, and give my days extra bursts of sunshine:

Nita~ Nita Notes

Lastly, I am so honored to have received the Liebster Blog Award!
A HUGE thank you to Amy of Amy's Crafting and Annette of Annette's Creations for giving me this award. :o) They are such sweet crafters and I would love to give them a cupcake right now.

'Liebster' is German for 'dearest.' The award is a 'share-the-love' arrangement, given to inspirational bloggers with less than 200 followers.

Here's the to-do list of any Liebster Award recipient:
 1. Thank the giver and link back to the blogger who gave it to you.
 2. Reveal your three-to-five blogger picks and let them know by leaving a comment on their blog.
 3. Copy and paste the award on your blog.
 4. Hope that those you award forward it to their favorite bloggers!

I am passing along this fantastic award to the following inspiring (and sweet!) bloggers:
 * Amy~ Amy's Crafting
 * Annette~ Annette's Creations
 * Nita~ Nita Notes

Whew! Thank you once again to all of you for sharing in this crafty journey with me! You are all super stars! :o) Have a sparkly day, my friends! I'll be back tomorrow with a tasty treat! (And maybe a card if all the stars align tonight! Miracles do occur!)

Photobucket

Monday, March 26, 2012

Pillow Box of Love for I Feel the Love

Happy Monday, my sweet friends! I hope you had a beautiful weekend. :o)

As you all know, I am an avid supporter of the I Feel the Love Project, hosted by the inspiring Madison of Funky Cards. Each month she highlights a particular person, family, or organization in need of our love and prayers. In turn, we have the honor of using our creative passion for a higher purpose. I cannot even tell you what this project means to me. When the 1st rolls around, my initial thoughts aren't of a new month but rather that there's a new recipient who needs our love.

It is no secret that sweet Trinitie has inspired me this month and that she is often on my mind... and always in my heart and prayers. I wanted to make one more little blessing for her, so I made a pillow box and filled it with a few tiny treasures.

Or maybe a lot. ;)
In a moment, a few close-ups to better see these cuties and the actual box...

My idea is to send her these so she can make her own little crafty creations using them, if she so desires. Or to simply have a whole lot of new friends to smile at as they keep her company. They were made with so much love, so I like to think each one is delivering a hug from me. I originally planned to make her a petal box filled with a bunch of my stamps that she could color... but then I read that after her brain surgery she lost all feeling on her left side and she is left-handed. Her mom posted a picture of a recent trip out to dinner where Trinitie was working on her writing, showing progress. My heart broke all over again. Doubtful that coloring was the best idea, I turned to Create a Critter which never fails with kiddos. :) She can simply do as she pleases with the assembled critters.

Now for a few closer photographs of Trinitie's sweeties! I couldn't resist using my favorite butterfly punch to send her a rainbow of butterflies. Despite it not showing, all of them are either sparkly Core Couture or pearlescent cardstock.

(I am in love with the heart-buttoned snail and want to make one for myself! I would think of Trinitie every time I saw it, which makes it even better.)
I think I've made approximately one million sparkly penguins since getting Create a Critter.
I needed to give her cupcakes and a Simply Charmed ice cream cone. If I actually knew her, I would bake her favorite cupcakes and take her out for the best ice cream on the planet. A double-scoop of love.
Lastly, the pretty pillow box. I kept it simple to avoid the potential for eager little hands breaking anything.
The Making Memories paper stands well on its own, I think. I wrapped crinkle ribbon around the short side only so she wouldn't need to remove it every time she opens the box. The tag is cut from Art Philosophy, which I adhered to the corresponding chipboard shape that came in the bundle. I love the thickness! I attached it to the crinkle ribbon with Grape Fizz Trendy Twine. The "Love" sentiment is from Create a Critter.

The box behind it was made last night, using the simple tutorial found HERE. Since I used Wild Orchid Crafts flowers on the cards I made Trinitie (found HERE and HERE), I wasn't comfortable sticking them in a regular paper envelope. To give them a little protection, I made a box out of 300gsm paper. I wrapped it with sprightly purple ribbon from Hobby Lobby.
There are still five days left if you'd like to make a card for this sweet girl. She will appreciate it more than we could possibly know. :o) I love her to pieces and hope my cards and pillow box of surprises bring a burst of sunshine and sparkles to her heart.

Thank you for visiting me today! I hope your day sparkles with love and blessings. :o)

Key Recipe Components:
 * Cricut cartridges: Art Philosophy, Create a Critter, Simply Charmed
 * Cuttlebug embossing folder: Swiss Dots
 * Paper: Core'dinations, DCWV, Heidi Grace, Making Memories, My Mind's Eye
 * Twine: My Craft Spot (Chocolate Truffle, Grape Fizz, Twisted Lime, Sky)
 * Peachy Keen Stamps: Critter Faces
 * Butterfly punch: Martha Stewart Small Monarch
 * Ribbon: Crinkle ribbon from My Craft Spot; sheer dotted ribbon from Hobby Lobby

Photobucket

Tuesday, March 20, 2012

All You Need is Love

Happy Tuesday, my super sweet friends! I hope your week is bursting with sunshine. :o)

You'll never believe what I made. I tried my hand at my first ever Clean and Simple card! It's such a vastly different concept from my norm, so it hurt my brain something fierce. I like a variety and hadn't yet ventured into CAS, despite wanting to give it a whirl. So, here is my first one!

"All You Need is Love"
A closer picture of the sparkling trail of rainbow love...
This was made for a friend and inspired by a few challenges. Her heart has been a little blue lately due to stormy trials, so I made this card to remind her that God's love is all she needs and that her rainbow is coming. :) The rainbow may technically be a small part of this card, but it really means everything. The smallest glimmer of sunshine leads to a rainbow. I wanted it to pop on a white background, so I used Bazzil pearlescent cardstock. Without rhinestones in rainbow shades of the same size, I used my Copics on crystal clear ones. That has rescued me on so many occasions!

The main image is two Spellbinders Nested Hearts, which is certainly among my favorite sets. It embosses beautifully! I sponged Tim Holtz Faded Jeans over the embossed areas and added three tiny pearls. The smaller layer is adhered with foam tape for a touch of dimension. I love white-on-white and I think it also lends itself well to keeping a CAS design, so I cut out two Storybook heart-scroll corners and centered them with little pearls. The pretty butterfly delivering the rainbow is a Martha Stewart Small Monarch punch. One of the CAS-ual Fridays requirements this week is to use a pattern, so I embossed the entire base with the Swiss Dots folder. The sentiment is from an Inkadinkado set that I've had forever.

Challenges entered:
 * CAS-ual Fridays~ Pattern, Image, Sentiment
 * Cooking with Cricut~ St. Patrick's Day or Rainbow
 * Lollipop Crafts~ Sentimentally Yours (Sentiment is the focus)

Thank you for fluttering to see me today! I hope you have a blessed and beautiful week. :o)

Key Recipe Components:
 * Cricut cartrdige: Storybook
 * Cuttlebug embossing folder: Swiss Dots
 * Spellbinders Nestabilities: Nested Hearts
 * Sentiment: Inkadinkado
 * Butterfly punch: Martha Stewart Small Monarch
 * Ink: Tim Holtz Faded Jeans
 * Miscellaneous: Copics (to color rhinestones), iRock, Pearls (Recollections)

Photobucket

Sunday, March 18, 2012

Hugs and Kisses

Happy Sunday, my crafty friends! :o)

I have a sweet and summery card to share today, which was such fun to make. It was inspired by summertime, sweet children, and nature's beauty. (And my sweetheart, because he's amazing.)

"Hugs and kisses"
There was so much joy in creating this. The papers are My Mind's Eye Miss Caroline Howdy Doody, which I adore and have been anxious to use. The precious little girl is Pati's Kisses, a digital stamp by the amazing Elisabeth Bell. I love her! I colored her with Copics and added Star Dust to her belt, the ruffled trims on her shirt, and the flowers on her headband. One especially fun aspect to this card is that I had my first attempt at making a landscape. I used Bev Rochester's cloud template and Tim Holtz Broken China Distress Ink to surround her with puffy clouds. When making this card I envisioned the heartwarming sight of little girls joyously playing outside with their stuffed animals. I made her a tiny hill with varying shades of green for dimension, ending with a few blades of grass tickling her feet. Child-like innocence and a pure love are two of the most beautiful things... both are represented in this. :o)

I used Spellbinders Labels Four for the image, making the mat a buttery yellow to symbolize the scene being enveloped in a warm, sunshiny hug. A divine hug, which entails the utmost warmth. Two itty bitty butterflies, dotted with a pearl, are being guided by love... to Spellbinders Fanciful Holiday filigree hearts. I cut out two of them in the same gingham as the middle layer and nestled them partially within the base... like little love notes that we tuck away in a drawer.

Unfortunately, the flower/pearl cluster is blurry, but is truly beautiful. Everything is from Wild Orchid Crafts. The pink and yellow two-tone flowers not only go well with the paper, but I love them for a summery-inspired card because they remind me of strawberry lemonade. :o) The petals are trimmed in Star Dust and I tucked in a few gorgeous pearl sprays.

Since flowers and lace always make a great combo, I used my Martha Stewart Doily Lace Edge Punch for the gingham layer. My favorite Wild Orchid Crafts Guipure lace is adhered to the bottom. The sweet sentiment is from the Whimsical Designs~ With Love stamp set, which I used atop an Art Philosophy tag. The larger butterfly is from the Martha Stewart Small Monarch punch, lined with pearls and given a tiny pearl trail. The papers throughout are inked with Tim Holtz Walnut Stain and I used my sewing machine to stitch around the top layer. I couldn't stop using pearls, so I added a tiny corner decoration of three sizes to complete my card. :o)

Challenges entered:
 * Belles and Whistles~ Use Butterflies
 * Digi Bells DT~ Flowers (March Digi Release Blog Hop)
 * Elphine House~ Pearls and Lace

Thank you for fluttering on by! I hope your day sparkles with love, hugs, and blessings. :o)

Key Recipe Components:
 * Cricut Cartridge: Art Philosophy
 * Spellbinders: Fanciful Holiday, Labels Four Nestabilities
 * Paper: Core'dinations, My Mind's Eye, Papertrey Ink
 * Sentiment stamp: Whimsical Designs~ With Love
 * Image stamp: Elisabeth Bell~ Pati's Kisses
 * Copics: E0000, E000, E00 (skin); E25, E29, E31, E50 (hair); R22, R24, R27, B91, B95, B97 (clothing); YR20, YR21, YR24 (teddy bear); YG17, YG23, G28 (grass)
 * Flowers, pearl sprays, Guipure Lace: Wild Orchid Crafts
 * Butterfly punches: Fiskars (small butterflies), Martha Stewart Small Monarch
 * Border Punch: Martha Stewart Doily Lace Edge Punch
 * Tim Holtz Inks: Broken China, Walnut Stain
 * Miscellaneous: Pearls (Recollections and Queen & Company); Stickles

Photobucket

Saturday, March 17, 2012

Sweet Saturday!

Happy Saturday, my dear friends! I hope you're having a gorgeous weekend. :o)

I'm ecstatic that I had some crafty time last night, but I wasn't able to complete my card to post along with this recipe today. (I'll be back with it tomorrow!) Instead, all I have for you is a delicious cake. I hope you forgive me. ;)

With spring and warmer weather's arrival, many of us yearn for fruity desserts. However, sometimes you still need chocolate. I hadn't made a bundt cake in quite some time, so I started my search there. Oh the joy of stumbling upon a recipe for Chocolate Espresso Bundt Cake with Chocolate Cinnamon Glaze. Oh my.
Yes, I made a mess with the glaze... but everyone likes having a little extra to scrape off the bottom and put with their piece. ;) I couldn't resist letting it pool as much as it wanted. The majority of this went to work with my sweetheart as a little blessing to his coworkers, which is probably a good thing. I easily could have cleared it out myself this weekend. ;) The cake is rich, dark, chocolatey, and super moist. The glaze is a marvelous pairing of chocolate with a hint of cinnamon. My mom appropriately classified the topping as having a Mexican dimension to it, just as the recipe's creator stated. As is often the case in baked goods, by the time the baking is complete the espresso flavor turns subtle and primarily serves to enhance the chocolate's intensity. I will tell you that if you're a coffee lover, you MUST taste some of the batter while filling the pan. It tastes like pure chocolate espresso! If you want more of a coffee kick to the finished product, you can brush some coffee/espresso on the top of the cake while it's still warm. I love the elegance and ease of bundt cakes, which makes them a great option for the outdoorsy days of spring and summer. No huge amount of preparation time needed. :o)

This rich cake received rave reviews from all and I will certainly be making it again. If you try it, I hope you love it as much as we did! Have a blessed day, my sweet friends! I'll be back tomorrow with a card bursting with summery love. :o)

Chocolate Espresso Bundt Cake with Chocolate Cinnamon Glaze

Ingredients:
For the cake:
2 sticks unsalted butter
½ cup Dutch process cocoa
1 tablespoon instant espresso powder, dissolved into ¾ cup hot water
2 cups granulated sugar
1 cup sour cream
1 tablespoon vanilla extract
2 large eggs
2 cups all-purpose flour
1 teaspoon baking soda
½ teaspoon salt

For the glaze:
4 ounces good quality semi-sweet or bittersweet chocolate, coarsely chopped (I use semi-sweet)
⅓ cup unsalted butter, softened and cut into pieces
1½ teaspoons light corn syrup
½ teaspoon ground cinnamon

Directions:
To make the cake, preheat the oven to 350º F. Butter and flour a 10-12 cup bundt pan.

Melt butter in a large saucepan over medium-low heat. Add cocoa, stirring until smooth. Whisk in the espresso water and remove from heat. Add the sugar, sour cream, vanilla, and eggs to the warmed cocoa mixture and whisk until smooth. In a medium bowl, combine the flour, baking soda, and salt. Add all at once to the first mixture, whisking until well-blended.

Pour batter into prepared pan. Bake for 40-45 minutes or until it feels firm to the touch and has slightly pulled away from the sides of the pan. Cool in pan on a rack for 20 minutes. Carefully loosen the cake with a knife and invert onto a large plate.

To make the glaze, place the chocolate, butter, corn syrup, and cinnamon in a medium heatproof bowl over a pot of simmering water. Stir the mixture using a rubber spatula until melted and smooth.

Pour the warm glaze over the bundt cake. Keep covered in a cake-keeper at room temperature for up to 4 days.

Source: slightly adapted from Sweetapolita


Photobucket

Tuesday, March 13, 2012

Fluttering By to Say Hi... more love for Trinitie :)

Happy Tuesday, my dear friends! I hope you're having a sunshiny day where you are, too. :o)

Last week I posted a little garden card for Trinitie, who is this month's recipient of the I Feel the Love Project, hosted by the sweet Madison of Funky Cards. As stated in that post, I already had an additional card in mind for beautiful Trinitie who was recently diagnosed with a brain tumor. I had planned on Create a Critter fun, but instead decided to make her a sparkling castle surrounded by butterflies. :o)

"Fluttering by to say hi" (sorry for the dark picture)
The goal of this card was to give Trinitie a whimsical and happy little scene to immerse herself in. The castle is from Wall Decor and More, which I adore because of those whimsical flourishes that make me think of a heavenly breeze whistling around the castle. The castle paper is from the Echo Park Runway collection, which I chose based on the subtle design.. it is somewhat reminiscent of a fancy stone pattern. (At least in my mind! Hehe.) The tops are cut from the super sparkly DCWV glitter stack, which are trimmed with rhinestones. (I nearly wore out my iRock on this one.) Hopefully you can see the paper a little better here if you enlarge it:
The flags are covered in bright pink glitter and a coat of Glossy Accents, which looks nice with the sprinkles of glitter in the paper. Why so much sparkle atop the castle? Because everything is better with sprinkles on top, be it cupcakes or castles. :o)

I couldn't give Trinitie a sparkly castle without a sparkly princess, so without any type of Disney cartridge I turned to my Copics. The digi stamp is from The Paper Shelter, titled Spring Princess. I colored her in rosy pinks and coated the fluttery sleeves and skirt with Star Dust to be like a shimmery overlay. Her flower headpiece is also Star Dusted and I put a layer of atyou Spica glitter on her eyelids for sparkly eyeshadow. I probably would have given her a necklace if I wasn't already frustrated with the troubles from those 29 rhinestones on the castle. ;) You don't want to know how ridiculously long those took me to get "just right."

The exquisite Magnolia background paper is one of my all-time favorites, titled Mini Butterfly Dreams. I bought it last week (in four colors!) and was wondering if I'd ever be able to get myself to use it... what will I do when it's gone?! But I had a feeling Trinitie would love a sky of butterflies, so I used it as the backdrop. :o) I pray she smiles as much as I do when I see them. I punched out a few white sparkling butterflies with Core Couture cardstock and sprinkled them throughout for a touch of dimension. One landed on the Princess' dress, which I can clearly imagine happening with lovely Trinitie. She has such a radiant heart.

Lastly, I used pretty green patterned paper from the Kaisercraft~ English Rose collection for her landscaping so she could be nestled in nature. I added two Sweetheart Blossoms from Wild Orchid Crafts because Trinitie is such a sweetheart. :o) The sentiment is from the Whimsical Fun~ Volume 1 stamp set from Whimsical Designs. The pink base isn't merely an Elegant Edges scallop base... it's to reflect my favorite sunset. Wispy blue skies with puffy pink clouds, which I call cotton candy sunsets. :o) It seemed ideal for a card of this nature. I hope she loves it.
And the lovely Trinitie, who has inspired me so much in the last couple of weeks.
Challenges entered:
 * A Gem of a Challenge~ Perfect Pastels
 * Flutterby Wednesday~ Spring Time
 * Paper Sundaes~ Feminine Flair
 * Sentimental Sundays~ Go Green or Recycle
 * Sweet Stamps~ Think Spring
 * The Paper Shelter~ Anything Goes

Thank you for fluttering on by today! There is still plenty of time to make a card for Trinitie. The information can be found HERE. She needs tons of love right now. I hope you all have a blessed and sunshiny day. :o)

Key Recipe Components:
 * Cricut cartrdiges: Create a Critter (grass), Elegant Edges, Wall Decor and More
 * Paper: DCWV, Echo Park, Kaisercraft, Magnolia, Papertrey Ink
 * Sentiment: Whimsical Designs~ Whimsical Fun, Volume 1
 * Image stamp: The Paper Shelter~ Spring Princess
 * Copics: E25, E29, E33 (hair); E00, E000 (skin); R81, R83, R85 (dress and larger flower); Y15, Y11 (smaller flower); BG11 (headband); atyou Spica glitter in clear for eyeshadow
 * Flowers: Wild Orchid Crafts (Sweetheart Blossoms)
 * Butterfly punch: Fiskars
 * Miscellaneous: Glitter (Martha Stewart), Glossy Accents, iRock, Stickles

Photobucket

Saturday, March 10, 2012

Thinking of You

Happy Saturday, my sweet friends! I hope your day is bursting with sunshine and sparkles. :o) Thank you for your incredibly kind words regarding my card for Trinitie throughout the week. I can't tell you how much that meant to me. *hugs!* Although there is no Sweet Saturday today due to injury flare-up, I was able to finish a card this morning to quickly share. :o)

This is for my mom who hasn't yet completely bounced back from her heart attack in December. She is making progress physically (thank the Lord), but emotionally she is struggling a bit. She loves pearls, birds/nature, flowy ribbon, and any distressed or vintage type of look, so I combined some of her favorite things for this tiny gesture.

"Thinking of you"
I used corresponding papers from the First Edition Love Letters collection throughout the card, which paired nicely with Papertrey Ink Autumn Rose cardstock. The sweet bird is from my new favorite cartridge Art Philosophy, as is the little branch and the decorate filigree-heart layer. I wanted the branch to be flowering, so after embossing it with the Victoria folder, I added a few Wild Orchid Crafts roses. I've been anxious to use this birdie, but wish I'd had the black pearls I keep forgetting to buy. I used a regular pearl for his eye instead. He's nestled in a tiny flower cluster and gorgeous Vanilla Bean crinkle ribbon from My Craft Spot.

The pretty birdcage stamp is from the Tim Holtz Artful Flight collection, which I stamped with Victorian Velvet Distress Ink. I added a little Guipure lace and dotted the top and bottom with pearls. It's hanging from a tiny flower cluster and a string of pearls which slightly graduate in size because that's how my mom would love it. The sentiment is from the Whimsical Designs~ Everyday Sentiments stamp set, which I used on an Art Philosophy tag. The patterned paper is the same as the pretty paper beneath the filigree layer.

I stitched around two of the layers, inked the stamp layer with Victorian Velvet, and inked the other layers with a combination of Tea Dye and Walnut Stain. To finish it off I centered each little flower burst on the decorate layer with a pearl, which my mom cannot get enough of. I hope this card makes her smile. :o)

Challenges entered:
 * Crafty Catz~ Mother's Day or a Special Lady
 * Divas by Design~ Favorite Things (Art Philosophy cart, pearls, ribbon, Wild Orchid Crafts)
 * My Craft Spot~ For the Birds
 * Simon Says Stamp~ Mother's Day/Special Girl

Thank you for visiting me today! I wish you all a blessed and beautiful weekend. :o)

Key Recipe Components:
 * Cricut cartridge: Art Philosophy
 * Cuttlebug embossing folder: Victoria
 * Papers: First Edition Love Letters, Papertrey Ink Autumn Rose and Vintage Cream
 * Image stamp: Tim Holtz Artful Flight
 * Sentiment stamp: Whimsical Designs~ Everyday Sentiments
 * Ribbon: My Craft Spot Vanilla Bean
 * Flowers and Guipure Lace: Wild Orchid Crafts
 * Pearls: Recollections (smallest sizes), Queen & Company (birdcage holder and corner details)
 * Inks: Tim Holtz Tea Dye, Victorian Velvet, Walnut Stain
 * Miscellaneous: Stickles

Photobucket

Monday, March 5, 2012

I Feel the Love: Love Blossoms Encouragement Card

Happy Monday, my crafty friends! I hope your weekend was beautiful. :o)

A new month means a new recipient of the I Feel the Love Project, faithfully hosted by the amazing Madison of Funky Cards. Each month she highlights a person, family, or organization in need of an extra dose of love and blessings. In turn, we have the privilege of crafting for this wonderful cause. No projects bring me more joy than the ones dedicated to I Feel the Love, despite often being made with a heavy heart.

This month's recipient is a lovely girl named Trinitie who was recently diagnosed with a brain tumor. I've pretty much thought about her non-stop since Friday morning when I read about her. Far too often I'm down to the wire with Madison's project (not typically by choice), but this one took precedence over everything. I simply needed to create for Trinitie immediately.

I will be making her a fun Create a Critter card, too... all kids love that cartridge! But from the moment I saw her picture and read her story, I've had it on my heart to make an encouragement card of a different nature. I couldn't let it go. I want to send her a little "garden" via a card bursting with nature's beauty. Her own little garden she can look at and immerse herself in whenever she likes, just like this sweet girl in my card.

"Love Blossoms"
This card is all about the sentiment's double meaning. While the flowers are surely love blossoms, the driving force and inspiration are with the verb form. Her little garden is blossoming in and by love, just like divine love is blossoming within her gorgeous heart as she faithfully awaits her miracle. Healing love is blossoming within her every time we pray for her. A reassurance of love is so encouraging to a child. Nature's beauty is unrivaled and I couldn't help but think a card bursting with unfading flowers might deliver a burst of sunshine to Trinitie's difficult life.

For those who like the stories behind so many of my cards, there are a couple involved here that are integral parts of this creation. The bottom of the card is yellow polka-dotted paper, serving as a path of sunbeams. I edged it with my Martha Stewart lacy heart border punch because my and God's love are with her every single step of her journey. The white flourish I made represents a pure, heavenly breeze... a whisper of hope and a breath of life. The pale yellow crinkle ribbon is a hug of warmth. The kind of hug that makes everything feel better. How I wish I could hug her.

Now for some technical details. The precious sweetheart is an Elisabeth Bell digi stamp, titled Little Rapunzel. I colored her with Copics and nestled her inside a field of flowers upon an Elegant Edges base. I centered some of the flowers on her shirt with rhinestones, along with a few surrounding flowers. I also sprinkled Star Dust Stickles throughout because she and nature sparkle with hope. I cut off the flower that was part of the stamp and replaced it with a small Wild Orchid Crafts mini rose. I wanted her to be holding a 'real' flower instead. :o) All roses on the card are from Wild Orchid Crafts, ranging from 15mm to 25mm, and are trimmed with Star Dust. I cut Storybook leaves to accompany them.

All of the patterned papers are from Kaisercraft's Lilac Avenue collection. The bases are a lovely deep purple, despite my stellar photography making them appear black. The flourish is an Autumn Leaves stamp which I heat embossed with white opaque embossing powder and dotted with pearls. The gorgeous Buttercup crinkle ribbon is from My Craft Spot, which I centered with a stitched heart button and a tiny Trendy Twine Grape Fizz bow. The sentiment is computer generated from my sappy heart.

To finish it off I stitched around the base layer and the middle layer with my sewing machine. I would have LOVED to stitch around the image, but decided I better wait until I can practice going in a circle first. I'm still working on a straight line for my 'straight' stitches as it is. ;) There is another part to this card; a coordinating gift box from the Art Philosophy cartridge. I can't complete it until I get to the store, so I'll post it with the second card I'll be making for her. :o) I hope with all of my sparkly heart that she likes this card.

It's super early in the month, so there's plenty of time for you to create a card for sweet Trinitie. :o) Visit I Feel the Love for details!

Challenges entered:
 * CES~ Flower Frenzy
 * Crafty Catz~ Punches and Dies
 * Cute Card Thursday~ Signs of Spring
 * DL.Art Thankful Thursday~ Three Layers, a Bow, and Bling
 * Die Cuttin' Divas~ Recipe (Fabric, Feathers, and/or Flowers)
 * Paper Playtime~ Die Cuts and Flowers
 * Sentimental Sundays~ Words of Encouragement
 * Simon Says Stamp~ Anything Goes
 * The Cutie Pie Challenge Blog~ Swirls and Pearls

Thank you for fluttering on by today! I hope your day sparkles with blessings, hugs, and a heap of chocolate. :o) Oh! And I mentioned happy news the other day... keep an eye out! To celebrate 100 posts (that took a while! Ha!), I'll soon be having a little giveaway. I love you all something crazy.

Key Recipe Components:
 * Cricut cartridges: Elegant Edges, Storybook
 * Paper: Core'dinations, Kaisercraft
 * Sentiment: Computer generated
 * Digi stamp: Elisabeth Bell~ Little Rapunzel
 * Copics: E00, E000 (skin); E25, E29, D31 (hair); V01, V15, YG23 (shirt, jeans cuff); B91, B95, B97 (jeans)
 * Flourish stamp: Autumn Leaves
 * Border punch: Martha Stewart Lacy Heart
 * Flowers: Wild Orchid Crafts
 * Crinkle ribbon: My Craft Spot
 * Twine: Trendy Twine Grape Fizz
 * Heart button: Little Yellow Bicycle
 * Miscellaneous: Embossing Powder (Recollections Opaque Snow), Pearls (Recollections), Stickles


Photobucket

Saturday, March 3, 2012

Sweet Saturday and a Thank You!

Happy Saturday, my talented friends! :o) I hope everyone is having a marvelous weekend!

After returning to craftiness yesterday, I planned to complete a card to post with my little treat. That was just silly... my speed is too tortoise-like. I'll have the special card tomorrow instead, along with some fun news. Thank you for the well-wishes for my finger! It is healing up nicely. :o)

I was able to return to baking on Thursday, but time constraints prevented me from making something too involved. I love that there are delicious treats you can make in mere minutes! Despite its simplicity, you still get to do fun things like boil honey and sugar. (Not that I'm easily entertained or anything.) You just can't go wrong when you fancy up some plain popcorn to snack on... especially when it's Reese's Peanut Butter Cup Popcorn! :o)

Adaptations can clearly be made to suit allergies and such, but for those who can eat peanut butter, this needs no tweaking. The freshly popped popcorn is covered in a deliciously gooey peanut butter caramel and a milk chocolate drizzle. With a thorough sprinkling of Mini Reese's Peanut Butter Cups, it's basically one of the funnest snacks you can make! Since the popcorn is not baked, it stays tender, which is how we all prefer it. Despite loving regular caramel corn, I do not like that it's rock solid. This type of popcorn is my ideal. I sent about 95% of this batch to work with my sweetheart and they devoured it in no time flat. :o) If you want a fun snack for family night, game day, or an I-really-need-a-cute-treat day, this is surely a winner. :o)

Before I flutter off, I want to thank my dear friend Nita of Nita Notes for passing along the Green Blend Award to me! Based on this previous post, you know how much I treasure this award. Thank you with all of my sparkly heart, Nita! I *heart* you.

Thank you for dancing on by! I wish you all a sparkly weekend. :o)

Note: If you can't find Mini Reese's Peanut Butter Cups, you can chop up regular Peanut Butter Cups.

Reese's Peanut Butter Popcorn
Yield: Approximately 8 cups

Ingredients:
8 cups plain popcorn (air-popped, microwave, or stovetop)
Fine salt (optional)
½ cup honey
⅓ cup granulated sugar
½ cup natural peanut butter (or regular, if you prefer)
½ teaspoon vanilla extract
½ cup milk chocolate chips, melted
1½ cups Mini Reese's Peanut Butter Cups

Directions:
Place the popped popcorn in a large bowl and salt to taste. Set aside.

Mix the honey and sugar in a small saucepan and bring to a boil. Let it simmer for about 2 minutes. Remove from the heat and add the peanut butter. Stir vigorously until all the peanut butter is melted, then mix in the vanilla extract.

Immediately pour the peanut butter caramel over the popcorn and gently stir with a long-handled wooden spoon until it's thoroughly coated. Spread the popcorn on a large baking sheet. Drizzle with melted chocolate and let sit until chocolate hardens. Stir in the Mini Reese's Peanut Butter Cups.

Source: Two Peas and Their Pod

Photobucket
Related Posts Plugin for WordPress, Blogger...
Blogging tips