To pin my projects to Pinterest, hover over the picture and a Pin-it Button will magically appear.

Wednesday, November 30, 2011

Whimsical Wednesday Challenge: Layer It!

Happy Wednesday, sweet friends! :o)

Today kicks off a sparkly stream of whimsical fun! This week's Whimsical Wednesday challenge is to use layers on a winter or Christmas-themed project. Aren't layers such fun? Whether only a couple or overflowing with them, they are always marvelous. For my project, I made an easel card to carry a message of peace in a backdrop of winter's simple beauty. :o)

Each part consists of three base layers: A sparkling Elegant Edges scallop, a Spellbinders Picot Edge Circle, and an embossed circle (to look like gently falling snowflakes). It had been far too long since I've played with ribbon, so I layered the top with a big flower made from burgundy velvet ribbon. I centered it with a Tim Holtz fanciful button. Partially for fanciness and partially for the snowball-look, I went nutty with my pearls! I added one to every scallop and made a little flourish for the flower. You can never go wrong with them, right? :o) 

The bottom holds a gorgeous swirl-embossed dove and olive branch, which is a Cuttlebug combo die that cuts and embosses that I won from my sweet friend Pam. The swirls are sparklified and I used an itty bitty pearl for the eye, which you can only see if you enlarge the photograph. I added a layer of tiny pearls to coordinate with the theme and to make the branch look snowy... heavenly peace can be reached in the midst of a storm, after all. :o) I cut out the Peace from Cindy Loo, which I think is my first time ever cutting out a word! I slightly rounded it and sponged it with the same ink as the picot circles, but with a lighter hand. (And let me just say that this ink was NOT the color I anticipated. I thought it was a super deep burgundy.. not an almost pinky burgundy. That made me feel matte, as opposed to sparkly.)

Here is the tutorial I followed for the flower... once I stopped staring at her gorgeous ribbon supply! :o)

I hope you'll play along with us by linking up your Christmas or winter layered project to the Whimsical Wednesday challenge post! I would love to see your creations. Our fabulous sponsor this week is our very own Nanne, who is generously donating a prize pack filled with gorgeous Webster Pages scrapping supplies. Thank you, Nanne! :o)

A few reminders:
 * The Add Texture challenge is still open, where one random winner of the challenge will win all four of Stephanie's stamps sets from her release! Amazing prize. :o) It closes at noon on Friday.
 * The Whimsical Designs Stamp Release Sneak Peek days are tomorrow and Friday at 7am. So much excitement!
 * The Stamp Release Blog Hop is FRIDAY at 7pm! Isn't this badge adorable?
I love these stamps, my friends. They are a pleasure to create with and I am ecstatic to share my projects with you beginning tomorrow. I am certain you will love Stephanie's stamps, too. :o)

Be sure to flutter on over to the rest of the Design Team's blogs to see their fabulous creations! Thank you for visiting me today! You make me happy. :o)

Key Recipe Components:
 * Cricut cartridges: Cindy Loo, Elegant Edges
 * Cuttlebug embossing folders: Dove duo, Swiss Dots
 * Spellbinders Nestabilities: Picot Edge Circles
 * Paper: Core'dinations, DCWV
 * Ribbon: Celebrate It (from Michael's)
 * Button: Tim Holtz Fanciful Buttons
 * Pearls: Recollections
 * Miscellaneous: Stickles

Photobucket

Tuesday, November 29, 2011

Whimsical Designs Reminders!

Hello, my sweet friends! How I miss blogging... but I've been hidden away with my crafty supplies every moment possible, creating fun projects for the celebrations this week!

Excitement is fluttering around this Whimsical Designs Stamp Release week! Our Sneak Peeks are Thursday and Friday mornings, bright and early at 7am. Friday night at 7pm is our celebratory Blog Hop! My crafty friends, I am positively thrilled for these events! :o) Inspiration and prizes will abound... and a whole lot of love as we share in this incredible journey with Stephanie. :o) I hope to see you there!

Have a sparkly happy day, my friends! (And eat some chocolate!) I'll be back tomorrow with my weekly Whimsical Wednesday project! :o) Keep smiling!

Photobucket

Wednesday, November 23, 2011

Whimsical Wednesday Challenge: Add Texture! (And exciting news!)

Happy Wednesday, my sweet friends! :o)

I have incredible news to share with you! Stephanie's new stamps are coming out so soon that we are having a celebration NEXT WEEK! The Whimsical Designs sneak peeks will be on Thursday (December 1st) and Friday (December 2nd) at 7:00am EST. The stamp reveal Blog Hop will be on Friday, December 2nd at 7:00pm EST. One random winner who enters this week's challenge will win all four stamp sets in Stephanie's very first release! How exciting! Want to see a sneak peek photo? I thought you might...
This week's challenge will not be two weeks long, but rather will be remain open until Friday, December 2nd at 12:00pm EST. The random winner of all four stamp sets will be announced during the stamp release blog hop that night. My sweet friends, I have seen all of these sets. You know how much I already love them, as I've been bursting at the seams to use them. I have even held off on two special cards I've been longing to make because two of her stamps will be perfect. Once I saw them, I knew I had to wait. I truly love these, as her beautiful heart shines through them. I know you will love them, too! I am honored to be a part of this journey with her. :o)

And now onto the challenge! This week's Whimsical Wednesday challenge is Add Texture! Create any card or project, in any theme, with texture incorporated into it. Like so many, I love this quality in handmade cards. There are so many ways to add texture, from a small accent to a primary focal point.

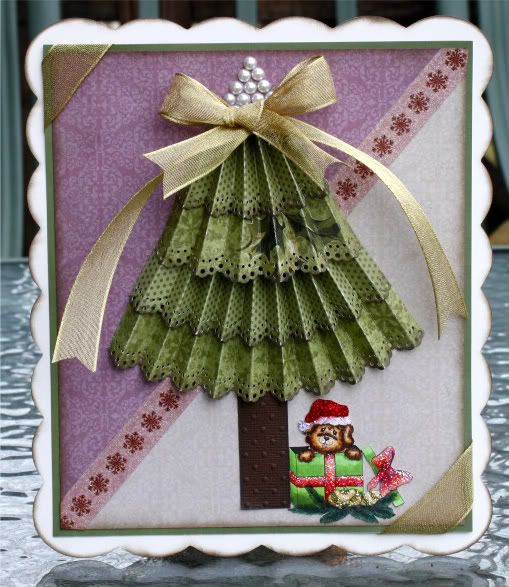
I decided to embrace the textural element in all its glory. In a recent newsletter from the scrappy store I visit, there was a basic white card with one element: a simple rosette Christmas tree. I fell in love and knew I would quickly be doing my own take on it. With my mom in mind, I designed with a Victorian theme and fancied things up to suit her taste. My textural elements: oodles of half-rosettes, flowy ribbon, a dollop of pearls, and a little embossing.
This wall hanging will soon be given to my mom, who loves greens, Victorian, and vintage. She loves to add festive decor, but doesn't always have a ton of space... or smaller scale items that she can nestle in those tinier areas of wall space that yearn for something. I chose pretty vintage-y green papers for the rosettes, using my Martha Stewart Doily Lace punch once again to make them fancy, and inked them in brown so the layers would stand out a bit. She absolutely adores long ribbon, so I topped the tree with a big bow and then added some extra to cascade down the sides. And if she could, she would totally top her tree with pearls to complete the shape. So I did that for her here. :o) I love the look of a rosette tree and will surely make another one this season. I may cinch in the tops of each layer to give it more of a shape between layers like the newsletter did... we'll see! I like both looks. As far as adhering these to the paper, Zip Dry Paper Glue was my best friend. I expected to be attacked by the pretty rosettes once I let go, but they stayed put! Miraculous product.

I used cream and vintage purple for the green tree's background because it is such a lovely combination, though I don't think I've ever used it. The Recollections "The Ballet" stack I received as a gift provided all of the patterned papers, including the sparkly snowflake divider. Even if it didn't contain ballet images, this would be my new favorite. I think I need a second stack already. ;)

I certainly couldn't give my mom a Christmas tree with no present... so I selected one of my favorite digi stamps from Cindy's Scraptastic Designs! The cute little puppy bursting out of the present is appropriately titled Sweet Gift. Isn't he adorable? I colored him with Copics and sparklified his Santa hat, the box ribbon, and ornaments with four shades of Stickles. (Ha! I'm not addicted... really.) I wrapped gold ribbon around the corners to make the wall hanging look like a present in and of itself, too. :o) At first I wasn't sure about using brighter colors for my stamp (given the rest of the design), but then I realized it's a great way to represent how animals brighten our days. :o) He's a pop of Christmas cheer!

I would love for you to play along with us this week by linking up your textural cards/projects at the home of the Whimsical Wednesday Challenge: Whimsical Designs. (You'll also find information on this week's prize on the challenge post!) I am excited to see your creations. And guess what? We are nearing Stephanie's stamp release... one week closer! I am eager to create with her wonderful stamps and am sure you will love them, too. :o)

Be sure to skip on over to the rest of the Design Team's blogs to see their wonderful projects! Thank you so much for visiting me today... you make my heart ultra sparkly. Have a whimsically beautiful day! :o)

Challenges entered:
 * Winter Wonderland~ Awwww, what a cutie! (Hehe! LOVE this theme!)
 * Lollipop Crafts~ Anything Goes!

Key Recipe Components:
 * Cricut cartridge: Elegant Edges
 * Cuttlebug embossing folder: Swiss Dots
 * Paper: Bo Bunny (green mat), Papertrey Ink, Recollections
 * Stamp: Sweet Gift from Cindy's Scraptastic Designs
 * Copics: E31, E33, E57 (puppy); R22, R24, R27 (bow); YG11, YG13, YG17 (box); G28 (pine needles); Y11 (ornaments)
 * Punch: Martha Stewart Doily Lace
 * Pearls: Recollections
 * Ribbon: stash
 * Stickles: Christmas Red, Diamond, Gold, Stardust

Photobucket

Monday, November 21, 2011

Scraptastic Monday Challenge: Folds!

Happy Monday, my sweet friends! :o)

Today is another fabulous Scraptastic Monday at Cindy's Scraptastic Designs! The requirements this week are to create any fold card you like, but not a shape card or an A2 single fold... and it also must include ribbon and a cut from a die, Cricut, or a punch. Remember, while we'd love for you to use a wonderful image from Cindy, it is NOT a requirement. You don't even need to use any digital stamp at all, if you so choose. Simply follow the theme in whatever manner you desire! I hope you'll play along. :o)

At first I was a wee bit of a scaredy cat because I decided to challenge myself with something new! :o) Using Cindy's precious Sweet Snowman Love digi stamp, I created my first Swinging Z-Fold card:

Partially open:
Fully open, with the middle panel viewable where I'll be writing my message:
Lastly, a closer picture of Cindy's adorable stamp that I colored with Copics:
Despite being more of an adventure than I planned, this card was such a joy to make. The swinging element is way more fun than it probably should be... I may need to give this card early just so I stop playing with it. ;) It's a lovely fancy fold technique that I think will be enjoyed by the recipient. :o) Here is the link to the tutorial I (basically) followed: Swinging Z-Fold Card.

Not only did Cindy's sweet image inspire a Christmas winter wonderland, but I also was able to use more birthday goodies! For the snowy sweethearts, I cut out their wintry neighborhood backdrop with my new Spellbinders Picot Edge Circles. The design works so well with a snowflake theme. I strategically selected which part of the Basic Grey paper to cut out... see the tree behind their sweet hands? If you look carefully at the base of the trunk, you'll discover the lovey dovey couple carved a heart to signify their love (using a Martha Stewart pen... they're resourceful). The tree is wrapped in Christmas lights (I adore this paper), just like their love that shines brightly as it stems forth from their heartfelt foundation. I sparklified lots of this scene, from the snowy pile surrounding them (how long have they been standing there holding hands?!) to dollops of sparkle in the sky, her hat and ruffly trims, scarf fringe, and oodles of other little extras. Her coat is colored with new Copics my boyfriend gave me for my birthday... a few gorgeous rose pinks! Love. Not detected well in the picture are the blue and purple rhinestone buttons on the snow peeps. :o)

When opened, more seasonal delight awaits. The deep green Noel ornament stamp is heat embossed with Alexandrite embossing powder. (I am so grateful for my heat embosser! Amazing gift.) I used two of the nested Picot Edge Circles for the ornament's base, the larger one trimmed in clear rhinestones and the smaller one trimmed in Christmas green sponged ink. I used my new jumbo sponge dauber and I love it! Such a small detail, but one I've longed to be able to do. Try as I may with the ink pads themselves, I was never able to make it look nice. Now with my trusty dauber, I had to resist from sponging my entire house! ;)

The center panel is sponged in Christmas red, with pretty corners from a Fiskars punch and a tiny snowflake embellishment. A smattering of sparkles can be found throughout all three sections, because this IS a sparkling season! Clear rhinestones center the Cricut snowflakes and accent the corners, then I added red and green sparkles to some of the flakes on the SEI paper. To finish it off, I used my sheer glitter ribbon for a puffy bow. :o)

I hope you'll play along with us this week by linking up your fold cards to the challenge home of Scraptastic Mondays: Cindy's Scraptastic Designs. I am excited to see your creations! :o) Hop on over to the challenge post to see the rest of the Design Team's projects and visit their fantastic blogs. This is truly an incredible group. :o)

Thank you for visiting me today! I hope your Thanksgiving week is off to a delicious and crafty start. (And for those outside of the US... eat extra dessert this week, just because.) :o)

Challenges entered (I am so thankful to be participating in them again!):
 * CES~ Snowflakes
 * Crafty Catz~ Snowflakes
 * Frosted Designs~ Die Cuts!
 * Just Some Lines~ Tic Tac Toe (How fun is this? I used embossing/ribbon/die cut)
 * Little Scrap Pieces~ Holiday
 * Paper Sundaes~ Beautiful Bows

Key Recipe Components:
 * Cricut cartridge: Gypsy Wanderings
 * Spellbinders Nestabilities: Picot Edge Circles
 * Paper: Basic Grey, Core'dinations, Papertrey Ink, SEI
 * Digital stamp: Sweet Snowman Love, by Cindy's Scraptastic Designs
 * Copics: R81, R83, R85 (snowwoman's coat, hat accent); V12, V15, V17 (snowwoman's scarf, hat, mittens); B00, B02, B04, Y11, Y13, Y15 (snowman's scarf); Y11, Y13, Y17, R24, C3, C5 (snowman's hat); R20, R22, R24 (candy cane); YR01, YR12 (noses)
 * Noel ornament stamp: Inkadinkado
 * Ribbon: Casa Collection Special Occasion (JoAnn's)
 * Miscellaneous: Fiskars corner punch, iRock (clear rhinestones), Recollections green and red rhinestones, Stampendous Alexandrite embossing powder, Stickles, Studio G green and red ink

Photobucket

Saturday, November 19, 2011

Monochromatic Winter and Sweet Saturday!

Happy Saturday, my sweet friends! :o) I hope you had a wonderful week!

It is tradition for my family to have our Christmas lights officially turn on after dinner on Thanksgiving, which means instead of crafting I've been stringing lights. How Thanksgiving is mere days away is baffling! While I don't have a paper craft to share with my treat today, I do have another facet of creativity. With winter fast approaching, I am excited to test my photography 'skills.' (I use that term loosely.) During my first (and only) winter picture session, I had all sorts of troubles while learning my DSLR... snowy photographs are challenging. Throughout my initial adventure, I discovered that I LOVE monochromatic winter pictures. The mood is simply gorgeous. So I'm sharing a few of my favorites leading up to the first snowfall of the year, which probably isn't all that far away. Pretty soon I'll be able to gauge how much I've learned since, which should be interesting. Hopefully I won't cry in disappointment. (Kidding!) Most likely to see any fluffy snow detail, you'll need to click and enlarge these.

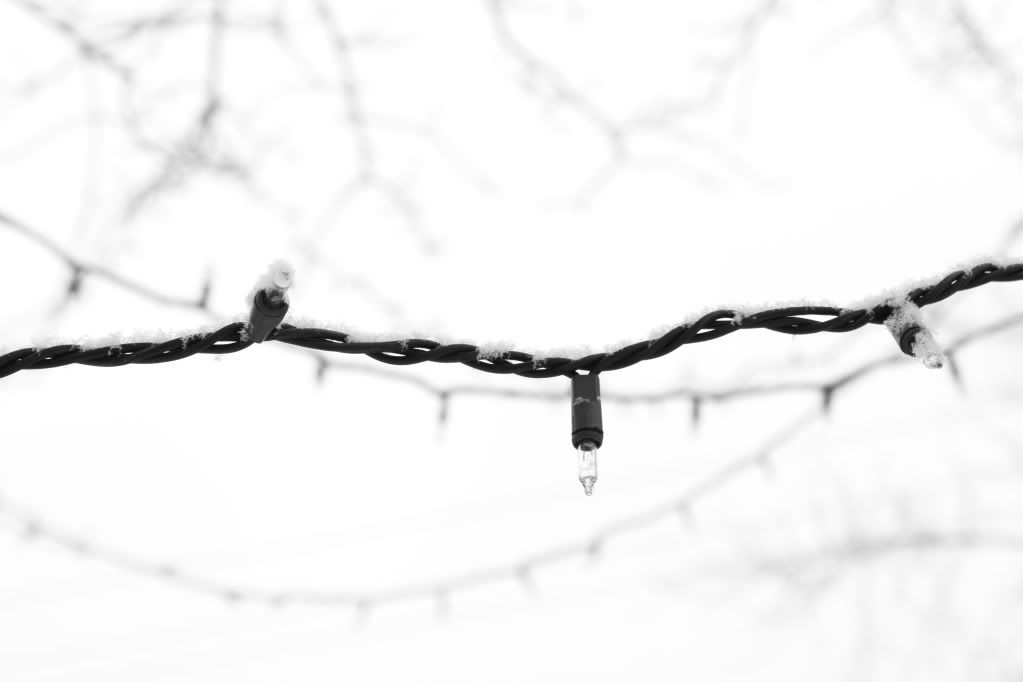
Probably my absolute favorite... I love how the fluffy snow is so delicately covering the Christmas lights.
Looking up into a snowy pine tree, with one tiny pinecone still nestled within the needles.
A snowy path to a neighbor's house.
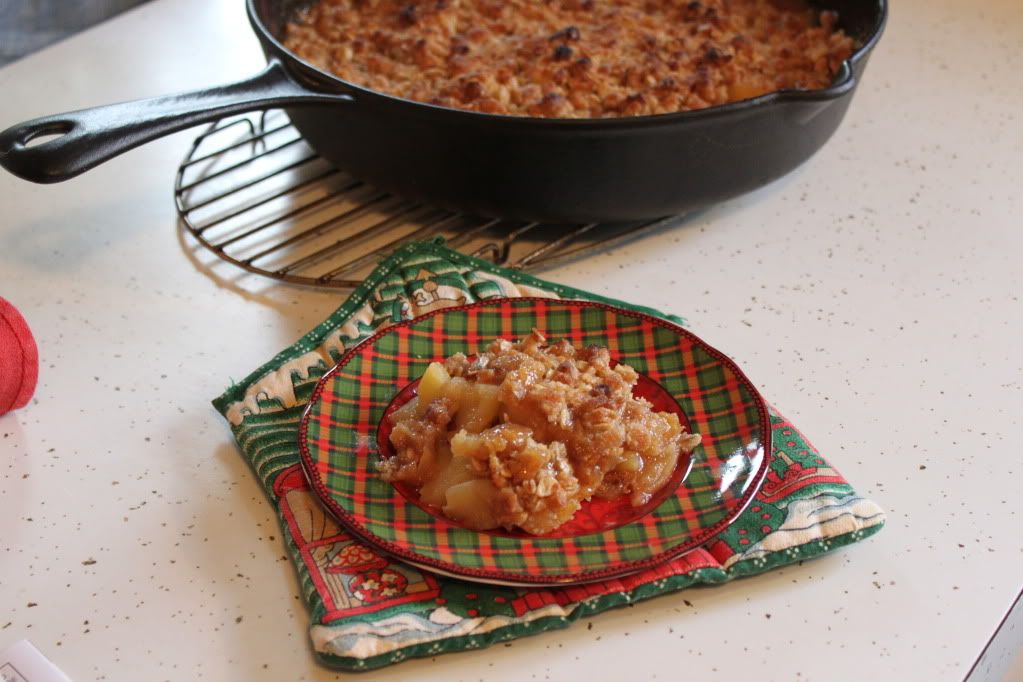
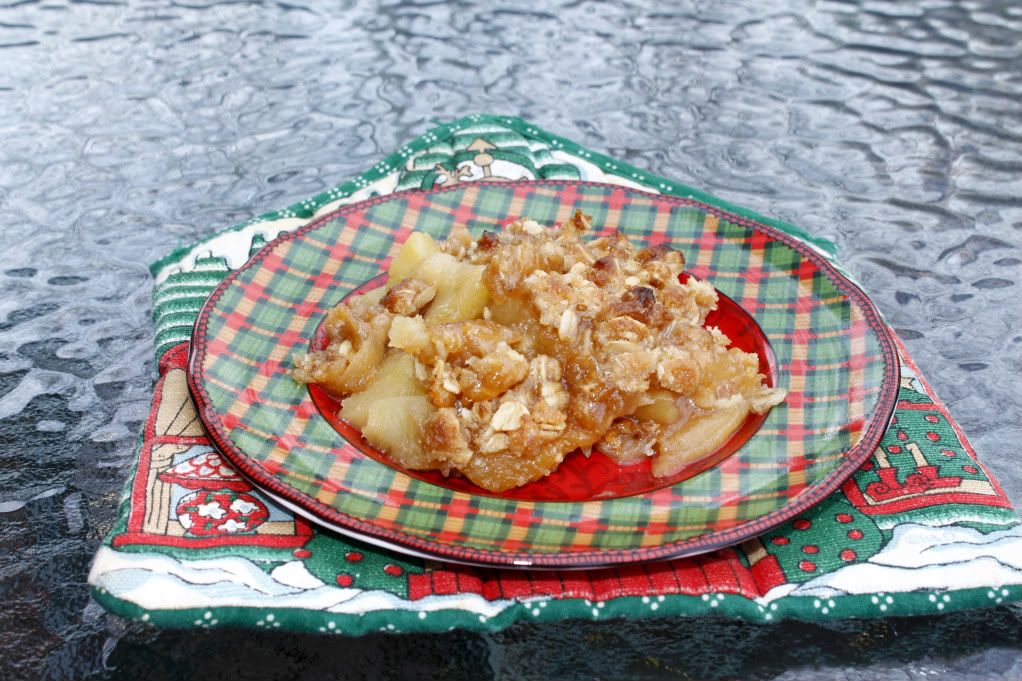
And now it's time for Sweet Saturday! :o) With the cooler weather, it's nice to curl up with a seasonal treat. Or as was the case yesterday, come in from a blustery day and take a dessert break from climbing ladders and pleading with lights to stay lit during the testing phase. Before dashing outside to begin, I made this tasty Autumn dish. A repertoire staple, executed in a new (to me) way... and it uses apple cider, which I adore. Skillet Apple Crisp!
This was completely gone within hours... and for good reason. The apples are tender without being mushy, the sauce is super thick and delicious, and the streusel topping provides a perfect crunch. I, and my loved ones, couldn't have been happier with this. Perfectly Autumn. Making it in a cast iron skillet made me feel fancy for some reason, even when it felt like my wrist might snap from the weight. (A cast iron skillet is not necessary for this recipe.) I love this and will certainly be making it again soon! If you give it a whirl, I hope you love it, too. :o)
Thank you for frolicking to my happy little blog today. I wish you all a beautiful weekend! :o)

Recipe Notes:
 * If your skillet is not oven-safe, prepare the recipe through step 4 and then transfer the filling to a 9x13-inch baking dish. Top the filling as directed and bake for an additional 5 minutes.

 * If you can't find Golden Delicious apples, any sweet, crisp apple such as Honeycrisp or Braeburn can be used. Do not use Granny Smith apples in this recipe.

 * Old-fashioned rolled oats are preferred, but you can substitute quick-cooking notes if that is all you have available.

Skillet Apple Crisp
Yield: 6-8 servings

Ingredients:
For the topping:
¾ cup all-purpose flour
¾ cup pecans, chopped fine (optional)
¾ cup old-fashioned rolled oats
½ cup light brown sugar
¼ cup granulated sugar
½ teaspoon ground cinnamon
½ teaspoon salt
½ cup unsalted butter, melted

For the filling:
3 pounds Golden Delicious apples (approximately 7 medium), peeled, cored, halved, and cut into ½-inch-thick wedges
¼ cup granulated sugar
¼ teaspoon ground cinnamon
1 cup apple cider
2 teaspoons lemon juice
2 tablespoons unsalted butter

Directions:
Preheat the oven to 450º F.

Make the topping: Combine the flour, pecans, oats, brown sugar, granulated sugar, cinnamon, and salt in a medium bowl. Stir in the butter until the mixture is thoroughly moistened and crumbly. Set aside while preparing the filling.

Make the filling: Toss the apples, granulated sugar, and cinnamon together in a large bowl; set aside. Bring the apple cider to a simmer in a 12-inch oven-safe skillet over medium heat. Cook until reduced to ½ cup, about 5 minutes. Transfer the reduced apple cider to a small bowl or liquid measuring cup. Stir in the lemon juice and set aside.

Heat the butter in the now-empty skillet over medium heat. When the foaming subsides, add the apple mixture and cook, stirring frequently, until the apples begin to soften and become translucent, 12-14 minutes. (Do not fully cook the apples.) Remove the pan from the heat and gently stir in the apple cider mixture until the apples are coated.

Sprinkle the topping evenly over the fruit, breaking up any large chunks. Place the skillet on a baking sheet and bake until the fruit is tender and the topping is a deep golden brown, 15-20 minutes. Cool on a wire rack until warm, at least 15 minutes, and serve with vanilla ice cream or whipped cream.

Source: Brown Eyed Baker

Photobucket

Wednesday, November 16, 2011

I Feel the Love Christmas Card

Happy Wednesday, sweet friends! I hope your week is going fabulously. :o)

As many of you know, the I Feel the Love Project held by the marvelous Madison of Funky Cards has become important to me. Each month she selects a particular person, family, or organization in need of some extra love and blessings. In turn, we all make cards to spread a little sunshine to the highlighted recipient. What an incredible opportunity to serve others by the simple means of our heart and our hobby. This month (and into early December), Madison is collecting Christmas cards for the children at Pediatric Oncology Unit at Kaiser Hospital (and their families). With these sweet children spending Christmas in the hospital battling disease, the least we can do is surround them with heartfelt homemade cards. Not only so, but this collection is extra special because it is a tribute to a very special girl, Korrine Croghan, who served as an inspiration and a true hero to many. She still is today, three years after her passing at 14 years old. Her parents will be personally delivering our cards to the children.

This card began with the sentiment. Recently my boyfriend and I were talking and he told me that he loved me dearly. My Christmas-loving heart instantly countered with a 'dearly' pun...

"I love you reindeerly."
Ha! We were both so amused. I totally one-upped him with my reindeer love. I don't know where that came from in my heart, but it tickled me pink and I knew I would be creating a Christmas card surrounding it. What I didn't know at the time was that it would be for such a beautiful purpose. I filled this card with as much love and festive cheer as possible. I wanted it to be textural for little person fingers to explore. The pop-dotted Create a Critter reindeer and die-cut Santa are riding along a flurry of embossed snowflakes. I used gorgeous Peppermint Stick Trendy Twine for extra fun and added two coats of Glossy Accents to the Christmas lights for a shiny dimensional finish.

You might notice a good amount of sparkle here... I had to sparklify as much as possible, particularly for this occasion. All of the lights are covered in various shades of Stickles beneath the Glossy Accents. I have no sleigh since I have no Christmas Cricut cartridges (which is so very sad), so I printed and cut out a clip-art one and covered it in Christmas Red and Silver Stickles. The snowflake-embossed center, light strand, and sentiment are Core Couture paper for the pretty silvery flecks. (I wanted my light strand snow-covered instead of a stark green or black.) And of course sweet little Rudolph has a sparkly nose and scarf... and his eyes are twinkling with love, thanks to Stardust. The four hearts are covered with my Copic Spica clear glitter pen for a sparkle that's less in-your-face.

Ready for the sappiness? You knew it was coming, especially since this is for I Feel the Love. The strand of snowy Christmas lights is anchored by three shimmery hearts because despite the fierce circumstances, they are secure in love. Just like those sweet kids who will be receiving our cards. Let's engulf them as a reminder. That's why Santa is holding a heart instead of a present in his right hand. He is delivering an abundance of love via this teeny tiny card. As previously mentioned, Santa and Rudolph are pop-dotted... it makes me feel 3 millimeters closer to the child. And there is a reason I have Christmas lights randomly hanging in the sky. I had to include them not only because everyone loves Christmas lights, but also due to my sentiment. Being told you're loved makes a heart sparkle brighter the tallest, chubbiest Christmas tree. I don't technically know the one who will receive this card... but I love them. I love them dearly. I love them reindeerly.

Challenge entered:
 * My Creative Time Throwback Thursday~ Kid Friendly cartridge for any KID friendly card or project! :o)

Thank you for twirling on by! You make me sparkly. Have a beautiful day, my friends. :o)

Key Recipe Components:
 * Cricut cartridge: Create a Critter
 * Cuttlebug embossing folder: Snowflakes from Winter Wonderland pack
 * Paper: Basic Grey, Core'dinations, DCWV
 * Sentiment: Computer generated from my sparkly heart
 * Twine: Peppermint Stick Trendy Twine
 * Santa die-cut: stash
 * Miscellaneous: Copic Spica glitter pen, Glossy Accents, Stickles

Photobucket

Saturday, November 12, 2011

Merry Christmas Card!

Happy Saturday, my dear friends! I hope you're having a beautiful weekend. :o)

Wanna know a secret? My birthday was on Thursday. It was a lovely day, bursting with blessings of all types. :o) My boyfriend took the day off so he could be with me, which was the best part! He showed up in the morning with huge balloons and a Starbucks in hand. :o) Guess what else? He spoiled me silly with crafty goodness. To show my appreciation and excitement, I made a simple, elegant Christmas card using some of my new treasures before he had to leave. (I really wish we lived in the same city.) One thing he bought me is something I've wanted for quite some time... a heat embosser! I wasted no time in putting this tool to use. (I am in love with the magic.)

"Merry Christmas"
Everything except the ribbon are birthday presents! The embossed images are from two Christmas stamp sets. When looking through my new stash, I knew I was going to make an embossed golden angel with a sparkly music note background. (It doesn't much show, but there is a lot of beautiful sparkle all along the paper.) She is singing praises unto the Lord. :o) The paper I stamped on is from the same stack, with the same light Victorian scroll background design as the musical paper. I matted both with gold cardstock, added a few of my new pearls (first time ever! Woo!), and incorporated a splash of Christmas red with the ribbon. (Speaking of which... as it appears, I did in fact get in a battle with my bow. I need to work on that.)

While I do love the simple beauty of a golden Christmas, what made me most happy is that my boyfriend loves it. :o) And I hope you do, too! The lack of a Sweet Saturday is a bummer, but I needed to rest my back the last few days. No baking allowed. I just may need to post two recipes next week to make up for it! :o)

Thank you for visiting me today, friends! I wish you all a sparkly Saturday. :o)

Key Recipe Components:
 * Cricut cartridge: Elegant Edges
 * Paper: Recollections
 * Stamps: Inkadinkado Christmas (angel), Recollections Christmas (sentiment and additional snowflake)
 * Embossing powder: Stampendous Pearlustre Champagne
 * Pearls: Recollections
 * Ribbon: stash

Photobucket
Related Posts Plugin for WordPress, Blogger...
Blogging tips