To pin my projects to Pinterest, hover over the picture and a Pin-it Button will magically appear.

Saturday, September 1, 2012

Christmas card :)

Happy Saturday, my sparkly friends! I hope everyone is having a wonderful weekend. :o) (Sweet Saturday returns next week!)

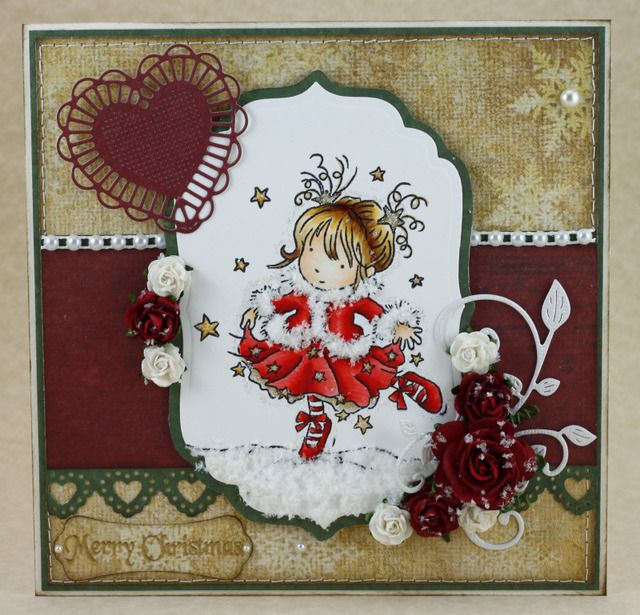
I've been anxious to create a Christmas card. It was getting painful. So when some free crafty time presented itself, I dove for this Lili of the Valley stamp like it was Christmas morning! It warms my sappy heart. :o)
Isn't she adorable? She is LOTV's Christmas Dance and I fell in love with her immediately. Dancing on Christmas goes beyond magical. :o) After stamping her on a Spellbinders Labels Four base, I colored her with Copics and created a wintry wonderland with my Polar White Flower Soft. It looks so pretty in person.. so soft and textural, with beautiful twinkles throughout. After using it for the trims of her pretty jacket and the ground, I decided to adhere some sporadically to the Wild Orchid Crafts flowers.

The papers are from K and Company, with the burgundy piece possessing a musical score that doesn't show up all that well in the picture. It's the music she's dancing to. :o) The green layer is edged with my Martha Stewart Lace Heart punch, creating hearts of gold. The gorgeous trim on top is a Wild Orchid Crafts flat-back pearl strand, which I adore. I liked it for this project because it made me think of little pearly snowflakes.

I couldn't resist using some beloved Cheery Lynn dies. The mini fanciful flourish is cut with pearlescent white cardstock to replicate a snowy vine. And oh how I love that heart! It is from the Two of Hearts set. The piercing in the center is so beautiful, but not well captured in the picture. I used a heart instead of a snowflake because as I was designing this card to celebrate Christmas, I kept thinking about one of my favorite Scriptures... about the Lord guiding our hearts into the love of God. :o)

The Whimsical Designs "Merry Christmas" sentiment is from the Snow Much Fun set, which I heat-embossed with gold embossing powder. The tag is from Art Philosophy, which I accented with tiny pearls. All of the card's sparkle is missing in the picture, but it's there! Star Dust covers the stars, part of her outfit, and an icy dusting outlines her body. I stitched around the base with my sewing machine and centered the largest snowflakes with pearls to finish it off. :o)

Challenges entered:
 * Craft Your Passion~ Emboss It (Heat-embossed sentiment)
 * Cute Card Thursday~ A Stitch in Time
 * The Cutie Pie Challenge Blog~ Borders and Frames
 * Jingle Belles~ Holiday B-I-N-G-O (Bling-Flowers-Heat embossing)
 * Krafty Girls~ Anything Goes
 * Make it Monday~ Anything Goes
 * Simon Says Stamp~ Anything Goes
 * Winter Wonderland~ Walking in a Winter Wonderland (I hope dancing is okay!)

Thank you for pirouetting on by today! I hope you all have a beautiful holiday weekend! :o)


Thursday, August 30, 2012

Rosette Wands for Olivia

Happy Thursday, my sweet friends! Do you know how loved you are? Immensely! :o)

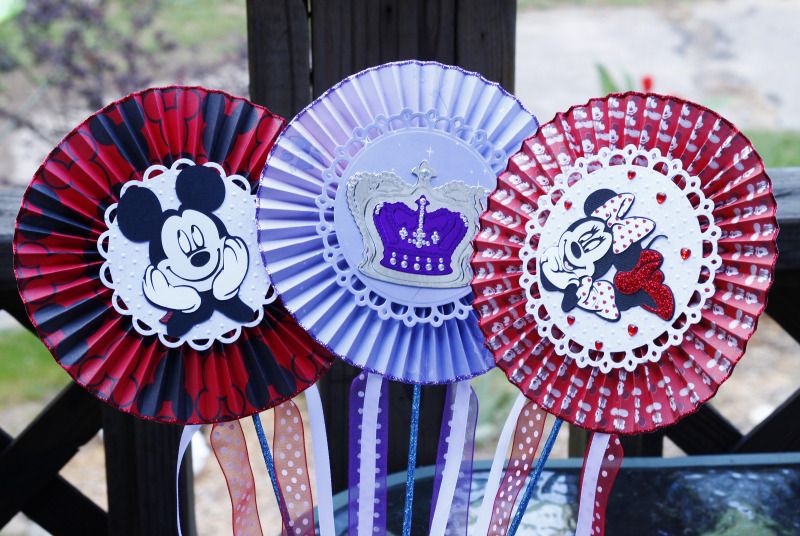
A quick post (don't laugh!), as I want to share these before I ship them out today! Such a busy bee week. Last month I made a ton of rosette wands for birthday celebrations at a homeless shelter, so I wanted to make a few for Olivia. (As you probably recall, Olivia is this month's recipient of Madison's I Feel the Love Project. It fills me with such joy that she will soon be opening a box filled of crafty love from so many of you. It will be such a blessing as she continues to adjust to life on earth without her amazing mom.)

I went the Disney route this time to honor and celebrate the Disney World memories that she and our beloved Erika shared.
Mickey and Minnie are from Disney and Friends, which I am so thankful to now own. It will be such a blessing for I Feel the Love creations! :o) Mickey is on a Spellbinders Lacey Circle, while Minnie is on a Picot Edge Circle. Both are embossed with Swiss Dots and their Disney papers are trimmed in Christmas Red Stickles. To deliver extra sappy love to Olivia, I cut out Minnie's outfit with heart paper and surrounded her with red heart rhinestones. And of course she needed sparkling shoes. :o)

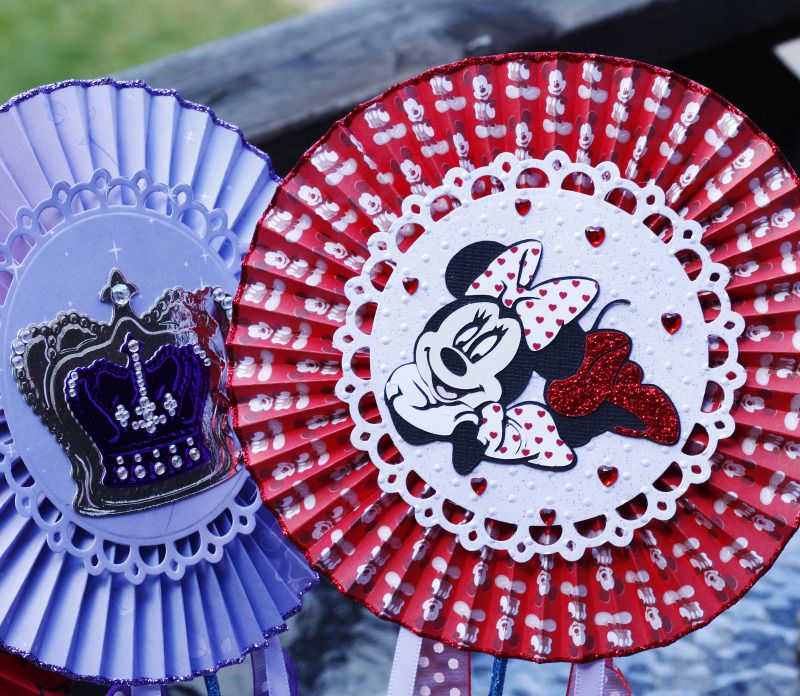
A closer look at Minnie and the crown rosette wand:
How pretty is that crown?! They are Spellbinders Nested Crowns, chosen for this project to go along with the Disney theme. I used foil paper for lots of shine: silver for the base crown and purple for the smaller nested crown. The detailing I kept trying to do wasn't going well, so I turned to my trusty rhinestones and covered some of the embossed areas with graduating sizes of crystals.

Just like last time, I painted bamboo skewers with turquoise glitter acrylic paint and gave them a coat of sealer for protection. Flowy ribbons are attached for Olivia's twirling delight. :o) I hope she enjoys them and feels my and God's love with every project I made for her this month. She is such an inspiring, strong, radiant 9-year-old and I know she will make a difference in this world. God has incredible plans for her!
Thank you for visiting me today! May your day be filled with blessings, love, and peace. :o)

Monday, August 27, 2012

Encouragement Card

Happy Monday, my dear friends! I hope your week is off to a sparkling start. :o)

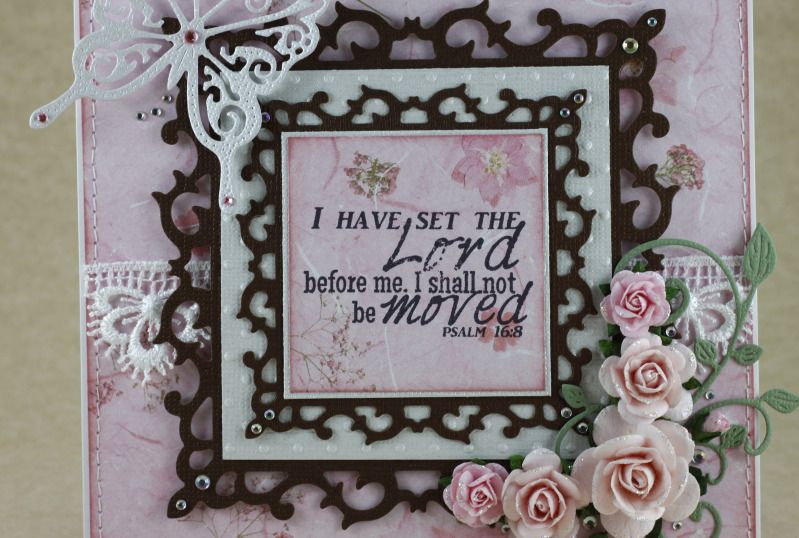
This card is for one of my sweet friends who is in the midst of a serious trial. It is vital not to waver, so I made this to encourage her to keep her faith steadfast.

"I have set the Lord before me. I shall not be moved."
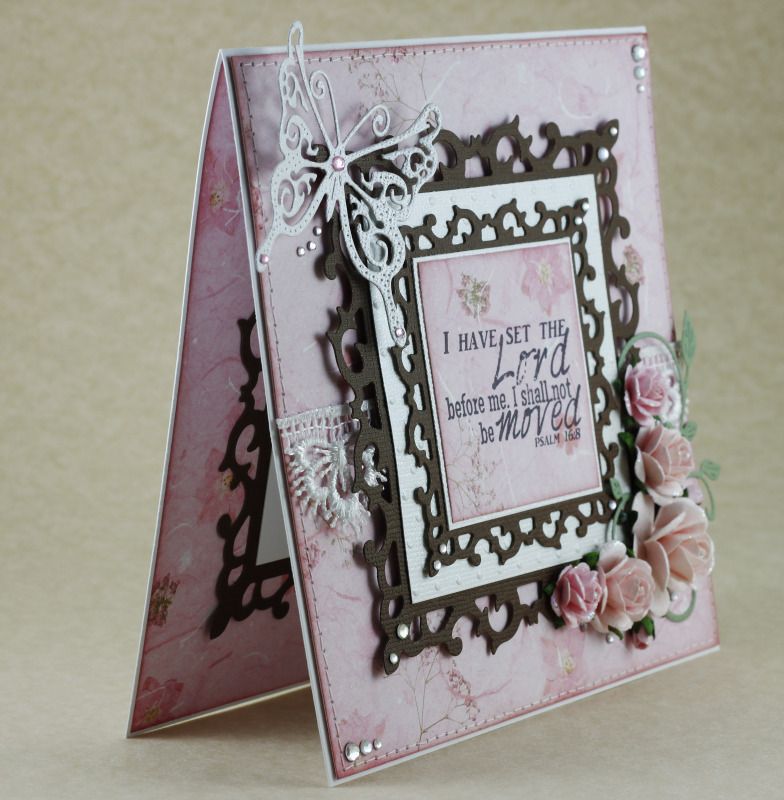
Last week I received some crafty blessings and I couldn't wait to put some to good use. I finally own a few dies from my favorite die company Cheery Lynn Designs and I love everything about them. They were worth the long wait! (Nearly a year of 'window shopping.') The exquisite butterfly is from the Small Exotic Butterflies #2 set and the beautiful leafy vine is their mini fanciful flourish... I positively love them. The butterfly is cut with pearlescent cardstock for a sweet shimmer and accented with pink rhinestones.
The Scripture is from K Andrew Designs~ Scripture Sayings, my go-to stamp set for these types of cards. It is invaluable. I have set it upon two layers of Spellbinders Fleur de Lis Squares, which are popped up with foam tape for dimension. The Paper Pizazz paper is so gorgeous that I didn't want to layer another design atop it. :o) The edges are inked with Victorian Velvet and I sewed around the base with my sewing machine. The white paper is embossed with Swiss Dots for textural happiness.

The Guipure lace and Pink Mist flowers are from Wild Orchid Crafts. Sprinkled within the flower arrangement are two sizes of rhinestones and the petals are trimmed in Star Dust for extra sparkle. You may need to enlarge one of the pictures to see those, however.

A peek inside, which I couldn't resist lining with this lovely paper... and a look at the butterfly perched atop the popped-up layer.
I am proud of her for fighting the good fight of faith and hope she always remembers that our God is greater than everything. I am eager to see her deliverance, which certainly will come. :o)

Challenges entered:
 * Cheery Lynn Designs~ Anything Goes
 * Fab 'n' Funky~ Leaves
 * In the Pink~ Things with Wings (and pink, of course!)
 * Little Scrap Pieces~ Make it Sparkle
 * Make it Monday~ Anything Goes
 * Sentimental Sundays~ Sewing or Faux Stitching

I want to give a shout-out to a fantastic challenge blog that I saw for the first time today: Word Art Wednesday. What a blessing it is! I look forward to participating each week and have already been so blessed by it. :o)

Thank you for fluttering on by! I wish you a day that sparkles with love and light. :o)

Tuesday, August 21, 2012

Gift-shaped Card Set :)

Happy Tuesday, my sparkly friends! I hope you're having a wonderful week. :o)

Despite my blog silence over the past week, some craftiness has been squeezed in. :o) The gift-shaped card I made for a loved one's birthday a couple of weeks ago was so well-received that I made a set of them in varying themes. :o) I used less poofy ribbon than the one I hand delivered, making it more envelope-friendly as opposed to a box.

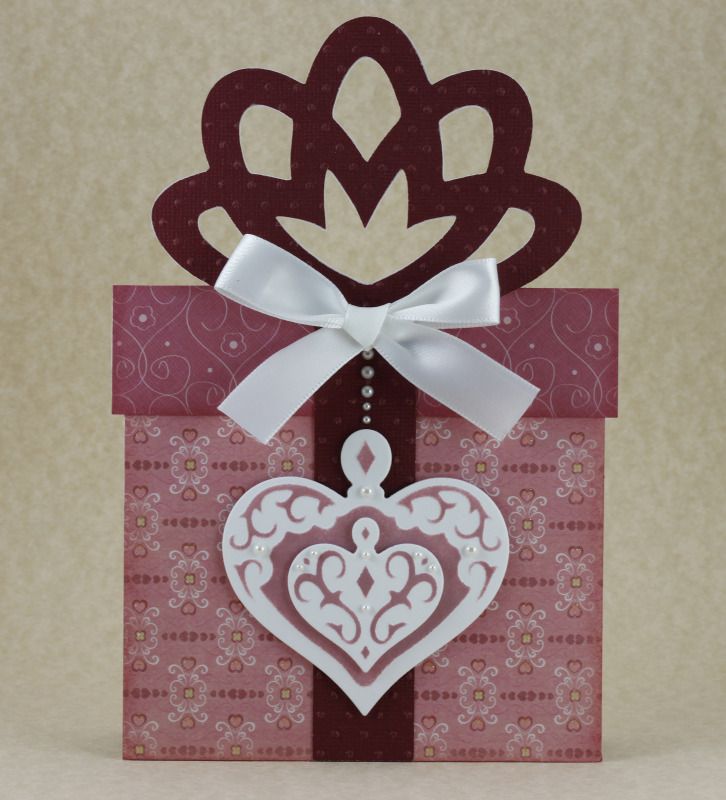
A rosy version was a must! (Enlarge if you want to see pearly happiness on the hearts.)
Whimsical hearts and flourishes from First Edition~Love Letters cover this gift, which I paired with Victorian Velvet distress ink and matching cardstock. I loved this shade on the embossed areas of the Spellbinders Nested Hearts so much that I decided to use two of the hearts instead of one! Pearls accent both hearts and provide the chain for them to hang beneath the bow. This card was left without a sentiment because the romantic feel lends it to be ideal for an anniversary card, as well as a birthday or Just Because card for a sweetheart. I wanted the options left open for this one.

I thought a butterfly gift would be super cute. :o)
Magnolia and My Mind's Eye papers are paired with Broken China distress ink for a lover of butterflies, aquas, or whimsy. Rhinestones serve as the chain, dangling beneath a double bow of crinkle ribbon from My Craft Spot. (Snow White and Aqua Mist, I believe.)

Everyone loved the original, so I made another one just like it, except with different ribbon.
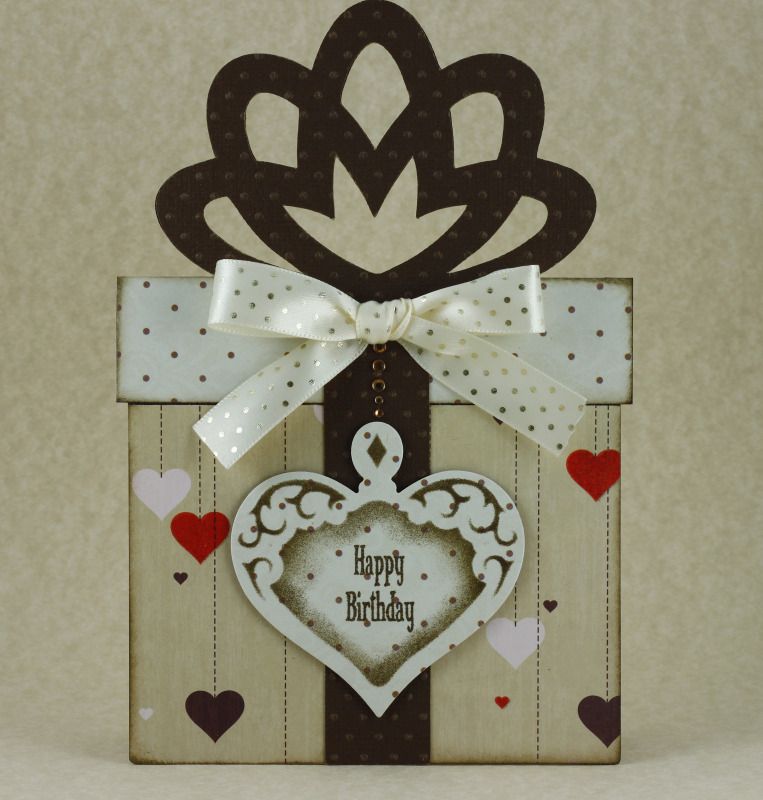
It was hard to cut into my last sheet of this SEI heart paper, but I persevered! ;) I used Walnut Stain on the embossed areas and to lightly distress the edges. Amber rhinestones were chosen because they make me think of caramel.. and all this brown made me think of chocolate. Hehe. Instead of the ultra-poofy bow, I used beautiful ribbon I found at JoAnns. It's satiny cream with metallic gold dots. I think the ribbon could work nicely for elegant Christmas cards. :o)

Lastly, a peek at the interiors.
Spellbinders Fleur de Lis squares are cut from the same cardstock as the bows to coordinate nicely, with a simple white or vintage cream square for the message. The present cuts are from Art Philosophy, welded with my Gyspy, and all of the bows from the image are embossed with the Swiss Dots folder. The birthday sentiment stamp is from Whimsical Designs. This was a fun set to make and I hope the future recipients love them as much as I do. :o)

Challenges entered:
 * The Crafty Pad~ To Die For (Use dies/punches!)
 * Frosted Designs~ Twine/Ribbon
 * In the Pink~ Fifty Shades of... Pink!
 * Make it Monday~ Anything Goes
 * Paper Playtime~ Polka Dots and a Sentiment
 * Simon Says Stamp and Show~ No rules!

Thank you for visiting me! I hope you have a beautiful day. :o)

Monday, August 13, 2012

Wishing You a World Full of Joy: More love for Olivia!

Happy Monday, my sweet friends! I hope your week is off to a sparkly start. :o) I apologize for being a couple of days behind on your marvelous creations. I will be visiting you right after I post this! :o)

As you already know from a previous post, this month the incredible Madison of Funky Cards is honoring someone in my life for her I Feel the Love Project. Each month she highlights a particular person, family, or organization in need of some extra love. In turn, we have the absolutely privilege of using our passion for a far greater purpose. Crafting for a cause brings such joy to my heart. I love everything about I Feel the Love and am so thankful to Madison for honoring someone in my life.

The collection this month is for 9-year-old Olivia, the daughter of my lifelong friend Erika. Erika passed away last year after a long, valiant fight against cancer. Sweet Olivia is a fighter just like Erika, but facing this world without her mom has been exceptionally difficult for her. To read more about the ever-inspiring Olivia and why she and Erika are so special to me, you can check out the first card I made for Olivia

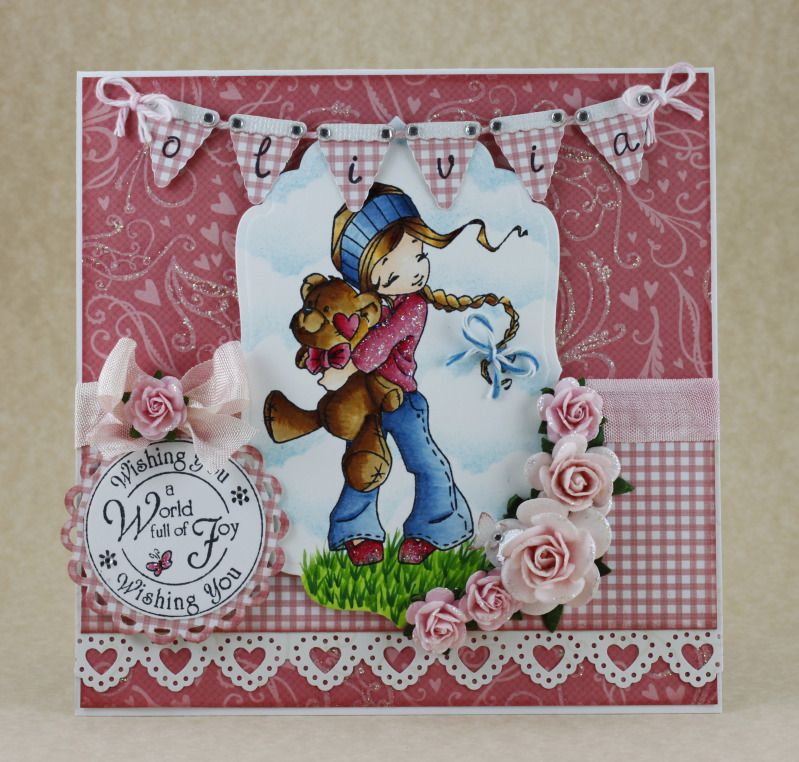
This weekend I used every spare morsel of time to make another card for her. You can never shower someone with too much love, right? I'll be making her a fun animal or Disney one soon, but before that I wanted to make her a Copic card. When I received this cutie pie last week, I knew I needed to color it up for Olivia. :o)

"Wishing you a World full of Joy"
Isn't this image adorable? It had been on my wish list for quite some time and am ecstatic to now own it. There's no better way to break it in than using it for I Feel the Love. :o) She is an Elisabeth Bell image, perfectly titled Beary Big Hugs. I stamped her on a Spellbinders Labels Four base, colored her with Copics, and used a cloud template and Tumbled Glass distress ink for the sky. I covered her sweater and shoes with Star Dust because sparkles make everything better. :o) I gave her a sweet twine bow to add a textural element.

The papers were chosen because of the fluttering hearts, so whimsically delivering my love to Olivia. The glittery swirls seemed perfect for her, too. I thought it would be fun to make her a super girly card, so I used a Martha Stewart heart border punch, a bunch of sparklified Wild Orchid Crafts roses, extra bows, and oodles of rhinestones. A tiny butterfly is resting atop one of the petals of the largest rose. The sentiment is from Lili of the Valley, which I attached to a Spellbinders Lacey Circle. I colored in the butterfly to match the stamp and centered the two little flowers with tiny rhinestones. The gingham papers are lightly inked with Victorian Velvet.

My friend Charlotte of A Little Bit of Detail made a card for this cause, in which she had Olivia's sweet name scrolled across the front in a beautiful font. It reminded me how special it is to personalize cards, especially for little kids. So I made a banner with my Art Philosophy cartridge and used small alphabet stamps to personalize this card. The banner is pop-dotted for dimension and lined with twine. I couldn't resist securing each end with a bow. :o)

There is still time to make a card for this deserving little girl, so I hope you'll consider joining this month's I Feel the Love collection! :o)

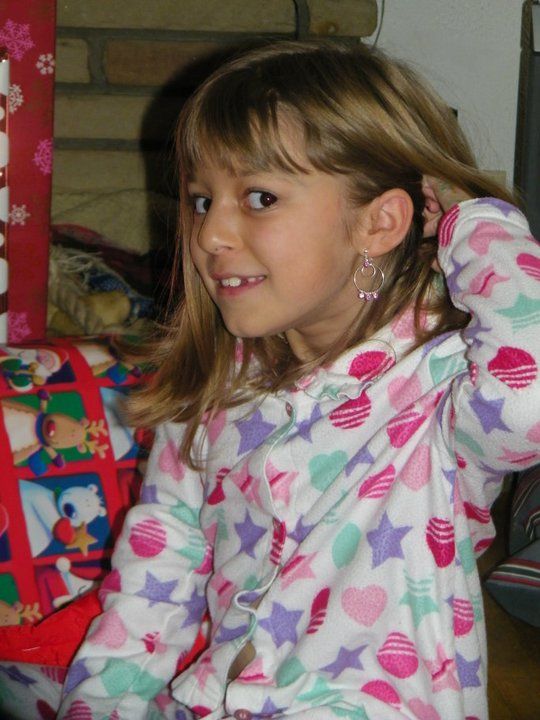
Sweet Olivia on Christmas morning, 2010.... a few short months before our beloved Erika passed away.
Challenges entered:
 * Cooking With Cricut~ Card Outreach
 * Divas By Design~ For a Female
 * I Feel the Love~ Cards for Olivia
 * In the Pink~ Fifty Shades of... Pink!
 * Little Scrap Pieces~ Use Your Bling
 * Make It Monday~ Anything Goes
 * Fab 'n' Funky~ Pearls or Rhinestones
 * Simon Says Stamp~ Bingo! (Ribbon-Free-Blooms)

Thank you for fluttering on by! I hope your day is filled with all things beautiful. :o)

Key Recipe Components:
 * Cricut cartridge: Art Philosophy
 * Spellbinders Nestabilities: Labels Four, Lacey Circles
 * Paper: Core'dinations, Heidi Grace
 * Sentiment stamp: Lili of the Valley~ Dreamy Days
 * Image stamp: Elisabeth Bell~ Beary Big Hugs
 * Copics: E000, E000, E00 (skin); E23, E25, E31, E50 (hair); R81, R83, R85 (sweater, shoes); B91, B93, B95, B97 (jeans and bandana thingy); E31, E33, E35 (I think.. for the bear), YG17, YG23, G28 (grass)
 * Flowers: Wild Orchid Crafts (Pink Mist)
 * Border Punch: Martha Stewart Lace Heart
 * Crinkle Ribbon: My Craft Spot (Petal Pink)
 * Twine: My Craft Spot (Blossom, Blueberry Blue)
 * Miscellaneous: iRock, Stickles

Saturday, August 11, 2012

Sweet Saturday: Peanut Butter Mini M&M Blondies (and blog award thanks!)

Happy Saturday, my dear friends! I hope you're having a wonderful weekend! :o)

After far too many missed weeks of this little feature, I'm happy to have a Sweet Saturday to share! (And one ready for next week, too! Jackpot!) I cannot believe how little I've been able to play in the kitchen this summer. Since I adore baking for my loved ones, I hope to pick things up a bit to deliver extra smiles. :o)

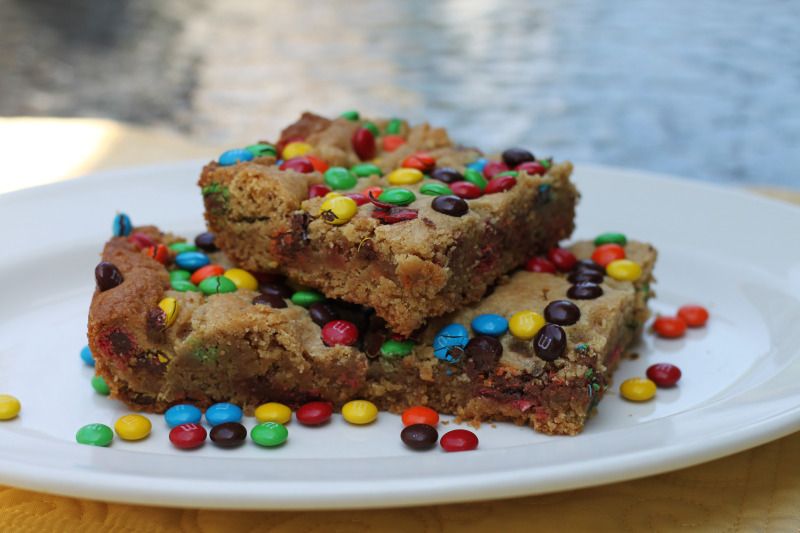
This week I'm sharing a recipe that my family fell in love with at first bite. It was my first time baking blondies... and certainly not my last! For your sweet enjoyment today: Peanut Butter Mini M&M Blondies!
Oh my, are these ever tasty! I love bar desserts for their ease and portability and these are a new staple in my baking repertoire. They'll make such cute, colorful gifts in handmade treat boxes. Plus, these use mini M&M's! I love the miniature version even more than the original. These blondies are rich without being overwhelming, packing a serious dessert punch without requiring hours in the kitchen... sometimes there just aren't hours to spare. I originally searched for this recipe after my mom and I fell in love with the M&M Blondie Blasts at Starbucks. Homemade versions always taste better and save bucks, so I was determined to find a standout recipe. As it turns out, we gravitated to a peanut butter version instead and love them even more. (And did I mention there are mini M&M's?) I hope you'll give these a whirl because they are sure to delight. :o)

Also, I would like to thank Gloria of Purpleglo Creations for awarding me the Liebster Award! I am so grateful to be receiving this award again, recognizing smaller blogs with less than 200 followers (and spreading crafty love and joy in the process). Gloria is sweet and talented and I hope you will visit her fantastic blog. You will not be disappointed! :o) Thank you, Gloria! Huge hugs for you!

Thank you for visiting! I wish you a sparkling, beautiful day! :o)

Recipe Note: Due to supplies on hand, I used 2½ cups all-purpose flour instead of subbing part of it with whole wheat flour.

Peanut Butter Mini M&M Blondies

Ingredients:
½ cup unsalted butter
2 cups brown sugar
¾ cup peanut butter
2 cups all purpose flour
½ cup whole wheat flour
¼ teaspoon baking soda
¼ teaspoon salt
1 teaspoon baking powder
2 eggs
1½ teaspoons vanilla extract
1½ cups mini M&M's

Directions:
Preheat oven to 350º F. Grease a 9x13'' baking pan and set aside.

In a medium-sized pot, melt the butter and brown sugar over medium heat, stirring until smooth. Remove from heat and stir in peanut butter. Allow to cool for 10 minutes until mixture is slightly cooled.

In a large bowl, combine the flours, baking soda, salt, and baking powder. Set aside.

Stir eggs and vanilla extract into peanut butter mixture (it may be very thick). Pour peanut butter mixture into flour mixture and combine well. Fold in 1 cup of the mini M&M's.

Pour batter into greased pan. Top with remaining ½ cup of M&M's, lightly pressing the candies into the batter. Bake for 23-25 minutes or until a knife inserted in the middle comes out clean. Allow blondies to cool completely before cutting into squares.

Source: Itty Bits of Balance


Wednesday, August 8, 2012

Birthday Card

Happy Wednesday, my crafty friends! I hope you're having a great week. Thank you for the sweet and loving comments on my last post. You make my heart sparkle brighter than a Christmas tree! :o)

Tomorrow is the birthday of a sweet family member! I am so excited for the celebration. :o) I decided upon a shape card for the festive occasion.
I have longed to make a gift-shaped card, as they're just so adorable. The gift cut is from Art Philosophy, of which I welded two together with my Gypsy for the base. Since the greatest gift is love, I went with a heart theme... and I like to think of all the brown as a nod to celebratory chocolate. ;) The 'wrapping paper' for the base is one of my favorites from SEI's With All My Heart collection. The brown polka-dot paper is from First Edition's Love Letters.. for some reason, I always love dots for birthday cards. Maybe because I liken it to confetti! :o)

A bit difficult to see in the picture is the sparkly trail of amber rhinestones "hanging" from the puffy, gold-rimmed ribbon bow. It leads to one of my favorite Spellbinders, the Nested Heart. Since this is all about giving the gift of love, a fancy heart needed to be the focal point. :o) The embossed areas (and all paper edges) are inked with Walnut Stain Distress Ink and the Whimsical Designs sentiment is from Stephanie's Everyday Sentiments stamp set. The dark brown ribbon section of the gift cut is embossed with the Swiss Dots folder to coordinate with the polka-dot papers.

Unfortunately, I forgot to take a picture of the interior. :( It has a dark brown Spellbinders Fleur de Lis square, which pairs nicely with the filigree embossing on the Nested Heart. A vintage cream square sits atop it, where my sappy message will be written. I hope it brings a smile to the beautiful heart we will soon be celebrating! :o)

Challenges entered:
 ** Craft Your Passion~ Anything Goes
 ** Crafty Ribbons~ Seeing Spots and Dots
 ** DL.ART~ Happy Birthday Blog Hop challenge
 ** Fun Friday~ Birthday
 ** Krafty Girls~ Get in Shape
 ** Make It Monday~ Anything Goes
 ** Papertake Weekly~ Anything Goes
 ** Really Reasonable Ribbon~ Bling and Ribbon
 ** Tuesday Alchemy~ Bingo! (Pearls/Bling-Free-Dies/Punches)

Thank you for twirling on by! I wish you a day that sparkles with love and cupcakes. :o)

Related Posts Plugin for WordPress, Blogger...
Blogging tips