Happy Saturday, my sparkly friends! :o)
Welcome to the
Whimsical Designs Stamp Release Blog Hop! You should have arrived here from the fabulous Cindy at
Cindy's Scraptastic Designs. If you just happened to stop by or you got lost along the way, start at the beginning at
Stephanie's blog. :o)
Since we are celebrating Stephanie's stamp release, I wanted to make something extra special to showcase a few of them. Her fantastic stamps played a huge role in how this project played out. The inspiration for my project idea itself came from my relationship. My sweetheart and I do our favorite things year round. We go to Christmas stores in the summer, make s'mores over candlelight in the winter... and now, we can have a little indoor picnic while snow piles up outside because I made us a sweet winter picnic basket!
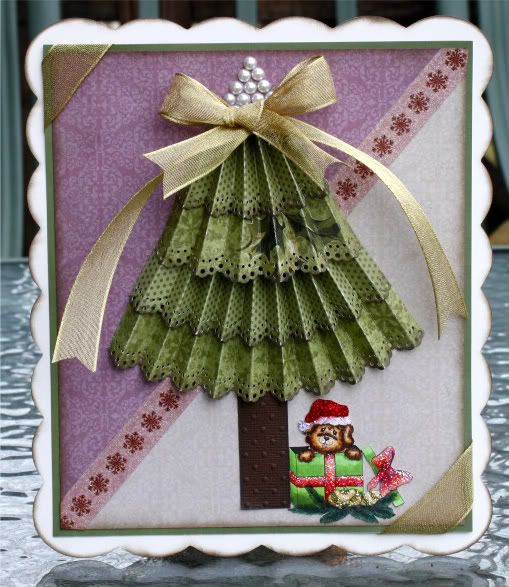
Oh my, was this ever a fun adventure! It had some bumps along the way since it was my first time trying this, but this basket is already loved by many. To properly show you all sides, I need to share a few additional pictures. Click for larger views, if you'd like! Just pretend you don't see my mistakes. ;) Ready to be whisked into a sappy winter wonderland?
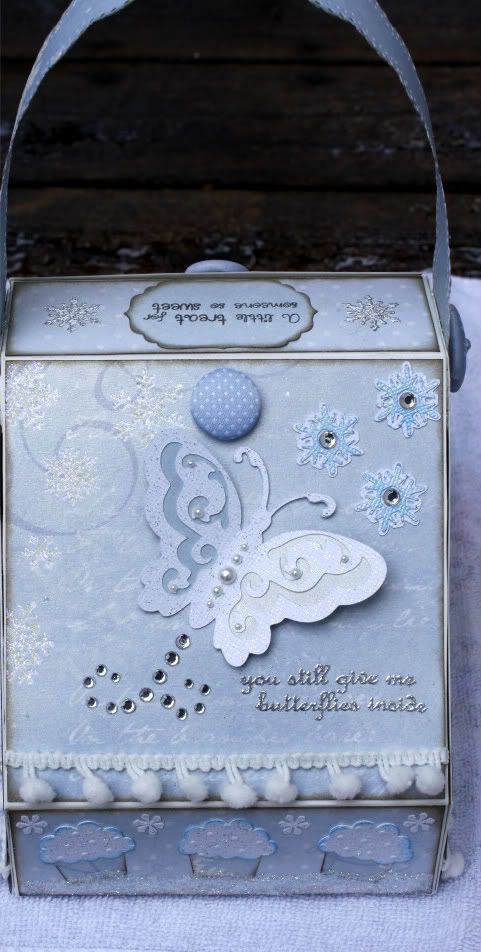
"You still give me butterflies inside"
One of my favorite sentiments in Stephanie's release, from her
With Love set. I heat-embossed it in silver and surrounded it by a whimsical butterfly of sparkly white, icy blue, and a smattering of pearls. The papers and fabric buttons throughout this project are all from The Paper Company Winter Whites collection. They are heavyweight, double-sided, and possess a gorgeous sheen. I added a few snowflakes, a rhinestone path, and trimmed the panel with white pom-pom ribbon to resemble snow. We love snow. :o)
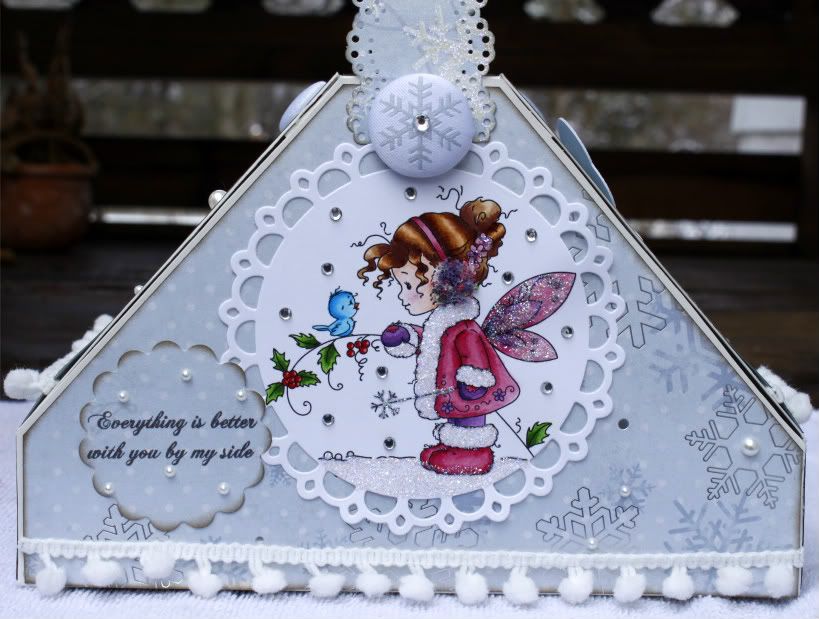
"Everything is better with you by my side"
This could not be more true. Everything is better with my sweetheart by my side... I knew this sentiment, also from the
With Love set, was going to make an appearance. I used my Copics to color the adorable
Wee Stamps Winter Fairy. Not only because it's precious, but also because the sweet birdie and little girl make me think of us. :o) I used Flower Soft in Fuchsia (yes, I clearly love that stuff) for her earmuff, as it perfectly coordinates with her rosy pink and purple outfit. I covered her wings, snowflake wand, and the snowy ground in Stardust Stickles. I thought it needed a smidgen more sparkle, so I grabbed my iRock and added crystal snowflakes in the sky. As is the case on all sides, I centered some of the snowflakes with pearls or rhinestones. Also, this is one of the better shots of the handle. I used my Martha Stewart Doily Lace punch on both sides to make it a little fancy.
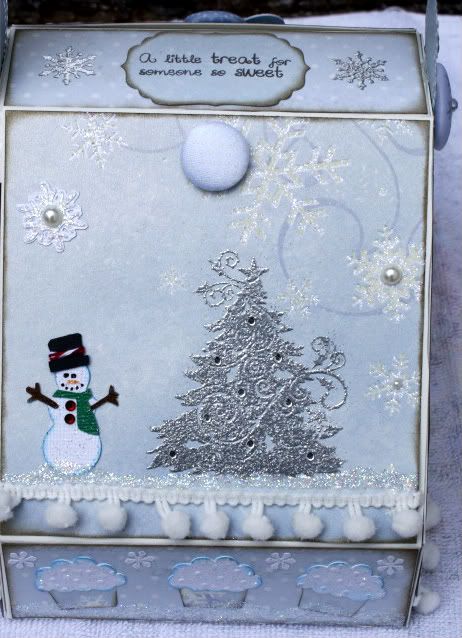
"A little treat for someone so sweet"
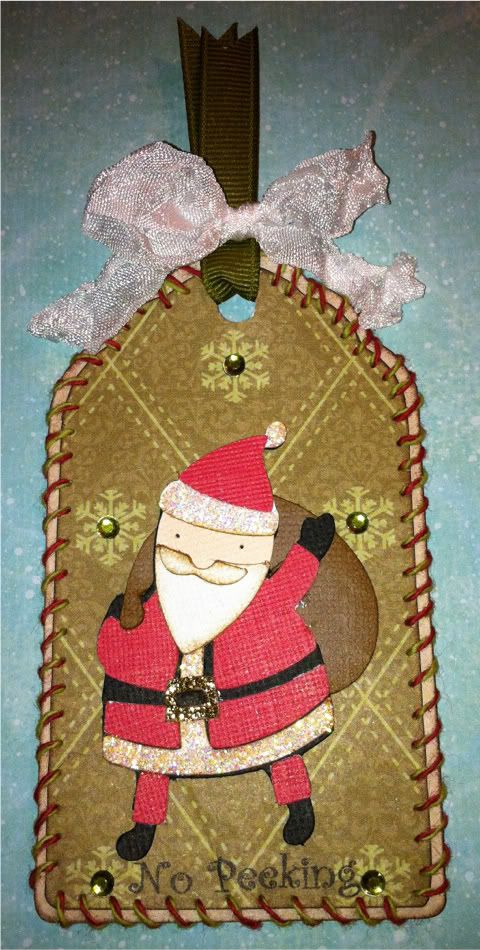
How sweet is that sentiment?! It is from Stephanie's
Whimsical Fun- Volume 1 set. I heat-embossed a couple snowflakes on either side of it to decorate the yoke of the basket. For the panel, I heat-embossed a Recollections Christmas tree stamp in silver to make it an icy outdoor tree, and then of course added a few rhinestones. I made a snowman to frolic beside the elegant focal point because there's always room for a little whimsy. :o) I gave him garnet rhinestone buttons, a sparkly green scarf, and Peppermint Stick Trendy Twine to make him spiffy. I added a layer of Stardust for the ground above the poms... just because.
You may have noticed the sweet little cupcakes on the two shorter sides. This is a picnic basket after all, ready to be filled with treats of all kinds. I cut out and embossed some cupcakes, topping them with sparkly white 'snowy' frosting. I nestled them in a layer of Stardust. I made the ones on the outsides slightly angled because they're happy dancing. They love this winter picnic idea! ;)
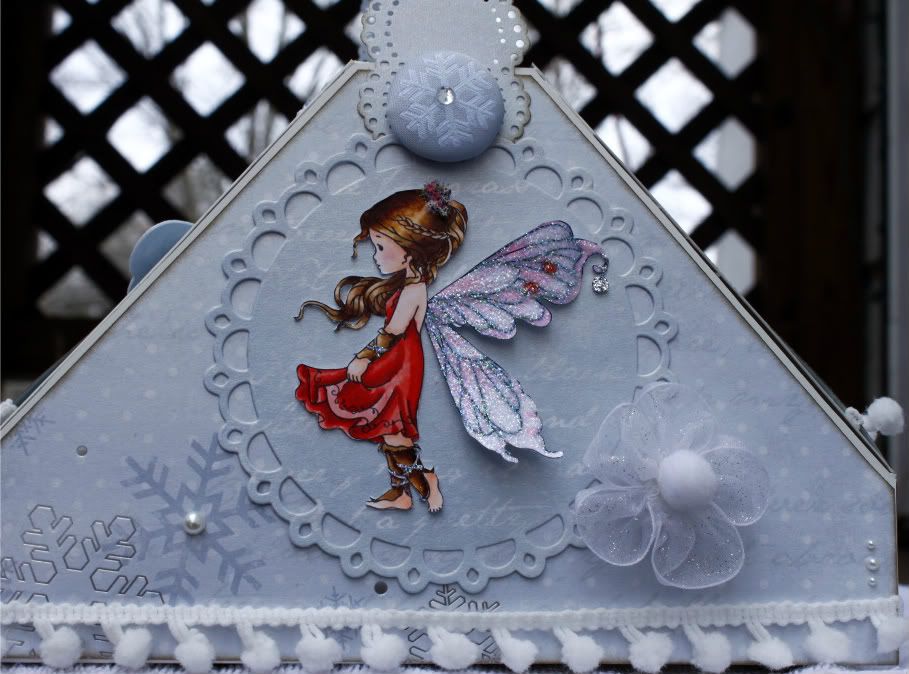
Lastly... a simple scene surrounding my angel of love.
Another Wee Stamps image, this is the
Silver Fairy, colored in red because she's bursting with love. Although she's technically a fairy, I always think of her as an angel. I made the flowers in her hair a textural bouquet of Flower Soft (I know, I know... I can't stop! Three times in two days of projects!). I sparklified her wings and placed her atop a coordinated Winter Whites paper. See the white scroll across the Spellbinders Picot Edge Circle and the silver scroll across the base? For this picnic basket, I like to think of those as our memories being journaled. :o) To complete this side, I made a flower out of sheer glitter ribbon and centered it with a snowball. Ha! That tickled me pink for some reason.
Regrettably I do not have interior pictures... but it will soon be stuffed with treats for my sweetheart and I to share. One of those treats just might make an appearance on my blog very soon! The two nearly-square panels are the lids and the big fabric buttons serve as the openers. Ideally you could use something like the recommended Tim Holtz hitch fasteners if you have them. The template for this basket can be found here:
Created By Silvie Z Picnic Basket Template. I (mostly) followed the instructions found in a Magnolia Ink magazine from this past summer. :o)
And now, are you ready to see Stephanie's fantastic stamp sets?! I am so excited to share these with you! I absolutely love them. :o)
With Love:
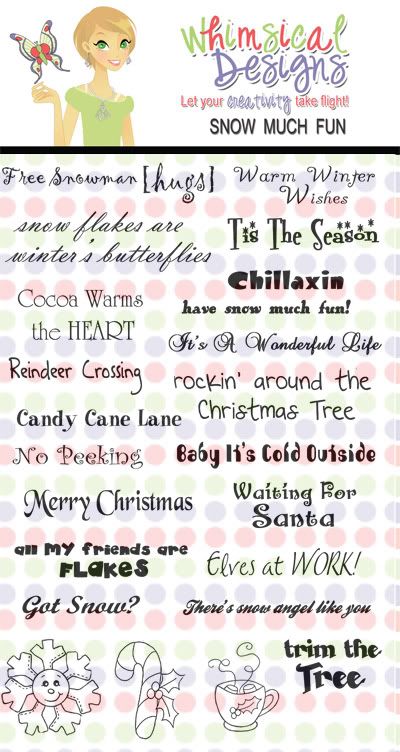
Snow Much Fun:
Whimsical Fun-Volume 1:
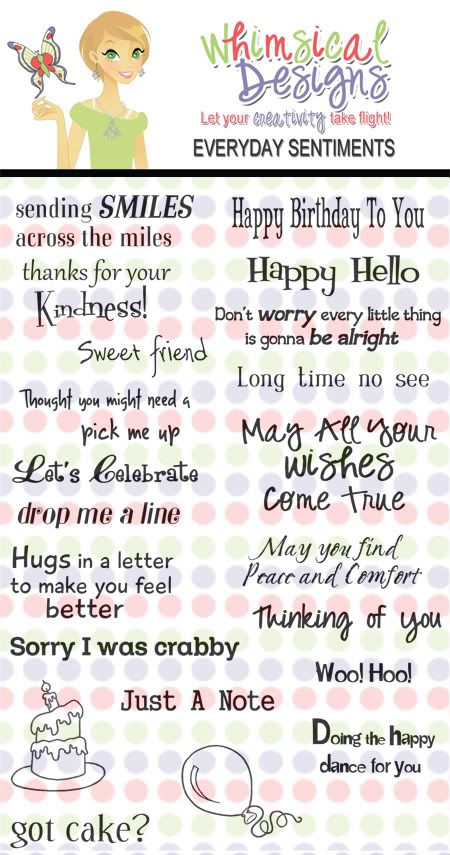
Everyday Sentiments:
Aren't they wonderful?! :o) I love the varied fonts, sizes, and the inclusion of sweet little images.
And now, because I'm all wrapped up in this festive atmosphere,
I am offering up some BLOG CANDY! One random winner (via random.org) will receive the
With Love set of Stephanie's new stamps! I am ecstatic to share these incredible stamps with you! It was difficult to decide which set, but my sappy side won out. ;)
To be eligible to win, simply leave me a comment on this post! I do not require that you become a follower, but of course would love it if you do! The more, the sparklier! I will select and announce the winner on Wednesday, December 7th! :o)
There is also a
GRAND PRIZE for this hop! :o)
One random winner will receive one Whimsical Designs stamp set of your choice, along with a fabulous prize pack that includes two Stampin' Up ink pads (Black and Chocolate Chip), one Stampin' Up medium sized acrylic stamp block, and one pack of Stampin' Up White Card Stock. In order to be eligible for the grand prize, you must be a follower of the
Whimsical Designs blog and leave a comment on all of the Whimsical Designers' blog hop projects. You have until Sunday night at midnight to leave your comments. :o)
For extra chances to win the grand prize:
1. Advertise the Whimsical Designs Stamp Release Blog Hop on Facebook and then go to the Whimsical Designs blog to leave a comment that you did.
2. Blog about the Whimsical Designs Stamp Release Blog Hop and leave a comment at the Whimsical Designs blog saying that you did.
You must include the links to the posts in your comments.
Thank you for playing along with us!
Your next stop is the marvelous Star at Star's Paper Passion. Happy whimsical hopping! :o)
**APRIL 13th EDIT**
Linking up in a Favorite Project challenge:
Getting Cricky with K Andrew
Key Recipe Components:
* Cricut cartridges: Create a Cricut, Gypsy Wanderings, Wall Decor and More
* Cuttlebug embossing folder: Swiss Dots
* Spellbinders Nestabilities: Labels Four, Picot Edge Circles
* Sentiment stamps:
Whimsical Designs Stamps (Whimsical Fun- Volume 1; With Love)
* Digi image stamps:
Wee Stamps (Silver Fairy; Winter Fairy); Colored with Copics
* Christmas tree and the yoke snowflake stamps: Recollections
* Paper: The Paper Company (Winter Whites Collection)
* Fabric Buttons: The Paper Company (Winter Whites Collection)
* Ribbon: American Crafts
* Handle Border Punch: Martha Stewart Doily Lace
* Miscellaneous: Flower Soft, iRock, Pearls (Recollections), Stickles