To pin my projects to Pinterest, hover over the picture and a Pin-it Button will magically appear.

Wednesday, January 25, 2012

Love is in the Air: Whimsical Wednesday Challenge!

Happy Wednesday, my sparkly friends! I hope your week has been marvelous. :o)

This week's Whimsical Wednesday challenge is all about love, since love is in the air! Create any love-themed home decor project to play along with us this week. It need not be celebrating Valentine's specifically, but simply love.

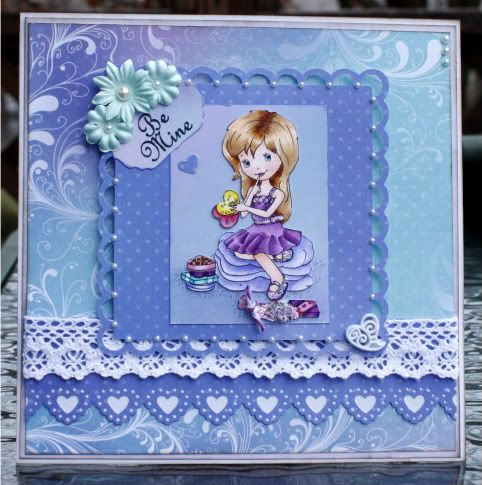
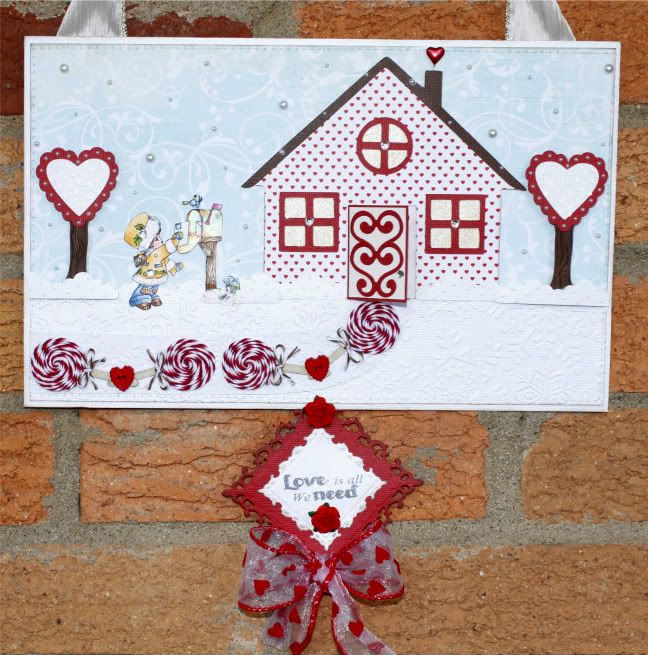
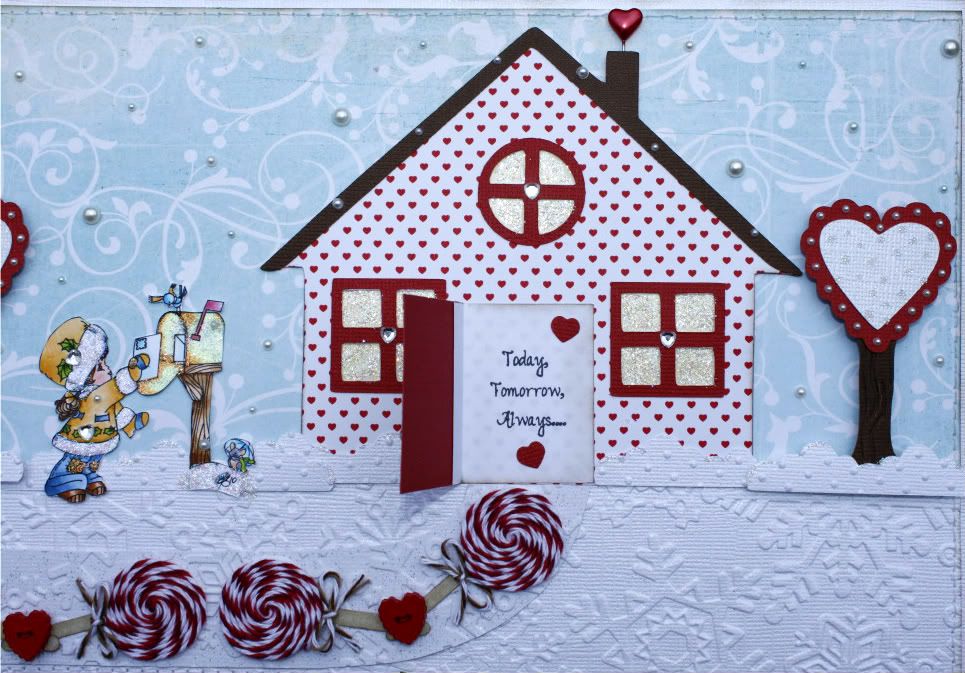
You know my sappy heart somersaulted with this one. I created a lovey-dovey wall hanging, which entails a winter scene in the beautiful land of love. We need a few pictures to properly capture the details and hidden surprise...

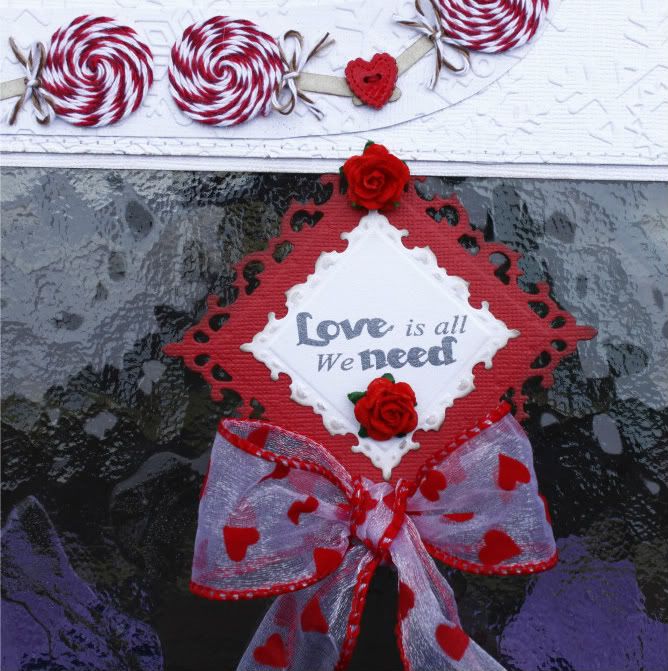
"Love is all we need"
Opening the door reveals a peek into the heart of the house: "Today, tomorrow, always..."
A closer look at one of the sugar cookie trees and the adorable Elisabeth Bell stamp (colored with Copics). Enlarging it may be necessary to see the little critters in the image.
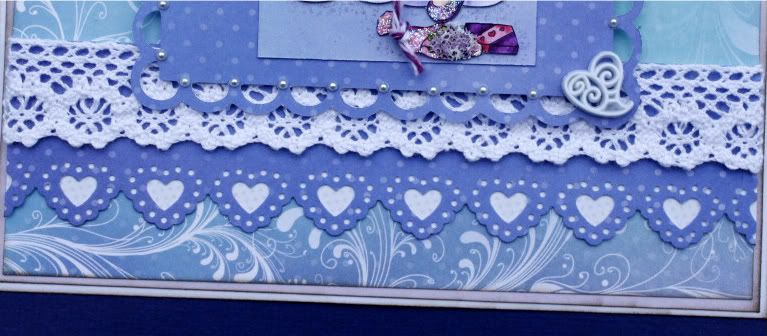
Lastly, the bottom of the wall hanging... showcasing the foundation of this loving household. (Excuse my fuzzy purple slippers that you can see through the glass tabletop. It was too windy to hang it up outside for long.)
Last summer I made a candyland card (found HERE), which I loved. I've been eager to make a new theme and decided love was the perfect inspiration, especially when expanded into a wall hanging. :o)

Now a little bit of info, some out of necessity since I remain photography challenged. As always, feel free to skip all of this... but I cannot resist sharing the intricacies of this fun little project for any who want to read it. :o) The storyline of this project is told within the details... it is all about incorporating love and sweetness into every facet of life. A life of love is the best life to live. :o)

The dollhouse is from Kate's ABC's, which I naturally made with heart paper to portray the type of home this is. The windows are pale yellow and coated in Star Dust to reflect the glorious warmth and sparkling love that reside within. Each window is centered with a rhinestone heart and I used a heart stick pin behind the chimney because this is bursting in all things sappy. The door's design was made with a heart Spellbinders die, which I tweaked a bit and doubled up. A rhinestone doorknob was vital. Truly.

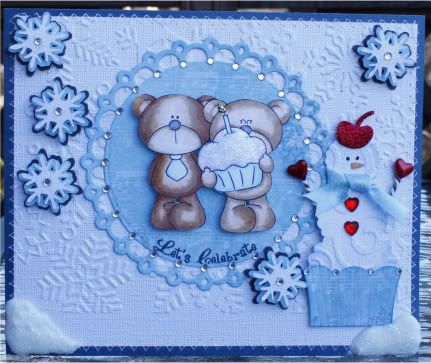
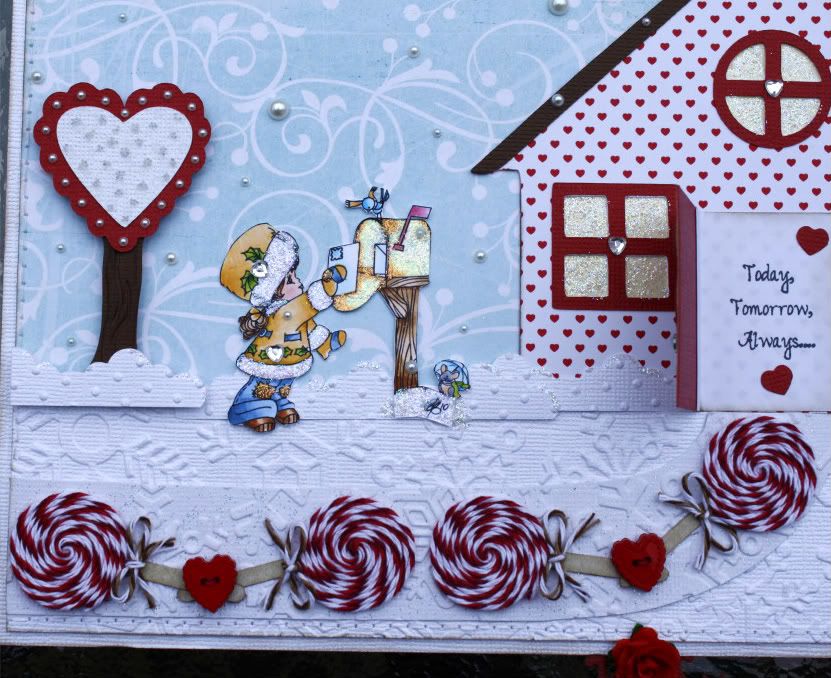
Those pop-dotted sweet trees are one of my favorite components. Designed to be sugar cookies, the interior of the hearts are dotted with "sugar" (via microbeads adhered with Glossy Accents) and the scalloped trim is "frosted" in red and dotted with "edible" white pearls. It makes me want to bake. The trunks were embossed with a folder that has a bird on a branch for added texture.

Honestly, I wish I had a "stone" pathway like this one for real. The lollipops are made with Peppermint Stick Trendy Twine, decorated with Chocolate Truffle Trendy Twine bows, and secured with heart buttons. None of the pictures show this, but the walkway is silver-speckled Core Couture paper to stand out from the regular snowflake-embossed ground. The Stickles-accented snowdrifts are embossed with dots for variety, with two sections being pop-dotted. I sprinkled the sky with three different sizes of pearls to reflect a pretty winter landscape. :o)

The sweet stamp is one of my favorites. I adore Elisabeth Bell images and have more new ones that I am anxious to use! So many blessings. This one is called Letters to Santa, but is obviously quite versatile. I covered the holly berries on her cute jacket and hat with heart rhinestones since love blossoms all around her (and her sweet birdie and mouse friends). I love this precious little girl, mailing sparkling letters to her loved ones. And I think I found my favorite Copic yellow combination, thanks to experimenting on her clothing. :o)

For the border I did my first ever straight-stitch with my new sewing machine. This entire project is sewn in love, so I needed to use stitching in some facet. The ribbon for hanging is really pretty, so it's unfortunate I cut it off in the main image. It is satiny with texture and trimmed in gold like our little sweetheart's golden patches on her clothes.

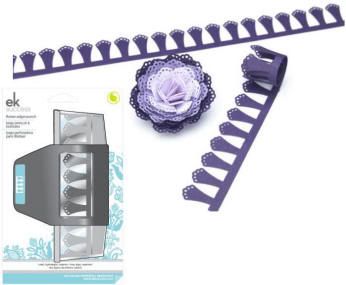
As stated with the final photograph, the bottom represents the foundation of this home and scene. I layered two Spellbinders Fleur de Lis dies to give a nice presence to the wonderful sentiment. I used two Wild Orchid Crafts roses for embellishment and added a puffy hearts bow, which I saved from a vase of flowers. Both of my Whimsical Designs sentiments are from Stephanie's beautiful With Love stamp set. Her stamps are such a joy to use.. they continue to give my creations the exact tones I strive for while designing them. :o)
If you read all this... you are beyond amazing and deserve a marshmallow-topped hot cocoa stir stick.

I hope you'll join us this week by linking up your love home decor project to the Whimsical Wednesday challenge post, where you'll also find information about this week's prize. I'm excited to see what you create! Be sure to flutter on over to the rest of the Whimsical Designers' blogs to see their fantastic projects. :o)

Thank you for stopping by! I wish you a day of love and sparkles. :o)

Challenges entered, because they're such fun:
 * Cooking with Cricut~ Anything but a card with Yellow and Polka Dots! (Swiss Dots embossing and dots in the pretty sky.. and pearls and microbeads are little dots, too!)
 * Crafty Catz~ Buttons and Bows
 * Fantabulous Cricut~ Label It! (Use a label other than a plain circle)
 * Getting Cricky~ Let it Snow (and include embossing)
 * Little Scrap Pieces~ Use Blue
 * Sentimental Sundays~ Use Die Cuts (No punches)

Key Recipe Ingredients:
 * Cricut cartridges: Elegant Edges (snowdrifts), Gypsy Wanderings, Kate's ABCs
 * Cuttlebug embossing folders: Swiss Dots, Winter Wonderland pack (tree trunks and snowflakes)
 * Spellbinders: Fanciful Holiday (for the hearts on the door), Fleur de Lis Squares Nestabilities
 * Sentiment stamps: Whimsical Designs~ With Love
 * Image stamp: Elisabeth Bell~ Letters to Santa
 * Copics: E25, E33, E50 (hair); E000, E00 (skin); Y21, Y23, Y26 (jacket, hat); B91, B95, B97 (jeans, jacket/mitten accents); YG23, YG25 (leaves on jacket); E33, E35, E50 (shoes and mailbox post); B00, B02 (bird); C3, YG23, B91, B95 (mouse/umbrella)
 * Paper: Basic Grey, Bazzill, Canvas Corp, Core'dinations
 * Roses: Wild Orchid Crafts
 * Heart stick pin: Little Yellow Bicycle
 * Buttons: Dress it Up (Love Potion)
 * Miscellaneous: Heart rhinestones/Microbeads/Pearls (all Recollections), Ribbon (stash), Stickles

Photobucket

Friday, January 20, 2012

I Feel the Love Sympathy Card

Happy Friday, my sweet friends! I hope your week has been crafty and happy. :o)

Today I have a very special card to share with you. As you well know, my favorite card to create each month is in support of Madison's incredible I Feel the Love project. Each month she selects an individual, group, or family in need of an extra dose of love and sunshine. We have the incredible privilege of making cards for the highlighted purpose... using our passion to bless someone in need. It's such a beautiful endeavor and I am so thankful to Madison for this cause.

This month's collection is to support a grieving family in Chile. Their beautiful little daughter, Olivia, passed away just before Christmas at only 4.5 months old. A twin, she weighed merely 2.2 lbs at birth. The spunky little baby battled through surgeries, including two open-heart surgeries. Her life expectancy was two weeks, but this sweetheart fought for over four months. It is heartbreaking to think what her loved ones left behind are enduring.

I decided to make this card a peaceful scene of nature's beauty, enhanced by beautiful Kaisercraft paper and Cindy Loo cuts. I made it a touch whimsical in hopes it will also make Olivia's young brother and sisters smile, too.

(Interior sentiment)
"May you find peace and comfort"... a Whimsical Designs~ Everyday Sentiments stamp.
This card was hard... how do you pack enough love into a tiny card for grieving people you'll never meet? The two purple butterflies on the front, which are the same patterned paper as the frame, are each carrying messages. Most likely they won't be realized, but hopefully they'll be felt. The one on the left has two tiny hearts down the center of the body, carrying the Lord's healing love. The other one has its beautiful pearl right in the center, bringing the divine light that is needed to arise from their current darkness. I covered a few of the flowers in droplets of Star Dust because I am hoping the shimmering accents will bring a matching twinkle to their eyes, if only for a moment.

I embossed the leaves for additional texture and centered the frame's flower with a sweet little button. Perhaps unseen in the main picture is that I added some Glossy Accents to the leaves and flower petals:
Those are dew drops, representing that this is a brand new day... a day to grow stronger, to receive more grace to heal, and to let Olivia inspire them to live a life of joy. The interior paper is polka-dotted to match the embossing and flower paper on the front, cut out with a Spellbinders Nestie that coordinated pretty well to the card shape. The merged trail of the sentiment-hugging butterflies forms a heart, in dire hope that the Cappelluti family feels an outpouring of love from this teeny tiny card.

And now that I'm teary again, I'll simply end this here so I can leave you all more love on your projects. There is still a little time remaining to contribute to I Feel the Love this month, so I hope you whip up a thinking of you or sympathy card. This beautiful family needs it.

Thank you for fluttering on by today, my dear friends. I am so thankful for you! Have a blessed weekend! :o)

Key Recipe Components:
 * Cricut cartridge: Cindy Loo
 * Cuttlebug embossing folder: Swiss Dots
 * Spellbinders Nestabilities: Labels Four
 * Sentiment stamp: Whimsical Designs~ Everyday Sentiments
 * Paper: Kaisercraft, Papertrey Ink
 * Butterfly punches: Fiskars (small ones), Martha Stewart Small Monarch
 * Lace ribbon: American Crafts
 * Button: My Mind's Eye Tres Jolie
 * Miscellaneous: Glossy Accents; Pearls (Recollections); Stickles

Photobucket

Wednesday, January 18, 2012

Anything Goes: Whimsical Wednesday Challenge!

Happy Wednesday, my sweet friends! I hope your week has been beautiful. :o)

This week's Whimsical Wednesday challenge is Anything Goes! Any style, any theme... link up any type of card, layout, or project that you want to create. :o) Before I share my card with you, there is some Whimsical news!

Whimsical Designs is having a Design Team Call for the upcoming term. Anyone interested in becoming a designer should click on the contact button at the Whimsical Designs Blog and e-mail Stephanie for more information. :o)

My card for this week's challenge is all about love and hearts... two of my favorite things!

"Be Mine"

A close-up to see the Flower Soft I used for the bouquet and the cute polka dot paper beneath the heart border. (You probably need to enlarge it anyway. Oops.)

My card is inspired by the incredible love my boyfriend gives me every single day of the year. That sweet girl is surrounded by little blessings, just as he constantly reminds me how loved I am via little (and big) gestures. The hearts she's holding very much symbolize how we hold each other's hearts... and how our hearts are guided to and by our Lord. He is love and my sweetheart and I share that divine love He has poured into our hearts. (The yellow one is like a burst of sunshiny love.) Recently another very scary event occurred within my family... and it took all the love and trust in God I could muster up to get through. As always, love never fails. :o) He is healthier than ever now. I just need to steady my nerves that are a wee bit shot after two traumatic situations within a few short weeks. God took care of us and this sweet card is all about celebrating love in the little things. :o)

The papers are some of my absolute favorites from Kaisercraft. The colors and patterns are both whimsical and elegant at the same time. :o) The adorable digi stamp I used is another image from The Paper Shelter, which I seemingly cannot get enough of. This one is Be My Valentine and I could hardly wait to color her with my Copics. (And she's currently on sale for Valentine's Day!) After covering the design on the top part of her dress, the straps, her belt, and shoes with Star Dust, I used my Atyou Spica Lilac glitter pen to dot a shadow of sparkles around her. Love makes us sparkle and shine, after all. :o) I sponged a shimmery tiny carpet for her, but it doesn't show up well on camera. Instead of coloring the flowers, I used a layer of ivory and lavender Flower Soft. After sparklifying the tissue paper holding them, I tied it with Grape Fizz Trendy Twine. I wanted to layer this in love, so I added that beautiful lacy heart border and topped it with some lace.

A few more tiny inspirations: While a lot of us often do multi-layer mats, I view this card to be like a picture frame. The itty bitty pearls hugging the scallop trim? They each represent a different special memory of a shared moment between me and my sweetheart. (Despite being girly, this may still go to him... he most loves when I use the products that make my heart sing. And that means sparkly, girly, and flourishy. He is a treasure!) The swirled heart embellishment nestled within the pearls of memories dictates how we are secure in love. I also love that it coordinates with the flourishy paper. :o)The dotted paper I cut to layer beneath the heart border punch are like little droplets of love sprinkled throughout our lives. They're everywhere, even when we initially don't notice them. :o)

Tying everything together is the wonderful Whimsical Designs "Be Mine" sentiment, from the incredible With Love stamp set. I surrounded it with precious Primas and centered them with pearls to heighten the sappy love factor. :o) Here's a peek at the entire set.. it's easy to see why I love and use it so often! :o)
I hope you'll join us this week by linking up your Anything Goes project to the Whimsical Wednesday challenge post, where you'll also find information about this week's prize. I look forward to seeing your creations! Thank you for visiting and I wish you a day bursting with love and sparkles. :o)

Challenges entered:
 * Celebrate the Occasion~ Any Occasion (must use polka dots)
 * Docerela Creations (my super sweet friend)~ Valentine's Theme
 * Little Scrap Pieces~ Anything Goes!

Key Recipe Components:
 * Cricut cartridge: Elegant Edges
 * Spellbinders Nestabilities: Labels Four
 * Sentiment stamp: Whimsical Designs~ With Love
 * Image stamp: The Paper Shelter~ Be My Valentine
 * Coloring medium: Copics
 * Paper: DCWV, Kaisercraft
 * Border Punch: Martha Stewart Lace Heart Edge Punch
 * Lace ribbon: American Crafts
 * Twine: Trendy Twine (Grape Fizz)
 * Pearls: Recollections
 * Flowers: Prima
 * Miscellaneous: Flower Soft; Heart embellishment (Dress it Up~ Love Potion); Stickles

Photobucket

Wednesday, January 11, 2012

Let's Get Sketchy: Whimsical Wednesday Challenge!

Happy Wednesday, my talented friends! Did you know that you make me smile? It's true! :o)

This week's Whimsical Wednesday challenge is a sketch challenge! Join us this week by creating a card inspired by this wonderful sketch, created by our very own Nanne:
Our wonderful sponsor this week is Stamp Fairy. When scrolling through her adorable images, I instantly gravitated to the cupcakes. Hardly shocking, I know. Inspired by Nanne's sketch and this precious digi (Lenny Cupcakes 3), I made a whimsical birthday card... complete with a cupcake snowman.

"Let's Celebrate"
What better way to celebrate than with cupcakes? These sweet little teddies used the extra frosting to whip up a snowman. The snowman's trim is sponged with DewDrop Brilliance ink because the silly bears tinted the swirling 'frosting' to be an icy blue. For the scarf I used my new light blue shiny ribbon with white polka dots to resemble snow flurries. His arms are heart stick pins, wrapped in Chocolate Truffle Trendy Twine to mimic twigs. He's just bursting with birthday love from his heart mittens to his heart buttons.. and of course a super sparkly cherry hat. His wrapper is scored to make it look like an actual cupcake wrapper.

The teddies' background and the cupcake wrapper are from the same paper, with pretty sheet music and snowflakes dancing in honor of a winter birthday (and a snowy Happy Birthday song). The tie and cupcake wrapper in the digi are shades of light blue, which may be washed out in this photograph. The frosting is coated in Stardust and the candle flame in Gold Stickles. A smattering of sparkles encircle the happy teddies to enhance their winter celebration.

I made the snowflakes three layers, topped with a sparkle, with each layer pop-dotted for dimension. I sewed around the embossed pearlescent paper and added a couple dollops of SnowTex to the corners for additional textural elements. The fabulous Whimsical Designs sentiment is from Stephanie's Everyday Sentiments stamp set. Isn't it wonderful? :o)

I hope you'll join us this week by creating a card inspired by Nanne's marvelous sketch and linking it up to the Whimsical Wednesday challenge post. I look forward to seeing your interpretations! For one lucky winner, the Stamp Fairy is generously donating a gift certificate for $10.00 worth of digis from her shop. Thank you!
Be sure to frolic on over to the rest of the Whimsical Designers' blogs to see their marvelous creations. :o) Thank you for stopping by and I hope you have a whimsical day! :o)

Key Recipe Components:
 * Cricut cartridges: Elegant Edges, Gypsy Wanderings
 * Cuttlebug embossing folders: D'vine swirls, Snowflakes from Winter Wonderland pack
 * Spellbinders Nestabilities: Picot Edge Circles
 * Digi image stamp: Stamp Fairy~ Lenny Cupcakes 3
 * Paper: Core'dinations, DCWV, K and Company
 * Heart stick pins: Little Yellow Bicycle
 * Ribbon: American Crafts
 * Twine: Trendy Twine (Chocolate Truffle)
 * Miscellaneous: Heart Rhinestones (Recollections); iRock; SnowTex; Stickles

Photobucket

Sunday, January 8, 2012

So Super Sweet Friendship Card

Happy Sunday, my crafty friends! I hope your weekend has been wonderful. :o)

I wanted to play along in a couple of my favorite challenges, so I made a friendship card for someone who needs an extra dose of love. (Forgive the darker first image. I was having issues! The close-up shows the actual shades better.)

"So Super Sweet"
Love and sweetness are sparkly... so I covered the steam in microbeads. (You may need to enlarge it to really see them.)
The pretty little butterflies are on a sparkly path, sprinkling the hot cocoa with love. I mixed in a few rhinestone hearts along the saucer and top of the cup as a reminder that my heart is with her and that she is amazing. My sweetheart told me to order some new paper as a gift and it arrived in the mail Friday! I wasted no time putting this pad to use. I truly love this First Edition~ Isabelle paper... it makes me swoon. (And it's sparkly.) Brown and pink is one of my favorite color combinations and I thought these patterns would work well for a feminine hot chocolate card. My cut is technically a teacup... but really, hot cocoa belongs everywhere.

For some additional textural elements, I embossed the brown layer, lined the butterfly bodies with pearls, and added a puffy bow of crinkle ribbon and Chocolate Truffle Trendy Twine. I used the same paper for the teacup and sentiment tag because I just couldn't put it down. The marvelous "So Super Sweet" sentiment is a Whimsical Designs stamp, from Stephanie's Whimsical Fun~ Volume 1 set. I can't even tell you how much fun I've been having with her stamps. They are a joy to use. :o) Hopefully this little card will make my friend's heart smile extra brightly. :o)

Challenges entered:
 * Cooking with Cricut~ Something new! (All three patterned papers)
 * Fantabulous Cricut~ Warming Up with Hot Cocoa (Use a cup, chocolate, or the color brown)

Thank you for visiting me today and for being such fantastic bloggy pals! :o)

Key Recipe Components:
 * Cricut cartridges: Elegant Edges, Wall Decor and More
 * Cuttlebug embossing folder: Swiss Dots
 * Spellbinders Nestabilities: Labels Four
 * Stamp: Whimsical Designs~ Whimsical Fun, Volume 1
 * Paper: Core'dinations, First Edition Paper~ Isabelle
 * Butterfly Punch: Martha Stewart Small Monarch
 * Crinkle Ribbon: Prairie Bird Boutique
 * Twine: Trendy Twine
 * Button: My Mind's Eye Tres Jolie
 * Miscellaneous: iRock; Recollections heart rhinestones, microbeads, and pearls

Photobucket

Wednesday, January 4, 2012

On the Edge: Whimsical Wednesday Challenge!

Happy Wednesday, my sweet friends! I hope everyone had a wonderful New Years weekend! :o)

This week's Whimsical Wednesday challenge is: On the Edge! To play along with us this week, your card or project must include a border. :o)

This card may be simplistic, but its purpose and inspiration are quite marvelous. I'll tell you why at the end for those of you who read through my chatter! Believe it or not, I try to minimize jibber jabber on DT posts... but this story must be included.

"Take life by the hand and dance"
Can you imagine my fluttery heart when I first saw this sentiment of Stephanie's? My absolute favorite Whimsical Designs sentiment, from the versatile Whimsical Fun~ Volume 1 set. It pairs perfectly with this precious digi stamp from The Paper Shelter, appropriately titled The Lovely Ballerina. I adore her so much that I purchased these beautiful rosy Copics specifically for her first costume. Her hair is a new color combo for me, which is not as auburn/reddish as it appears in this picture. The border requirement for this card is one of my favorite parts. My sweet mom surprised me with a sewing machine for Christmas... I am still in shock! She found it funny that my first project with it was on paper, not fabric! Hehe. I used the classically beautiful zig zag border stitch to frame the design. I have always loved how sewing looks on paper crafts, so I am elated to now have the ability. :o) This card is bursting with newness, from the new sewing technique to my new tulle, heart stick pin, and Stardusted flower. :o)

The snowflakes that suddenly began to fall prevented me from accurately capturing the main pink papers. I was a bit rushed and the sky was playing tricks on me. The diamond pattern is textural and sparkly, which looks so pretty in person. The white script on various sections makes me think of written ballet choreography or perhaps memories from a cherished day of dance. The mat behind the dancer has a beautiful tonal floral design over half of it, which matches the sentiment's mat. (Making a lightbox is a top priority this month! I'm pretty sure I said that last month, too.)

And now, the story of this little card... followed by the event that it celebrates. Our sweet dancer is delicately sparklified, with just the tutu bodice and lacy trims sprinkled with Stardust. To give her a bit of an actual surface, I dotted a little shadow and covered it in Stardust because she's leaving a trail of sparkles as she dances to her heart's content. The rhinestones on the white pearlescent cardstock are designed to be sparkling raindrops because she is dancing through her storms... she is outright defying them. The raindrops gradually get smaller the further they fall and end with a heart to signify God's love raining down upon us as we fight through trials and tribulations. He showers us with His perfect love, enabling us to be strong. The tulle's purpose? Not only because it's used for tutus, but also because it's like the entire card is wrapped in a giant tutu hug. Tulle= Love.

Aside from the story it tells, there's also an event it replicates. My mom being home for Christmas was certainly a gift. But guess what? I received another amazing gift. I danced on Christmas night. :o) It wasn't for an entire song... but for a few beautiful seconds, I danced along the brick and stone path alongside my home, surrounded by Christmas lights and a crisp winter breeze. A treasured moment in my beloved and missed dance world. I was wobbly, achy, and a bit unsteady, but filled with so much joy that I no longer care that my spine was too locked up to permit a sky-high extension to complete my tour jete. What I currently lack in technique is more than made up for in heart. Divine love rained down upon me.. just like it has for this entire injured journey. I have every confidence that this is the year I'll return to the dance studio. That Christmas blessing was a tiny glimpse and this little card is a celebration of it. :o)

I hope you'll join us this week by linking up your On the Edge card or project to the Whimsical Wednesday challenge post! I look forward to seeing your marvelous work! This week's generous sponsor is Crop Stop, who is donating an EK Success Edge Punch called Doily Petals. Have you seen this system to create flowers from an edge punch? It looks fabulous!
Be sure to pirouette on over to the rest of the Whimsical Designers' blogs to see their fantastic projects! Thank you for visiting me today. I hope you have a sparkly happy day! :o)

Challenges entered:
 * Frosted Designs~ Something New! (Machine sewing, tulle, stick pin, flower, glitter paper)
 * The Paper Shelter~ Anything Goes

Key Recipe Components:
 * Spellbinders Nestabilities: Labels Four
 * Sentiment stamp: Whimsical Designs~ Whimsical Fun, Volume 1
 * Digi stamp: The Paper Shelter~ The Lovely Ballerina
 * Copics: E0000, E000, E00 (skin); YR20, YR21, YR24, E35 (hair); R81, R83, R85 (costume); R10 (tights)
 * Paper: Best Creation, Core'dinations, DCWV, stash
 * Flower: Recollections
 * Heart Stick Pin: Little Yellow Bicycle
 * Miscellaneous: iRock (round rhinestones); Heart rhinestones (Recollections); Stickles; Tulle

Photobucket
Related Posts Plugin for WordPress, Blogger...
Blogging tips