To pin my projects to Pinterest, hover over the picture and a Pin-it Button will magically appear.
Showing posts with label Sweet Tooth Boxes. Show all posts

Sunday, May 27, 2012

Altered Recipe Box

Happy Sunday, my dear friends! I hope everyone is having a beautiful weekend. :o)

Yesterday I decided to ignore my throbbing, achy finger to try and make a project that's been on my cupcakey heart. By the time I was done designing and coloring, it hurt like mad to even take pictures! Oops. No crafting the rest of the holiday weekend for me...

This was such a fun project. One of the challenges I love participating in required the use of my favorite Elisabeth Bell stamp that I own, so I had no choice but to color my beloved Cinnamon Sugar again! Woohoo! Although my ten-year-old recipe box from the store was pretty, I wanted to alter it into a crafty creation. :o)
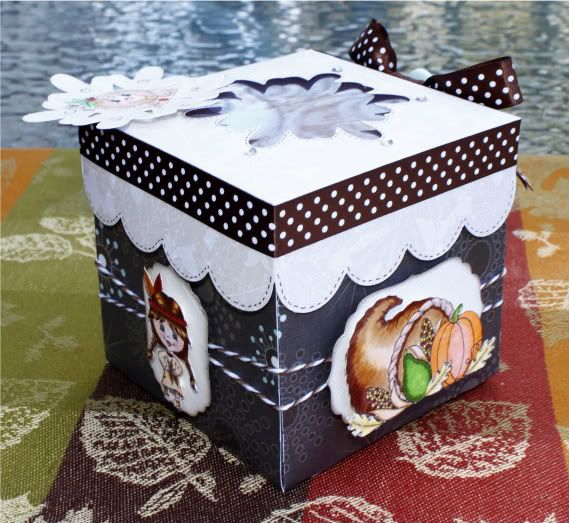
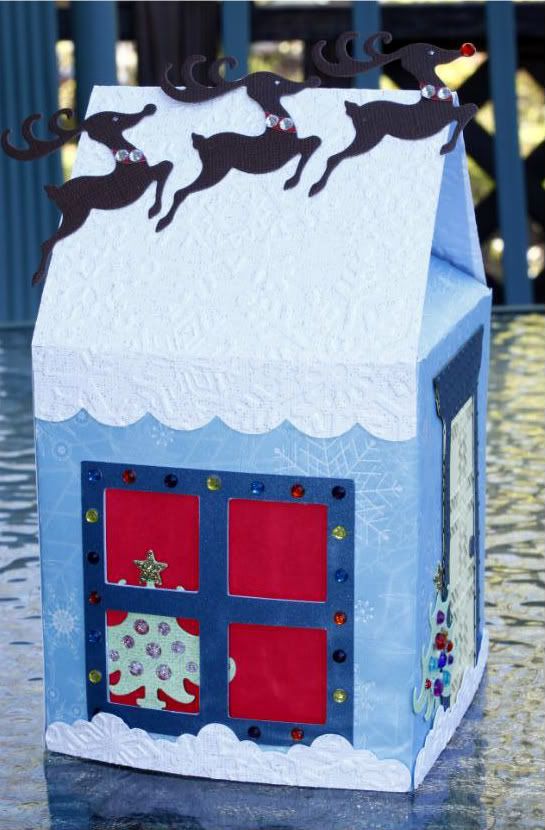
I turned it into a house! Here's a slightly better look at the front, despite cutting off the cute chimney with the heart stick-pin:
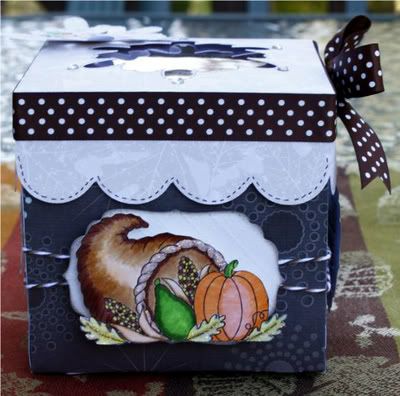
Side view:
The roof and chimney structures were made with 300gsm heavyweight cardstock. I used Elegant Edges to create scallop borders for my chocolate-shingled roof. The white portion directly beneath is a confectionery delight, with pom pom ribbon serving as dollops of freshly whipped cream and two sizes of pearls as white nonpareils. Beneath the recipe box opening, I created a pretty summery scene, starring our sweet Cinnamon Sugar. :o) The patterned papers are from the My Mind's Eye Blush collection. (Naturally the doorknob is a chocolate heart.) The fence is from Wall Decor and More, which I lightly inked with Walnut Stain so it would stand out a bit. I adhered Wild Orchid Crafts roses to the fence, trimmed in Star Dust.

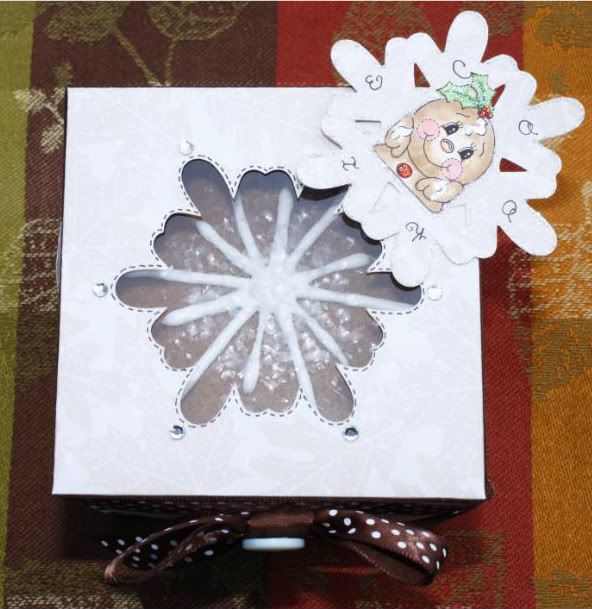
Our lovely baker is colored up in rosy pinks and aquas, with matching rhinestones on her apron and garnet rhinestones as the cherries atop her cupcakes. The heart puffing out of the chimney reflects that she bakes with love, but there is also another indicator. As you walk up to the door, there's a tower of love offering up a sweet cupcake, secured with a pink satin ribbon. :o) The hearts are a coordinating light pink filigree design, also from Blush. I cut the grass with scissors for some fringey texture.

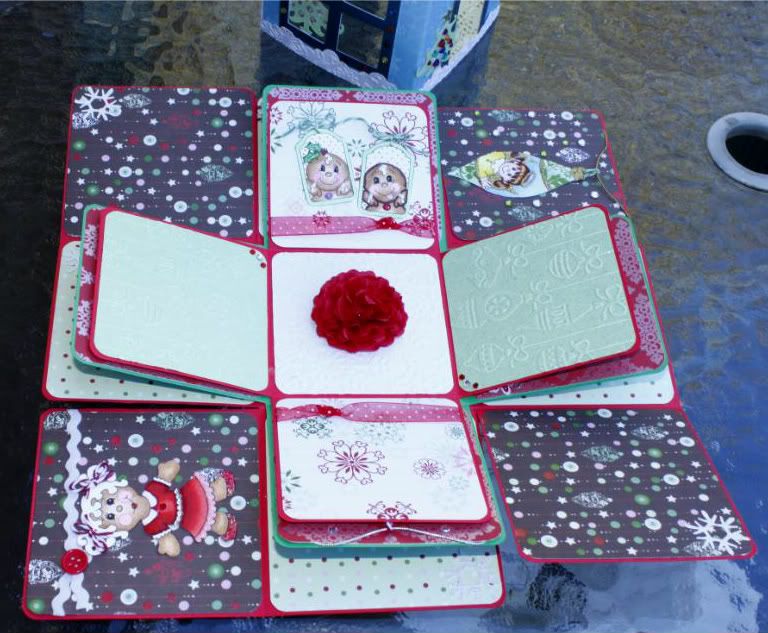
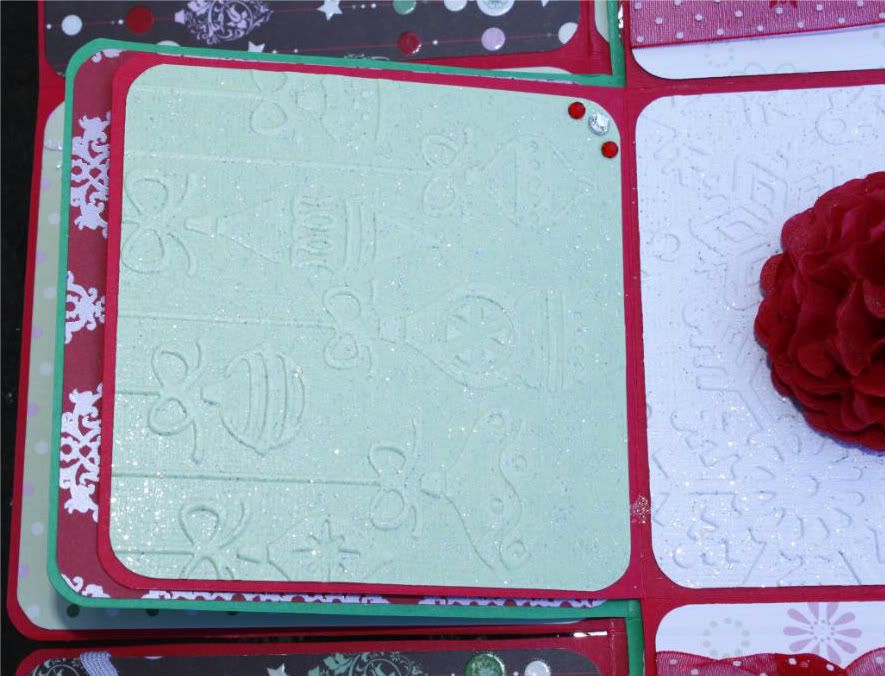
The side has a circular window from Sweet Tooth Boxes, which I backed with SEI heart paper... perfectly appropriate since every recipe within is used to shower my friends and family with sappy love. Instead of roses, I used cheery yellow Wild Orchid Crafts sweetheart blossoms as bursts of sunshine. I hadn't altered an item in a very long time, so it was a wonderful change of pace and such fun. I hope you like it, too! :o)

Challenges entered:
 * A Gem of a Challenge~ Photo Inspiration
 * Cooking With Cricut~ Pink and Satin
 * D.L. Art~ Anything Goes
 * Docerela Creations~ Scrap What You Love (baking!)
 * Elphine House Australia~ Alter It (with your favorite Elisabeth Bell stamp)

Thank you for dancing on by! I wish you all a sparkly day of hugs and blessings. :o)

Wednesday, February 8, 2012

Colors of Love: Whimsical Wednesday Challenge!

Happy Wednesday, my sweet friends! I hope your week is fluttering along beautifully! :o)

This week's Whimsical Wednesday challenge is all about the colors of love! Include the colors red, white, and a third color of your choice on your LO, card, or project to play along with us!

I decided to make a cupcake box this week! I hadn't made one in far too long and it was perfect timing to celebrate a loved one's birthday. :o)

"Sprinkled with love"
Cut from Sweet Tooth Boxes, I made a sweet little cupcake box swirling with love. The red flourish paper is from Echo Park (corrected from my original post date... not sure why I thought it was MME!) and I kept waiting for the perfect project to use it. Who doesn't love a swirly cupcake wrapper? Since this project is sprinkled with love, I used mini-hearts paper for the frosting. I pleated two layers of crinkle ribbon and attached them to the top of the base to fancy it up... plus, I like how it somewhat resembles fluffy frosting. :o)

The actual cut is topped with a cherry, with slits to make it 3D. I wanted to top mine with love, so I cut out two Gypsy Wanderings hearts instead and slid them together. (Sadly I didn't photograph this at the proper angle due to rushing. I meant to show the hearts more accurately.) The red heart layers are embossed and they're centered with a tonal-flourished pale yellow paper. Why yellow as my third color choice? Because the most beautiful hearts are bursting with sunshine. I surrounded them with Wild Orchid Crafts roses to replicate the pretty flowers on fancy celebratory cakes. (I honestly do not know why I couldn't properly photograph this project.)

For the tag, I wanted to incorporate additional embossed hearts... you can't have too much love, especially when a cupcake is involved. I cut out two more (the same as the topper) and layered them to be cascading love. I secured them with Peppermint Stick Trendy Twine and a sweet heart button. I had to force myself to refrain from adding more pretties throughout.. after all, this needed to be functional! While simple, it was very much loved by the one who inspired it. :o) The Sprinkled with love Whimsical Designs sentiment is one of my favorites, found in Stephanie's With Love stamp set. A must-have for all of my sappy creations. :o)

Regarding the contents of this box, after a couple of months away due to family situations, I am ecstatic that I finally returned to the kitchen! Sweet Saturday returns with a flourish, so check back this weekend if you'd like to see the delicious treat. Though not topped with red hearts, it's topped with a different form of love: Oreo whipped cream frosting. The family felt the love. ;)

The entire stamp set that I seem to grab with most every project of late:

I hope you'll join us this week by linking up your Colors of Love project to the Whimsical Wednesday challenge post, where you'll also find information on this week's prize. I am excited to see your work. :o) Be sure to flutter on over to the rest of the Whimsical Designers' blogs to see their inspiring projects!

Thank you for visiting me today! I wish you a day sparkling with love and cupcakes. :o)

Challenge entered:
 * My Craft Spot~ Valentine's! (Valentine's card or treat packaging)
 * My Sheri Crafts~ Love Is In the Air (At least two hearts)
 * Sentimental Sundays~ Feel the LOVE (Anything lovey!)

Key Recipe Components:
 * Cricut cartridges: Gypsy Wanderings, Sweet Tooth Boxes
 * Cuttlebug embossing folder: Swiss Dots
 * Sentiment stamp: Whimsical Designs~ With Love
 * Paper: Bazzill, Canvas Corp, Echo Park
 * Crinkle Ribbon: Prairie Bird Boutique
 * Twine: Peppermint Stick Trendy Twine
 * Flowers: Wild Orchid Crafts
 * Button: Dress it Up~ Love Potion

Photobucket

Thursday, December 1, 2011

Whimsical Designs Stamp Sneak Peek!

Happy Thursday, my dear friends! :o)

Welcome to the Whimsical Designs Sneak Peek Day 1! In case you've not yet heard, Stephanie of Whimsical Designs has a new line of stamps coming out! Today all of the Whimsical Designers will be sharing sneak peeks of two stamp sets, and then tomorrow morning we'll be giving you sneak peeks of the other two sets. Tomorrow night at 7:00pm EST is the stamp reveal blog hop! All of the stamp sets will be available for purchase on Stephanie's blog in her new shop.

For my project, I used Stephanie's stamp set With Love. (How perfect is that for my sappy self?) Not only do I love the stamps in general, but I love the versatility. They certainly are not solely for card-making. I made a 'gingerbread house' out of a Sweet Tooth Boxes house, which will be filled with recipe cards and given as a gift. Given the nature, I need a few pictures to show you its entirety. :o)

(Side note: Forgive the frustratingly dark photos. I was forced to battle indoor photography... I WILL be making a light box next week.)
"Sprinkled with Love" (and a sweet cupcake)
Stephanie's sweet stamps inspired me to create a gingerbread house filled with recipes that are sprinkled with love. Just like the window boxes filled with gumdrop flowers... the extra sparkly tops I gave them are those heartfelt lovey dovey sprinkles. And the twine lollipops I made with gorgeous Trendy Twine. I used Peppermint Stick, which is perfect for a confection swirled with love. I chose this sparkly and fun Bo Bunny paper particularly for this project, as the colors made me think of a gingerbread house covered in snowflakes. I used sparkling Core Couture paper for the snowy bottom (since this is a REAL gingerbread house, after all), embossed it with snowflakes, and inked the trim in sparkling blue. Naturally this house has a heart button for the knob on the embossed door... it is secured in love! (I'm like a walking marshmallow. Endless sugar shock from all my sappiness.)

See that super cute gingerbread sweetheart? She's a digi stamp (Gingerbread Cutie) designed by my friend Cindy of Cindy's Scraptastic Designs. I had colored her recently, but needed to do it again. I love her! This time I dressed her in my Copic wintry blues and gave her a belt of pearls (reminiscent of dollops of icing) and Blueberry Trendy Twine for hair bows. She is appropriately frolicking in the snow alongside the all-important sentiment. Nestled inside a heart is the key to this box's contents. Everything is indeed sprinkled with love. Every recipe that will be inside and every hour spent on decorating the exterior. My favorite stamps are the ones that inspire me.. the ones that you don't use because it happens to fit, but you use because IT filled your heart with a creative vision. That is the case with these fabulous Whimsical Designs stamps. (And the cute cupcake is her stamp, too! It's vintagey and aged in appearance.. cupcakes are a classic! Get it? Faded with time, but still decadent. And chocolatey, since it's brown.) To complete the main scene, I shaped two vintage red and green candy canes into a heart. It just felt right.

Not captured well is the window interior. It is a beautiful golden scene, like the warm glow of a fireplace... and a festive metallic Christmas tree. And one final note on this creation: The filigree brown backdrop of the other windows and the roof... that's all fabulous chocolate. I would totally live in a house with a chocolate roof laced with icing. I used ric-rac ribbon to emulate the icing, but once again had little luck adhering it. Is it even possible?! I've tried everything. I wanted to sew it, but that's a little challenging without a sewing machine. And all my needles are covered in Stickles and Glossy Accents from jammed nozzles.

Who's ready for some blog candy?! All of the designers will be giving away one stamp set for the sneak peek week. I am giving away the With Love set, which I used today! In addition, Stephanie is giving away the entire release to one person. That is a total of 11 prizes! :o)

In order to be eligible for the prizes above, you must leave a comment on all of the designers' blogs on both sneak peek days.

Even the header cards are adorable! See?
Want two extra chances to win? Post about the two-day Sneak Peek and the Stamp Release on:
1. Facebook~ Then return to the Whimsical Designs blog and leave a comment under the sneak peek post, saying that you did.
2. Your Blog~ Then return to the Whimsical Designs blog and leave a comment saying you did.

You will have until Friday, December 2nd, at 5:00pm EST to leave a comment on the blogs. All winners will be announced during the Stamp Release blog hop.

Be sure to flutter on over to the rest of the Designers' blogs to see their fabulous creations using Stephanie's wonderful stamps. :o) Thank you for visiting me! Have a sparkly day. :o)

Key Recipe Components:
 * Cricut cartridge: Sweet Tooth Boxes
 * Cuttlebug embossing folders: Snowflakes and Plaid from Winter Wonderland pack
 * Sentiment stamp: Whimsical Designs (With Love)
 * Coloring medium: Copics
 * Paper: Bo Bunny, Core'dinations, K and Company, Recollections
 * Twine: Trendy Twine

Photobucket

Monday, November 7, 2011

Scraptastic Monday Challenge: Thanksgiving Gift Box or Bag! (And Blog Candy Winner!)

Happy Monday, my sweet friends! I hope your weekend was crafty and beautiful. :o)

Today's post is packed with fun! Not only is it the very first challenge for Cindy's Scraptastic Designs, but after my project you'll find my blog candy winner from the blog hop AND a delicious treat! Whew! :o)

Challenge #1 is to decorate a Thanksgiving-themed gift bag or box, which must include a tag, stitching, and a button. It is NOT a requirement to use one of Cindy's images or any digital stamp to play along with us. Simply follow the theme by any means you desire. The more who join us, the merrier! :o)

For my project, I leapt at the chance to use the Sweet Tooth Boxes cartridge again! One of my favorite gifts to give for the holidays is baked goods. There's something innately special about that, don't you think? So I made a treat box for my sweet boyfriend. :o)

A couple close-ups before I show you the rest of the box! First, Cindy's digi stamp, Thanksgiving Friend:
Another new personal favorite of mine from Cindy's designs, Horn of Plenty:
There's a teeny tiny story going on here (I'll tell you in a sec), which made this extra fun. In the spirit of Thanksgiving, this was the perfect chance to remind my sweetheart that I'm thankful for him. So I typed up a sentiment that was fitting for us and this particular project. 
He will feel honored being mentioned in the same breath as cookies! ;) I used beautiful quilted paper for all of the mats on this box for some added texture. The brown base is from Cloud 9, which I used for this because the design makes me think of chocolate or gingerbread snowflakes. (There really should be such a thing.) The box top is an ivory fall leaves design, reminiscent of a gently frosted landscape. :o) Just like Thanksgiving! The Chocolate Truffle Trendy Twine is one of my all-time favorites... in fact, I'll re-order it before I get dangerously close to running out. I love the two shades of brown with the white! :o) The Dark Chocolate swiss dots ribbon is my favorite from Papertrey Ink. (Funny how both favorites have 'chocolate' in their actual product name! A treat for the eyes.)

And now, the story. See this fabulous image of Cindy's? It's the gingerbread girl from the tag set Sweet Gingerbread Tags. I cut her out and nestled her within a snowflake tag. It's trimmed in Stardust, but the flash washed it out (the clouds came!):
This sweet gingerbread girl has broken INTO the treat box. She tried to cover her tracks by faux stitching around the snowflake window and scallop trim. I wrote "Cookie" on the tag surrounding her, which I love because her little arms make it look like she's pointing into the box where the treats reside. (What she left of them, anyway.) :o) Maybe the Liquid Pearls I used for the icing on her cute little body made her feel all powerful. I can't really blame her, though... a girl needs her cookies. ;)

*** Before I share a special treat, I want to announce the winner of my blog candy! ***
Thank you VERY much for participating this weekend and helping us celebrate the grand opening of Cindy's store! It was such fun! The winner of the My Craft Spot gift certificate is #11: KELL! Congratulations!!! Thank you for hopping along with us! Contact me through the email address listed on the Contact Me page and we'll set up your prize! Woohoo! :o) You have two weeks to claim your prize! (Monday, November 21st.)

A couple of weeks ago when I saw the challenge for today, I already knew I wouldn't be posting my Sweet Saturday feature the weekend prior due to blog hops. I asked Cindy if I could include the corresponding recipe for this project since it's a part of it. She is so sweet that she loved the idea! (How amazing is she?! Thank you, Cindy!) Therefore, here's a peek at the delicious treat I made to go in the box, along with the recipe. :o)
Gingerbread snowflakes! They DO exist! I love gingerbread treats and this is my very favorite recipe for gingerbread cookies. It was a favorite of my boyfriend's last year, so I was eager to make it again when November rolled around. No huge commentary on it because the focus today is Cindy's Design Team, but just know that these are delicious! Soft, chewy, thick, and bursting with seasonal spice. (Note: I will be attempting actual cookie decorating later this month! Royal icing, even. We'll see how it goes! Until then I will continue to make willy nilly designs and top it with Cake Sparkles.)

I hope you'll join us this week by linking up your Thanksgiving gift boxes or bags at the home of Scraptastic Mondays: Cindy's Scraptastic Designs. I would love to see your take on the challenge! :o) Be sure to dance on over to the rest of the Design Team's blogs to see their incredible projects. This is a wonderful team and I am honored to be a part of it. :o)

Thank you for visiting me today! Blessings and cookies for everyone! :o) (P.S. I'm still using my Sweet Saturday label, despite it being Monday. Shhh, don't tell.)
***

Gingerbread Cookies

Ingredients:
4 cups all-purpose flour
1 teaspoon salt
1½ teaspoons baking powder
½ teaspoon baking soda
1 teaspoon ground cinnamon
1½ teaspoon ground cloves
2 teaspoons ground ginger
1 teaspoon ground nutmeg
16 tablespoons unsalted butter, at room temperature
1 cup sugar
1 cup molasses
1 large egg

Directions:
In a large mixing bowl, whisk together the flour, salt, baking powder, baking soda, and spices. Set aside.

In the bowl of a stand mixer fitted with the paddle attachment, cream together the butter and sugar on medium-high speed until light and fluffy, about 2 minutes. Mix in the molasses and egg until combined. Add in the dry ingredients and mix just until incorporated. Cover the bowl and chill the dough for at least one hour in the refrigerator.

Preheat the oven to 350º F. Line baking sheets with parchment paper or silicone baking mats. Roll out the dough on a lightly floured work surface to about ¼-inch thickness. Cut into desired shapes with cookie cutters. Place the cookie shapes onto the prepared baking sheets, about 2 inches apart. Bake for 10 minutes, rotating the pans halfway through baking. Remove from the oven and let cool on the baking sheets for 10 minutes. Transfer to a wire cooling rack and let cool completely. Decorate as desired.

Source: Annie's Eats
***

Key Recipe Components (for treat box):
 * Cricut cartridge: Gypsy Wanderings (for snowflake window), Sweet Tooth Boxes
 * Spellbinders Nestabilities: Labels Four
 * Paper: Cloud 9, Papertrey Ink, stash
 * Stamps: Horn of Plenty, Sweet Gingerbread Tags, Thanksgiving Friend (all from Cindy's Scraptastic Designs
 * Coloring medium: Copics
 * Ribbon: Papertrey Ink
 * Twine: Trendy Twine
 * Button: My Mind's Eye Tres Jolie
 * Miscellaneous: iRock, Stickles

Photobucket

Friday, November 4, 2011

Scraptastic Designs Blog Hop!

Welcome to the Scraptastic Designs Blog Hop! I am truly honored to take part in this event as we celebrate the store opening of Cindy's Scraptastic Designs! Not only is she a sweetheart, but she is so incredibly talented. :o)

If you just stopped by to say hi, please head on over to Cindy's blog to start at the beginning of the hop! You don't want to miss a stop as we showcase some of her adorable digi stamps. If you arrived here from Gigi (The Cricut Bug), you are on the right track! :o)

For my project, I wanted to showcase a few different stamps. I've been in the Christmas spirit (as always), so I made a festive creation. It begins with a little house, decorated for the big day. :o)
I used shimmery snowflake paper for the base to make it feel as though it's snowing. Embossed sparkly white cardstock for the roof further creates the sense of a snowy Christmas. The window is decorated in Christmas lights via small rhinestones, with the festive glow of an interior Christmas tree sparkling through this house of love. This surely helped guide Santa and his reindeer. I wonder what possibly could be inside the house after Santa's visit...

An ultra decked-out tree sits outside the house as well, brightly sparkling in Christmas cheer. The door is embossed with a plaid folder to somewhat mimic a carved wood design, while the frame is embossed with tiny dots for added texture. This entire base is the store from the Sweet Tooth Boxes cartridge, slightly altered to become a house. I cut off the bottom because Santa didn't leave cupcakes or treats as the Cricut cut is intended. Let's take a peek inside, shall we? Instead of sweets, Santa's gift is...

... a festive display for Christmas and winter memories!
My house is actually an explosion box! How fun was this?! I used the basic explosion box tutorial from Amy at Love To Crop, adjusting the dimensions to make it a few inches larger in total. Helping to showcase holiday pictures, journaling, or memorabilia (Nutcracker ticket stub, for example) are Cindy's sweet digi stamps! I colored them with my Copics and bedazzled them in their festive best. Now, a few close-ups to properly show Cindy's beautiful images (one of which is hidden from the main picture):

Sweet Gingerbread Tags:
How cute are these tags?! I used Liquid Pearls to make it look like actual icing on their adorable little bodies. The holly, berries, and cheeks of the sweet girl are sparkly and I tied the two tags together with gorgeous Trendy Twine.

The light green photo mats are embossed with an ornament folder, which I've been so anxious to use! I have a feeling my mom (the future recipient) will leave a few mats empty for a while just to enjoy the pretty papers and embossing. The center is simply decorated with a snowflake embossed mat and a flower made from a coffee filter and Candy Apple Red Glimmer Mist. (I'm still in love with those!)

Sweet Angels Set:
I love the gorgeous shape of these! The boy is nestled on the middle layer, only seen when the mats are flipped to look at the interior treasures. To create a sparkly sky background, I colored it with blue Copics and then coated it in Stardust Stickles. I cut out pieces of sparkling white cardstock and embossed it to add some texture to the lovely ornament design. To coordinate with the silvery photo mats, I used silver Stickles for accents and hung the ornament on heavyweight silver thread. (I forgot the actual word.)

The girl angel is colored the same, though the non-Copic parts are changed to match her home. I cut out some pretty filigree paper to make the design match the Christmas paper mat. On this one, I used gold accents and gold thread... and then went crazy (again) with my iRock and added a smattering of crystal and light green rhinestones to the mat for an explosion of Christmas sparkle.

Lastly, the Gingerbread Cutie!
She's in her Christmas best! Sparkly shoes, a rhinestone belt, and Trendy Twine hair bows make her live up to her name. I try not to play favorites... but I am SO in love with this stamp! This demonstrates the beauty in Cindy's images because the stamps are so enjoyable to color and sparklify. For this square I used white ric-rac ribbon because it reminded me of icing zig zags on many gingerbread peeps.

I had so much fun making this explosion box, so a big thank you to Cindy for providing such wonderful inspiration. I'll be giving this to my mom on Thanksgiving so she can enjoy it early and fill it up as the holiday season progresses. :o)

Cindy is generously offering a grand prize to one random winner! If you stop at every blog participating in this hop and leave a comment for each designer, you will be eligible to win three digital stamps and a set of 12 Prisma Colored Pencils. :o)

I'm joining in the fun and offering some blog candy! One random winner will receive a gift certificate to My Craft Spot, one of my favorite crafty stores. :o) To be eligible, simply leave me a comment on this post. :o) I will select and announce the winner on Monday!

The first Scraptastic Monday challenge is on Monday, November 7th, at 10:00am EST. If you've never tried digis, no worries! Using one is NOT a requirement to play along with us each week! :o)

Your next stop is the marvelous Star (Star's Paper Passion)! Thank you for playing along with us as we celebrate the opening of Cindy's Scraptastic Designs! Have a blessed and sparkly weekend, my sweet friends!

Key Recipe Components:
 * Cricut cartridges: Elegant Edges, Sweet Tooth Boxes
 * Cuttlebug embossing folders: Plaid and Snow from Winter Wonderland set, Swiss Dots
 * Stamps: Gingerbread Cutie, Sweet Angels Set, Sweet Gingerbread Tags (all from Cindy's Scraptastic Designs)
 * Paper: Core'dinations, Heidi Grace, Papertrey Ink, SEI
 * Spellbinders Shapeabilities: Fanciful Holiday (reindeer and Christmas trees)
 * Twine: Trendy Twine, purchased at My Craft Spot
 * Ribbon: Hobby Lobby
 * Miscellaneous: Glimmer Mist, iRock, Liquid Pearls, Stickles

Photobucket
Related Posts Plugin for WordPress, Blogger...
Blogging tips