To pin my projects to Pinterest, hover over the picture and a Pin-it Button will magically appear.
Showing posts with label Photography. Show all posts

Saturday, May 5, 2012

Sweet Saturday and a Touch of Nature!

Happy Saturday, my lovely friends! I hope you have a wonderful weekend planned. :o) Two posts in two days has me happy-dancing in my chair!

I had planned to complete a card last night to post with today's treat... but when my mom sends me a text message saying she'll pick me up in 7 minutes for coffee, everything just drops. ;) It was such a beautiful time. She even blessed me with the new cookbook I've been wanting! I can hardly wait to dirty it up in the kitchen. :o)

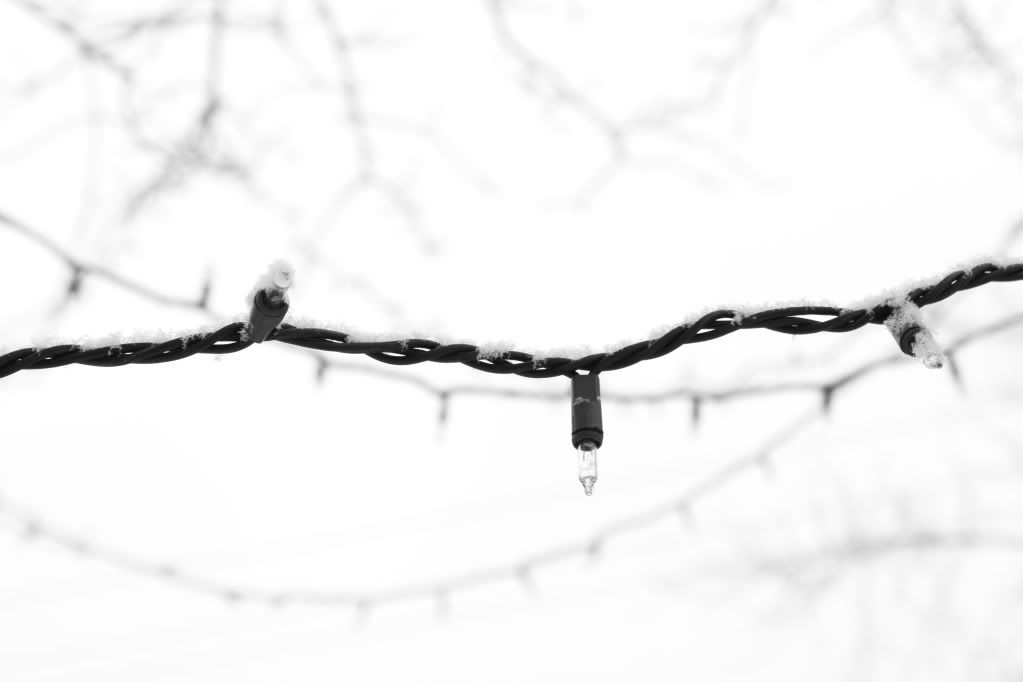
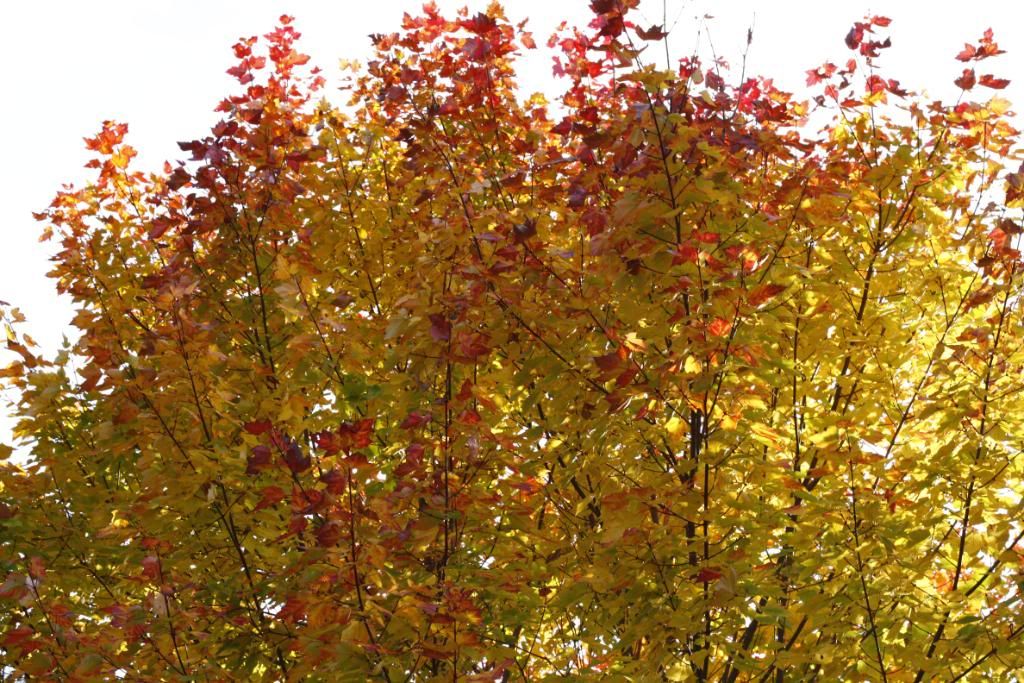
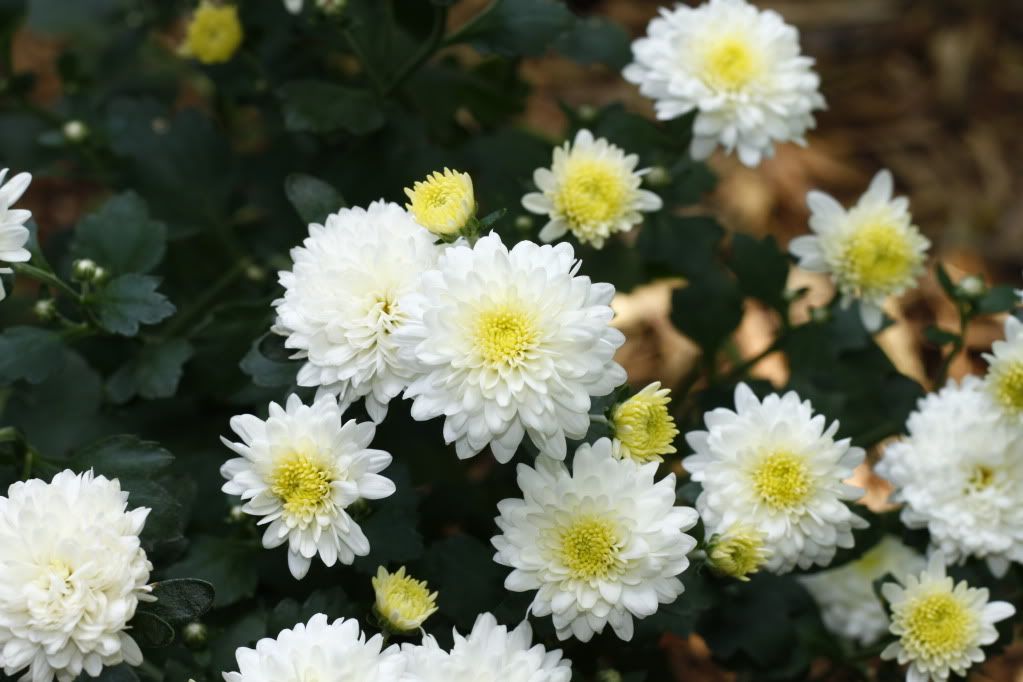
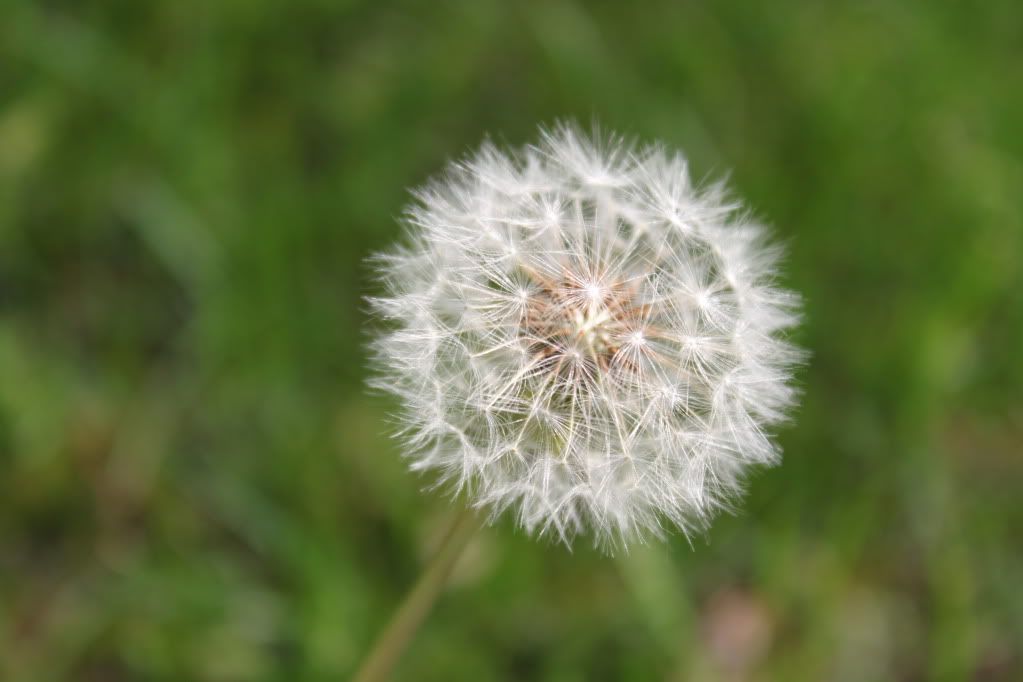
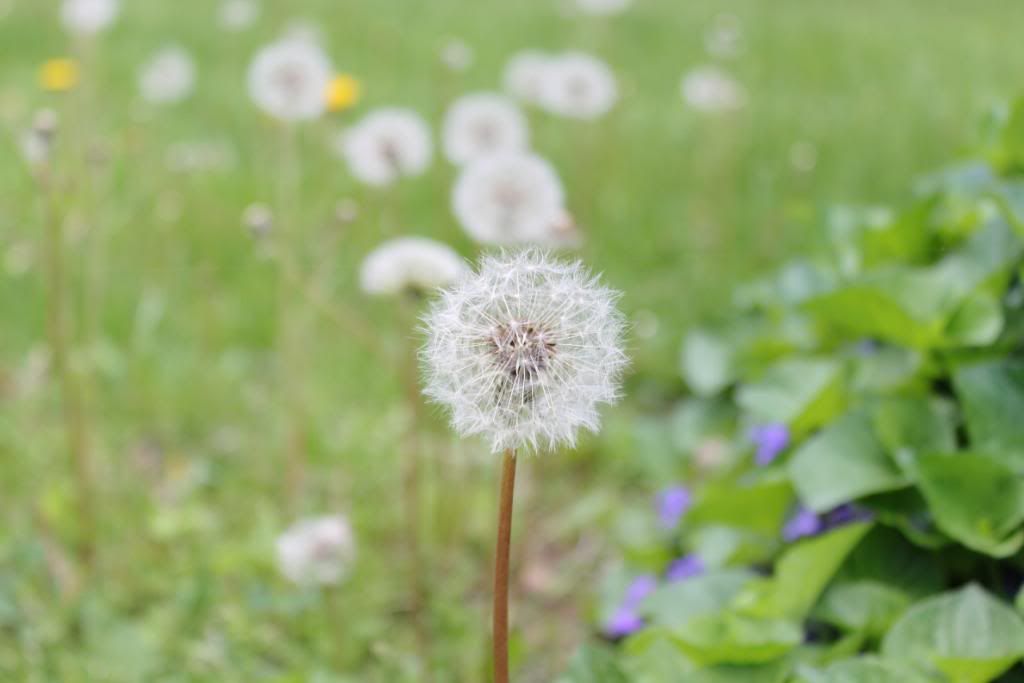
In lieu of a card, I'm excited to share a few photographs. Far too much time had passed before I frolicked about outside to snap a few pictures of the nature I cherish so deeply. I recently took the time to immerse myself in my love of flowers and photography. It was amazing. It was cloudy and gray all the way until the last picture... I just had to laugh. I didn't let bad lighting prevent me from snapping away, though! I'm hoping to develop my technique over the summer. There is quite a long road to get to where I want to be, but the journey will be beautiful. :o)

A few favorites! And then I'll reward you with a sweet confection.
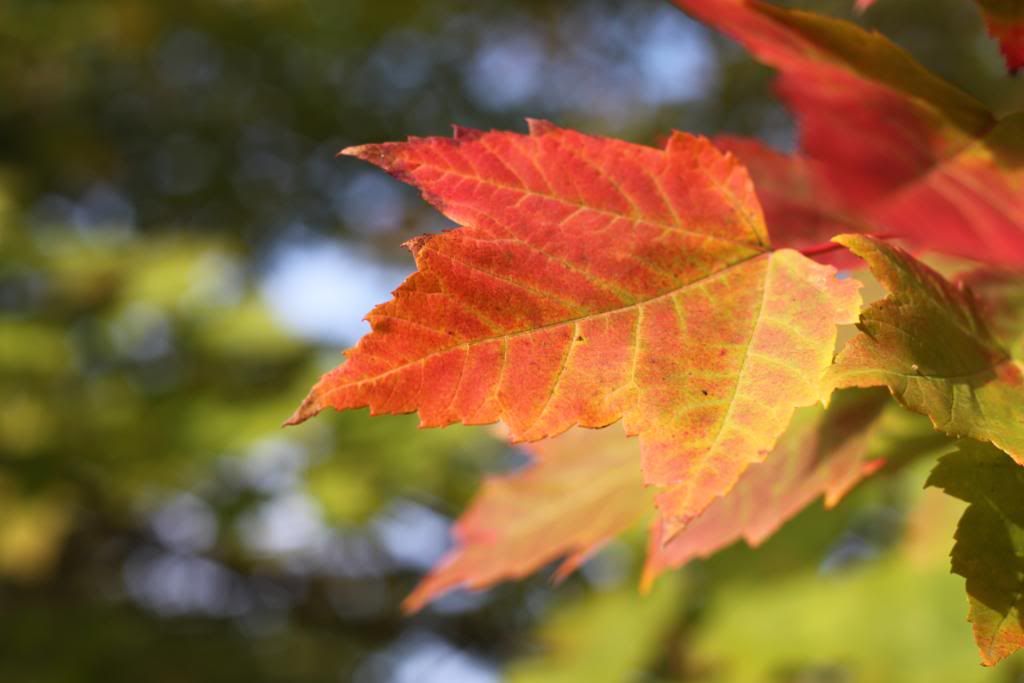
At last, the sunbeams appeared as sunset neared... just in time to gently dance along the top of the petals. :o)
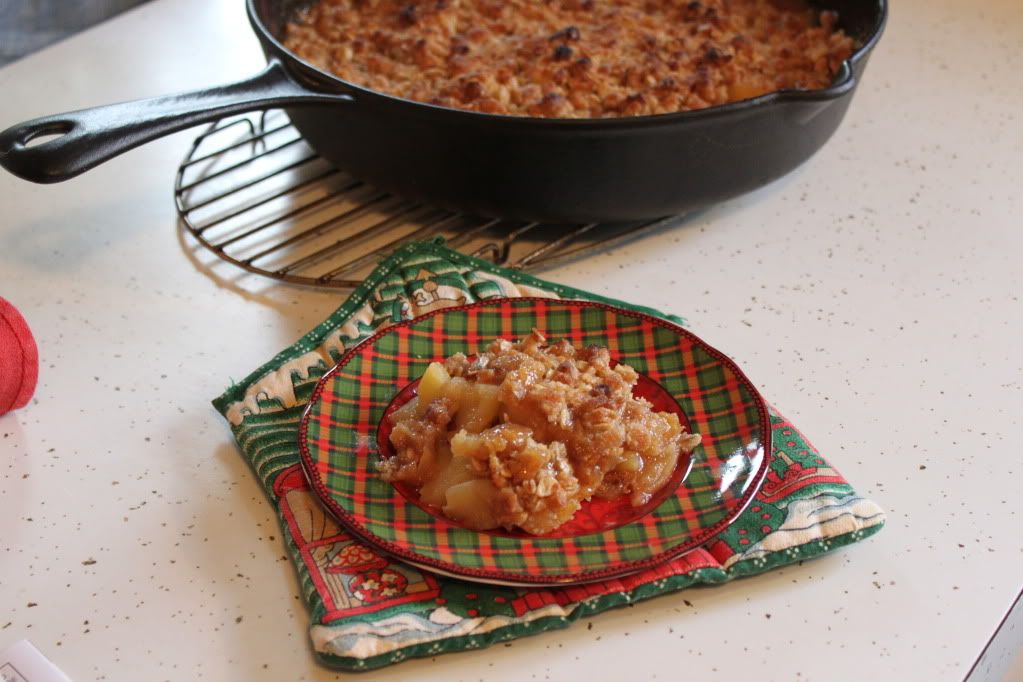
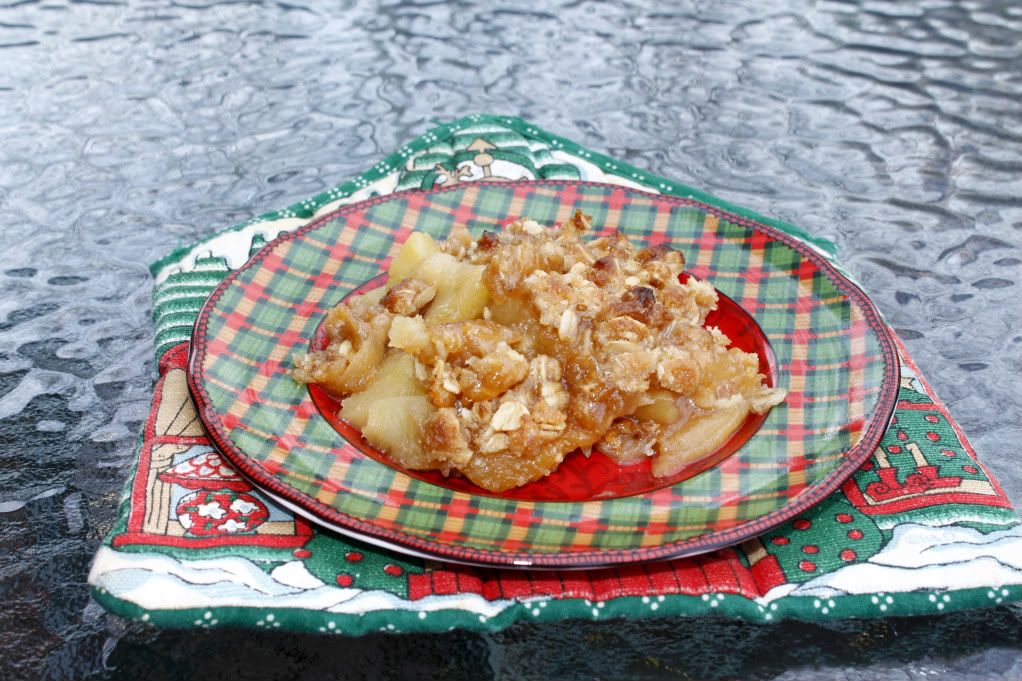
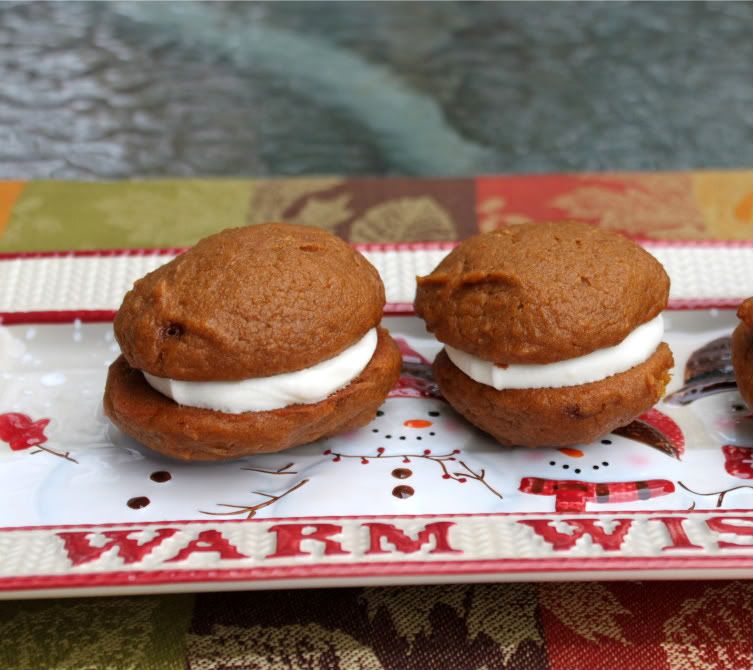
You know what else I adore, along with nature? The unique flavor of Snickerdoodle cookies. Last year I made, loved, and posted Snickerdoodle Bundt Cake. But at long last, I made them in my beloved cupcake form. Knowing I could count on the reliable source who posted the recipe, I whipped them up a few days ago, assured of their success. I used a different frosting than she did, however... and the combination is fantastic. Today we celebrate Snickerdoodle Cupcakes with Cinnamon Cream Cheese Frosting!
I completely forgot to add the cinnamon-sugar dusting to the top, which would have mimicked the cookie topping and added a touch of sparkle. No one missed it, I must say! (Thankfully.) The cake is soft, moist, and bursting with the cinnamon-sugar taste of a Snickerdoodle. The original recipe paired it with Seven Minute Frosting, but I opted for a cinnamon-infused cream cheese frosting. My loved ones were delighted, as the raves over it were constant. (Even from my mom who claims she doesn't like cream cheese frosting. Cinnamon is magical and the little flecks are so pretty throughout the swirls.) My family loves these and they will surely be made again... with the sparkly topping. ;) Bake and enjoy them, my friends!

Thank you for visiting me! I wish you a day of blessings, hugs, and cupcakes. :o)

Snickerdoodle Cupcakes with Cinnamon Cream Cheese Frosting
Yield: 28 cupcakes

For the cupcakes:
1½ cups all-purpose flour
1½ cups cake flour
1 tablespoon baking powder
½ teaspoon salt
1 tablespoon ground cinnamon
1 cup unsalted butter, at room temperature
1¾ cups granulated sugar
4 eggs, at room temperature
2 teaspoons vanilla extract
1¼ cups whole milk

For the frosting:
10 ounces cream cheese, chilled
6½ tablespoons unsalted butter, at room temperature
3¼ cups confectioners' sugar, sifted
2-2½ teaspoons cinnamon
4 teaspoons clear vanilla extract*

For the garnish:
2 tablespoons granulated sugar
½ teaspoon ground cinnamon

Directions:
Preheat oven to 350º F. Line standard muffin tins with paper liners.

Sift together all-purpose flour, cake flour, baking powder, salt, and cinnamon.

With an electric mixer fitted with the paddle attachment, cream the butter and sugar on medium-high speed until pale and fluffy, about 3 minutes. Add the eggs, one at a time, beating until each is incorporated, scraping down the sides of the bowl as needed. Beat in the vanilla. Reduce the speed to low. Add the flour mixture in three batches, alternating with two additions of milk, and beating until combined after each.

Divide the batter evenly among lined cups, filling each three-quarters full. Bake, rotating tins halfway through, until a cake tester inserted in centers comes out clean, about 20 minutes. Transfer tins to wire racks to cool completely before removing cupcakes and frosting. Cupcakes can be stored up to 2 days at room temperature or frozen up to 2 months in airtight containers.

To make the frosting, combine the cream cheese and butter in the bowl of an electric mixer fitted with the paddle attachment. Beat on medium-high speed until light and fluffy, about 2-3 minutes. Reducing the speed to low, add in the confectioners' sugar and cinnamon just until incorporated. Increase the speed to medium-high and beat 2-3 minutes more. Blend in the vanilla. Frost cupcakes as desired. (I used my favorite large star tip.) 

Combine the 2 tablespoons granulated sugar and ½ teaspoon cinnamon. Using a small, fine sieve, dust the cupcakes with cinnamon-sugar.

*Note: The frosting recipe creator only uses clear/imitation vanilla extract for her cream cheese frostings, noting that it holds its shape better and yields a brighter white result. I did not have any on hand, so I used pure vanilla extract. I will test her theory one day, so I'm posting the recipe as written.

Source: Cupcakes from Brown Eyed Baker; Frosting adapted from Annie's Eats


Saturday, November 19, 2011

Monochromatic Winter and Sweet Saturday!

Happy Saturday, my sweet friends! :o) I hope you had a wonderful week!

It is tradition for my family to have our Christmas lights officially turn on after dinner on Thanksgiving, which means instead of crafting I've been stringing lights. How Thanksgiving is mere days away is baffling! While I don't have a paper craft to share with my treat today, I do have another facet of creativity. With winter fast approaching, I am excited to test my photography 'skills.' (I use that term loosely.) During my first (and only) winter picture session, I had all sorts of troubles while learning my DSLR... snowy photographs are challenging. Throughout my initial adventure, I discovered that I LOVE monochromatic winter pictures. The mood is simply gorgeous. So I'm sharing a few of my favorites leading up to the first snowfall of the year, which probably isn't all that far away. Pretty soon I'll be able to gauge how much I've learned since, which should be interesting. Hopefully I won't cry in disappointment. (Kidding!) Most likely to see any fluffy snow detail, you'll need to click and enlarge these.

Probably my absolute favorite... I love how the fluffy snow is so delicately covering the Christmas lights.
Looking up into a snowy pine tree, with one tiny pinecone still nestled within the needles.
A snowy path to a neighbor's house.
And now it's time for Sweet Saturday! :o) With the cooler weather, it's nice to curl up with a seasonal treat. Or as was the case yesterday, come in from a blustery day and take a dessert break from climbing ladders and pleading with lights to stay lit during the testing phase. Before dashing outside to begin, I made this tasty Autumn dish. A repertoire staple, executed in a new (to me) way... and it uses apple cider, which I adore. Skillet Apple Crisp!
This was completely gone within hours... and for good reason. The apples are tender without being mushy, the sauce is super thick and delicious, and the streusel topping provides a perfect crunch. I, and my loved ones, couldn't have been happier with this. Perfectly Autumn. Making it in a cast iron skillet made me feel fancy for some reason, even when it felt like my wrist might snap from the weight. (A cast iron skillet is not necessary for this recipe.) I love this and will certainly be making it again soon! If you give it a whirl, I hope you love it, too. :o)
Thank you for frolicking to my happy little blog today. I wish you all a beautiful weekend! :o)

Recipe Notes:
 * If your skillet is not oven-safe, prepare the recipe through step 4 and then transfer the filling to a 9x13-inch baking dish. Top the filling as directed and bake for an additional 5 minutes.

 * If you can't find Golden Delicious apples, any sweet, crisp apple such as Honeycrisp or Braeburn can be used. Do not use Granny Smith apples in this recipe.

 * Old-fashioned rolled oats are preferred, but you can substitute quick-cooking notes if that is all you have available.

Skillet Apple Crisp
Yield: 6-8 servings

Ingredients:
For the topping:
¾ cup all-purpose flour
¾ cup pecans, chopped fine (optional)
¾ cup old-fashioned rolled oats
½ cup light brown sugar
¼ cup granulated sugar
½ teaspoon ground cinnamon
½ teaspoon salt
½ cup unsalted butter, melted

For the filling:
3 pounds Golden Delicious apples (approximately 7 medium), peeled, cored, halved, and cut into ½-inch-thick wedges
¼ cup granulated sugar
¼ teaspoon ground cinnamon
1 cup apple cider
2 teaspoons lemon juice
2 tablespoons unsalted butter

Directions:
Preheat the oven to 450º F.

Make the topping: Combine the flour, pecans, oats, brown sugar, granulated sugar, cinnamon, and salt in a medium bowl. Stir in the butter until the mixture is thoroughly moistened and crumbly. Set aside while preparing the filling.

Make the filling: Toss the apples, granulated sugar, and cinnamon together in a large bowl; set aside. Bring the apple cider to a simmer in a 12-inch oven-safe skillet over medium heat. Cook until reduced to ½ cup, about 5 minutes. Transfer the reduced apple cider to a small bowl or liquid measuring cup. Stir in the lemon juice and set aside.

Heat the butter in the now-empty skillet over medium heat. When the foaming subsides, add the apple mixture and cook, stirring frequently, until the apples begin to soften and become translucent, 12-14 minutes. (Do not fully cook the apples.) Remove the pan from the heat and gently stir in the apple cider mixture until the apples are coated.

Sprinkle the topping evenly over the fruit, breaking up any large chunks. Place the skillet on a baking sheet and bake until the fruit is tender and the topping is a deep golden brown, 15-20 minutes. Cool on a wire rack until warm, at least 15 minutes, and serve with vanilla ice cream or whipped cream.

Source: Brown Eyed Baker

Photobucket

Saturday, October 29, 2011

Exciting News, Beautiful Autumn, and Sweet Saturday!

Happy Saturday, my super sweet friends! :o)

Despite not having a card to post (what a crazy week!), I do have some fun things to share with you today! :o) It's a smorgasbord post!

First up, I am delighted to tell you that the very talented Melin has invited me to be a part of Paper Crafting World, her digital stamp/cutting file team! I am honored and look forward to creating with her sweet designs! :o) I am currently working on my first project for her Design Team and it will certainly showcase the versatility of her files. Look for that on Tuesday! :o) Also, we will be having a wonderful Thankful Hearts Blog Hop one week from today on Saturday, November 5th! A lovely theme. :o)


Secondly, I have even more fun news! This coming Friday, November 4th, the Design Team for Cindy's Scraptastic Designs will be having a Blog Hop! I am thrilled about this fun event to celebrate Cindy's new journey. :o) Our weekly challenges, Scraptastic Mondays, begin on November 7th! So much excitement!


Before I post my sweet recipe, I'd like to share a few pictures. Amazingly, Autumn colors are slipping away and I've yet to get anywhere to take some beautiful landscape pictures. I did manage to get a couple pretty ones from my yard. :o)

(A gift from my boyfriend's friend, taken on Thursday to showcase beauty on an emotional day.)

And now... Sweet Saturday! Woohoo! Before I show you the picture, let me just tell you that it *is* possible to make these uniform and structured in appearance by use of a piping bag. But sometimes it's fun to just be willy nilly and higgly piggly. Whatever the haphazard shape, these are bursting with seasonal delight. Plus, they have a fun name! Who can resist Pumpkin Whoopie Pies with Maple Cream Cheese Filling? Not this household, that's for sure.
Oh my. I've been wanting to try whoopie pies (also known as Gobs if you're native to Pittsburgh) for over a year! The combinations are endless. The classic is chocolate with marshmallow filling, but I couldn't pass up a seasonal twist to celebrate the spicy goodness of Autumn. The cookie-cakes are soft, puffy, and encompass all of the flavors you love about the season. This adaptation is paired with a maple cream cheese filling, which a couple of my loved ones questioned... but guess what? Yep, they were devoured and everyone loved it! The flavors team up beautifully. The maple isn't overly strong, so if you want a stronger maple flavor, definitely use some maple extract. Want to completely steer clear of maple? Try these with a ginger filling or even a plain cream cheese filling. Just make these fun and delightful treats! :o)

Note: The yield varies greatly, depending upon the size you make your cookie-cakes. This recipe as made by my source made 4 dozen assembled mini whoopie pies. Me? I made 19. HA! It was unintentional... but no one complained. ;)

Hopefully in the next month I'll have a new blog design... I may need to enlist some professional help, however. Otherwise, it may not get a redesign until 2015. ;) Thank you for dancing on by today! I wish you a sparkling weekend of love and creativity. :o)

Pumpkin Whoopie Pies with Maple Cream Cheese Filling
Yield: Varies upon size

Ingredients:
For the whoopie pies:
3 cups all-purpose flour
2 tablespoons cinnamon
1 teaspoon baking powder
1 teaspoon baking soda
1 teaspoon salt
1 teaspoon ground ginger
½ teaspoon ground nutmeg
1 cup granulated sugar
1 cup dark brown sugar
1 cup canola or vegetable oil
3 cups chilled pumpkin puree
2 eggs
1 teaspoon vanilla extract

For the maple cream cheese filling:
3 cups powdered sugar
8 ounces cream cheese, at room temperature
½ cup unsalted butter, at room temperature
3 tablespoons pure maple syrup
1 teaspoon vanilla extract

Directions:
Preheat oven to 350º F. Line baking sheets with parchment paper or silicone baking mats.

In a large bowl, whisk together the flour, cinnamon, baking powder, baking soda, salt, ginger, and nutmeg. Set aside.

In a separate bowl, whisk together the granulated sugar, dark brown sugar, and oil. Add the pumpkin puree and whisk to combine thoroughly. Add the eggs and vanilla, whisking until combined. Gradually add the flour mixture to the pumpkin mixture and whisk until completely combined.

Use a small cookie scoop or a large spoon to drop rounded, heaping tablespoons of the dough onto the prepared baking sheets, about 1 inch apart. 

Bake for 10 to 12 minutes, making sure that the cookies are just starting to crack on top and a toothpick inserted into the center of a cookie comes out clean. The cookies should be firm when touched. Remove from the oven and let the cookies cool completely on a cooling rack.

To make the filling, beat the butter on medium speed until smooth with no visible lumps, about 3 minutes. Add the cream cheese and beat until smooth and combined, about 2 minutes. Add the powdered sugar a little at a time. Add the maple syrup and vanilla and beat until smooth.

To assemble the whoopie pies: Turn half of the cooled cookies upside down. Pipe or spoon the filling (about a tablespoon) onto that half. Place another cookie, flat side down, on top of the filling. Press down slightly so that the filling spreads to the edges of the cookie. Repeat until all the cookies are used. Put the whoopie pies in the refrigerator for about 30 minutes to firm before serving.


Photobucket

Thursday, October 6, 2011

Beautiful Mums and Halloween Blog Hop Reminder!

Happy Thursday, my dear friends! :o)

I planned to share a card with this post, but alas I have zippo complete. So I thought I'd use this opportunity to share one of my newest pictures! I haven't been able to frolic out and about all that much with my camera lately, but I had a mini-session a week or two ago. This photograph is the inspiration for a card I'm making my mum (teehee), which has been delayed. These sweet mums are nestled in the front yard and they're so pretty I couldn't resist snapping their picture. Don't you just love the burst of sunshine in their centers? They give me warm fuzzies.

And now a sparkly reminder that tomorrow night, beginning at 7pm, is the Whimsical Wednesday Blog Hop! :o)


I am ecstatic to see what all of the designers created for the event. I hope you are able to visit us for fun projects and fabulous blog candy. :o) My labor of love for the hop is the reason I have nothing to share with you today. My dinner plate was even temporarily adhered to my craft mat... Glossy Accents is an amazing product. ;) Thankfully it didn't get on my sugar snap peas. That would just be sad... and not so tasty.

Have a gorgeous day, my crafty friends! Smile lots because you are loved. :o)

Photobucket

Saturday, July 16, 2011

Pretty Picture and Sweet Saturday

Happy Saturday, my dear friends! I hope you all have the most wonderful weekend planned! :o) I'm going to the Josh Groban concert tonight and am ready to burst in anticipation. He's my absolute favorite musician. :o) I haven't been able to complete a new card yet, but I do have a lovely picture to share with you as well as a delicious recipe.

This picture is the inspiration for a very special craft project I'll soon be doing... I'm anxious to begin, but need to wait until I learn to brilliantly use my Copics. Hopefully later this summer I'll make it. (I had hoped to be a Copic natural... alas, I am not.) ;)

Isn't this gorgeous? My favorite water fountain I've ever encountered. I snapped this picture earlier this summer and am just enamored with it.

Sweet Saturday time! I missed doing this little feature last weekend. I couldn't let that happen again, so despite the crazy busy-bee days, I carved out some baking time last night around midnight. Made for my sweetheart, the perfect chocolate chip cookie recipe.

If you need a classic, go-to chocolate chip cookie, I beg you to try this. I first made this recipe over a year ago, and this has been requested on a regular basis ever since. (They are my boyfriend's favorite.) I've had no reason to even try other recipes. At long last, the perfect chocolate chip cookie I had been craving to make at home. :o) (And it's super dooper fast to whip up!) Chewy, thick, and bursting with chocolate chips. These are truly incredible and are a staple in my baking adventures.

Have a beautiful day, my crafty friends! I'm sending you extra hugs and sparkles today. :o) Thank you so much for stopping by!

Note: I only bake one sheet of cookies at a time, due to a lack of trust in my oven. I'll write the recipe as is for baking multiple sheets at a time. :o)

Thick and Chewy Chocolate Chip Cookies
Yield: Approximately 20-24

Ingredients:
2 cups plus 2 tablespoons all-purpose flour
½ teaspoon baking soda
½ teaspoon salt
12 tablespoons unsalted butter, melted and cooled until warm
1 cup brown sugar, packed
½ cup granulated sugar
1 large egg plus 1 egg yolk
2 teaspoons vanilla extract
1½ cups semi-sweet chocolate chips

Directions:
Adjust oven racks to upper and lower-middle positions. Preheat oven to 325º F. Line two cookie sheets with parchment paper. (I need three, since my sheets aren't massive.)

Whisk flour, baking soda, and salt together in a medium bowl; set aside. With an electric mixer fitted with the paddle attachment, or by hand, mix butter and sugars until thoroughly combined. Beat in egg, yolk, and vanilla until combined. On low speed, add dry ingredients and beat just until combined. Stir in chocolate chips.

Roll a scant half-cup of dough into a ball. Holding dough ball in fingertips of both hands, pull apart into two equal halves. Rotate halves 90 degrees and, with jagged surfaces facing up, place formed dough onto cookie sheet, leaving ample room between each ball. Repeat with remaining dough. Bake, reversing position of cookie sheets halfway through baking, until cookies are light golden brown and outer edges start to harden yet centers are still soft and puffy (approximately 11-14 minutes). Do not overbake.

Cool cookies on sheets until able to lift without breaking. Transfer to a wire rack to cool completely.

Source: Annie's Eats

Photobucket

Sunday, May 22, 2011

Butterfly Wishes

Happy Sunday, friends! A batty week prevented me from crafting or blogging, but at last I've returned to my happy new home. I've quickly grown fond of my itty bitty blog haven and don't expect to be away so long again. I've been blessed to already encounter such beautiful people. (That means you!)

Time for the crafty goodness! (Butterflies again! I can't help myself. There's always room for butterflies.) This warrants a bit of a story, but I won't blame you if you skip the writing and zip to the pictures. ;) I promise! I understand time constraints. This is a rare instance to be so wordy and picture heavy... it's just one of those creations that came to be in a unique manner.

Before I begin, just a note that I'm including this in three fun locations since it's always fun to share. :o)

* A wonderful link-up party at Patches of Pink. (Click the pretty button to see some wonderful creations.)


Patches of Pink

 * Alex's weekly link-up party, which was a ton of fun last week! Join in if you haven't already. :o)

* The weekly challenge at the inspiring Fantabulous Cricut Challenge Blog, which requires the use of a triangle and rectangle within the project.

I carved out some creativity time this weekend to make a fun project. This is special to me because it represents something exceptionally gorgeous. It's one of those beautiful instances when three of my passions combine into one glorious moment. The inspiration for this design came about while I was frolicking outdoors with my trusty camera. I was still reveling in joy at the unexpected news that I just might return to dancing soon'ish... this very summer or autumn, after so many years of waiting in the wings. Hope was dancing through me when I happened upon a tiny treasure trove of wishes. Such flawless timing. 

The wind tried its best to deter me, but I dropped to the ground and semi-patiently waited for calm. I only had a few seconds of cooperative weather, so I snapped away and pleaded with my simple kit zoom lens to perform beyond its technical ability. I'm fairly new to photography, but have high aspirations... in time my skill and equipment will catch up to my visions. So much patience required at the beginning of a journey. It's thrilling to capture a moment like that. Seemingly simple on the surface, but so much more fiery if you dig deeper. Nestled alongside a flower bursting with hope and wishes, my love of photography melded with my ultimate passion for dance, which in turn propelled me to *this* cherished creative outlet. I  needed to attempt to create something to emulate this moment of sunshine.

I came up with a basket to encourage and sustain my "butterfly" wishes. I refer to them as such for two primary reasons: to reflect the graceful aspect of dance, like a butterfly whimsically fluttering across her own stage... and also as a symbolic messenger to carry my prayers heavenward. When any moment of doubt creeps in or the inability to dance cuts too deeply, I'll take out one of the tags tucked inside. There are a couple themes, as you'll see. Additional tags may be added when time permits. 

(Disclaimer: A gargantuan bumble bee was very interested in me and my basket, so I didn't have time to experiment with capturing the best pictures. He wasn't as cute and friendly as the one on the Create a Critter cartridge.)

The two tulle flowers on each side of the basket make me think of ballet costumes, though I love them in their own right. They're lovely accents without shouting that they're there.


Three tags list a few of my favorite ballet roles and classical compositions, and when I choose one of those I'll listen to the stunning orchestration and watch the accompanying ballet choreography.


Half are Scriptures to remind myself where my focus needs to be and the power that is already at work within me. 


The final one is extra special. It's a reminder of what awaits me. This tag contains three of my favorite songs, which will be my first three choreographies when I can dance again. They've already begun in my heart. :o) (And you can finally see the sweet butterfly at the back of my basket.)


It's only appropriate to conclude this post with the aforementioned inspiration. Make a wish...


... or several, thanks to this abundance. :o)


Key Recipe Components:
 * Cricut cartridges: Cindy Loo, Florals Embellished, Create a Critter, Classic Font
 * Paper: SEI, DCWV, Heidi Grace, Papertrey Ink
 * Sentiment: Digital stamp from Playing with Paper
 * Ribbon: SEI, Offray, and miscellaneous
 * Flowers: Prima Fabric Fancies
 * Buttons: My Mind's Eye Tres Jolie
 * Heaps of diamond Stickles

You are beyond angelic for taking the time to share in my story. Thank you for visiting and I wish you a sparkling Sunday. :o)


Photobucket
Related Posts Plugin for WordPress, Blogger...
Blogging tips